
My husband is an avid woodworker. He’s always either working on a project or watching woodworking videos on YouTube. This, of course, means I’m also watching, if only from the corner of my eye.
And now I find myself obsessed with wood-and-resin furniture. Thanks, Black Forest Wood Co. 😂
I can’t be trusted around power tools, so crafting furniture isn’t in the cards for me. That said, I use UV resin to finish my polymer clay jewellery, and it seems the perfect introduction to resin art.
So, when I got my hands on a silicone mould, I knew I had to try making some resin charms.
Before we get started, this post contains links to various other sites. I’m not being compensated for mentioning any product or company. Also, prices listed in this post are subject to change. 😊
Materials Used in this Tutorial
Mould
I used the Leaves Premium Silicone Push Mould by Craft Smart. This mould is actually intended for polymer clay, soap, wax, or plaster of Paris, but I’ve read a few reviews in which users state they use resin without any issue.
If you’d like to read my thoughts on how well this mould works with polymer clay, I’ve got you covered! I talk about my first experience with a clay mould in this post.
Resin
I used UV resin by Sanaaa. Friends, resin is expensive, so I’ve been shopping for something affordable but durable for quite some time. And I’ve been pleasantly surprised by this brand! It doesn’t yellow once cured and there is barely any smell. This is really a great budget-friendly alternative.
Other Materials
You’ll need a lighter or hair dryer to remove bubbles from the resin before curing.
To cure the resin, I used my mini UV lamp. If you don’t have a working UV lamp, you can pick one up for around $20 from Michaels. I also used silicone tools with which I shifted the resin into the corners of the mould, but a toothpick or pin would work fine, too.
Finally, decorations. I used paint pens to draw designs on the resin, and I made a few more charms off-camera using glitter. You could also use dried flowers, rhinestones, and any other small decorative item.
Making a Resin Charm
I was inspired by the resin art created by Nerdforge. The idea is to draw/paint an artwork working in layers, starting with the background. Each layer is separated by resin, which creates a 3D effect.
For this small charm, I had to invert the above concept because the charm faces downward in the mould. So, I worked from the closest layer to the one farthest away. Additionally, because details would be lost on such a tiny charm, I opted for a simple design using paint pens for precision.
The first four steps of this tutorial are super important, and we’ll repeat them throughout the process. Had it not been for a little issue regarding the mould, we’d have followed steps 1 through 4 to the end of the tutorial. But hey, what would a DIY project be without something going wrong?
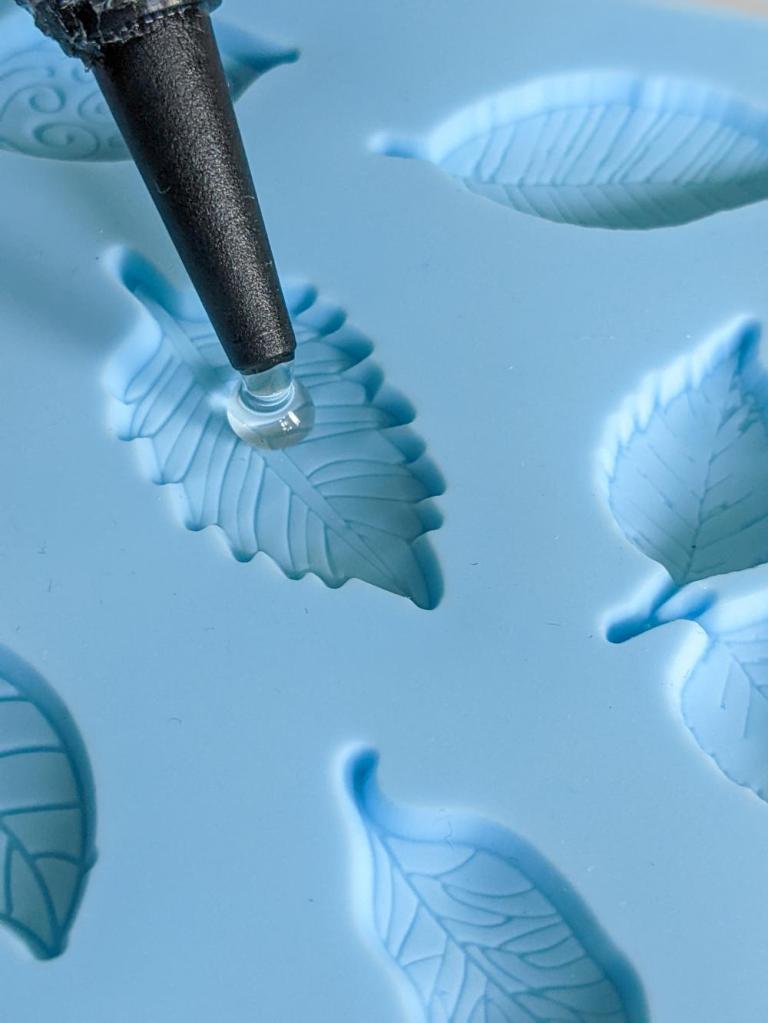
Step 1 – First Layer of Resin
Add a drop of resin to a clean, dry mould. We’re going to be building up layers, so don’t fill the mould to the top.
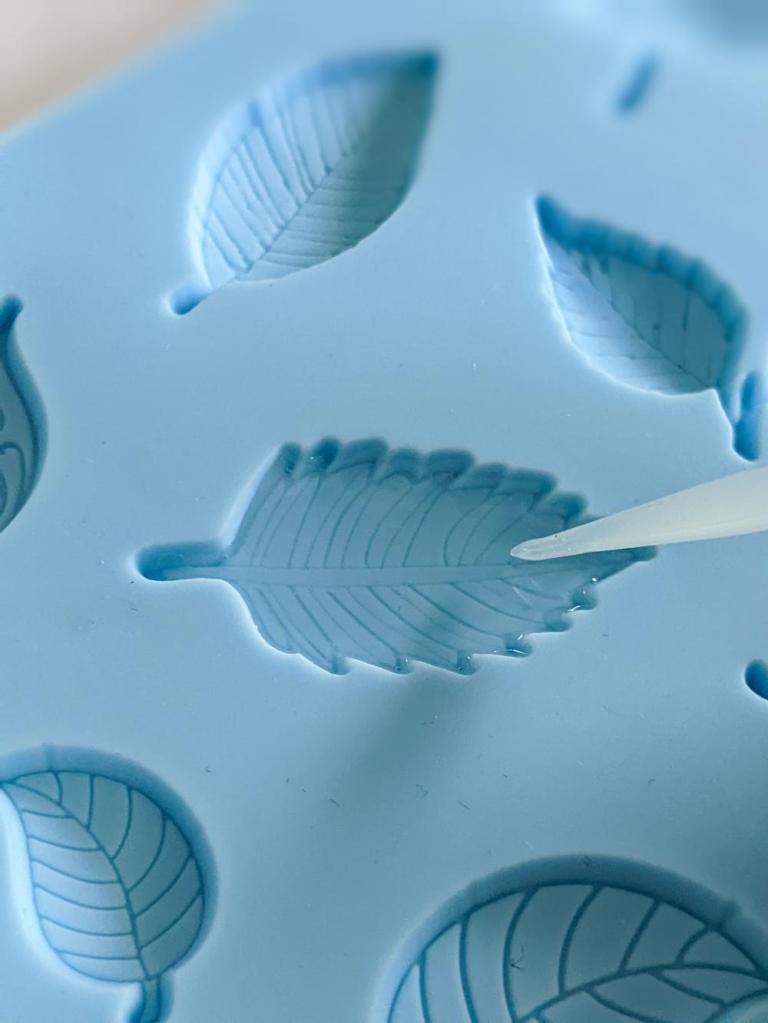
I used a silicone tool to prod the resin into all the corners of the mould. These tools came with my curing lamp, but you could use a toothpick to get the job done.
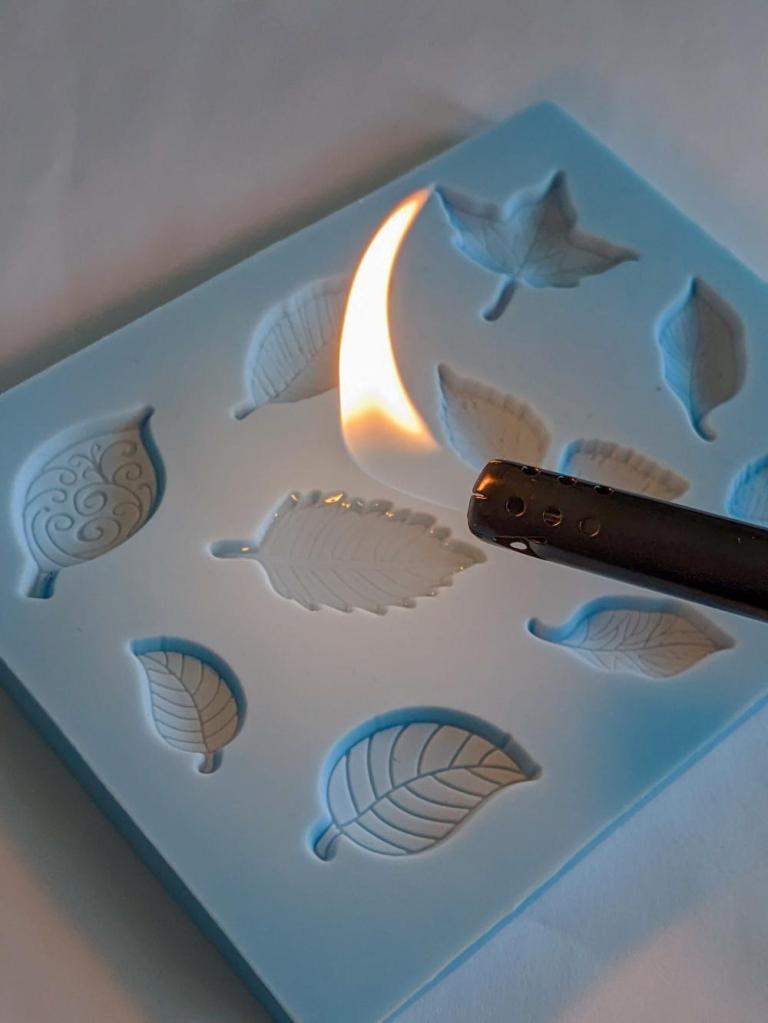
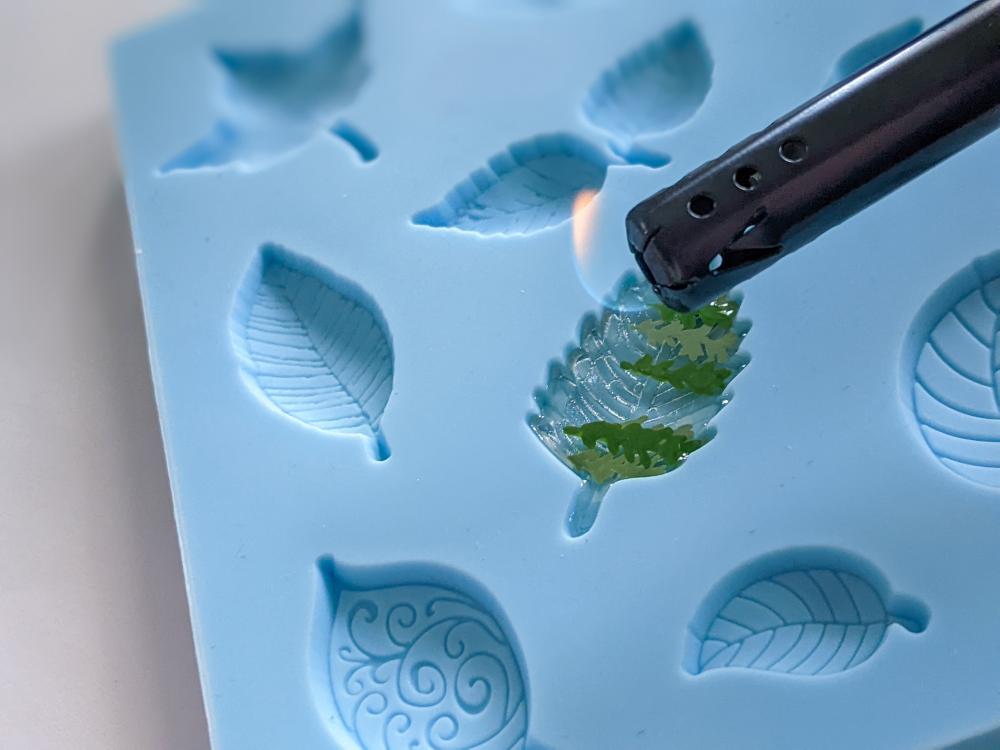
Step 2 – Remove the Bubbles with Heat
I used a lighter for this step, but promise the massive flame was just for the picture! 🤣 I was super afraid of scorching the sides of the mould, so I worked carefully.
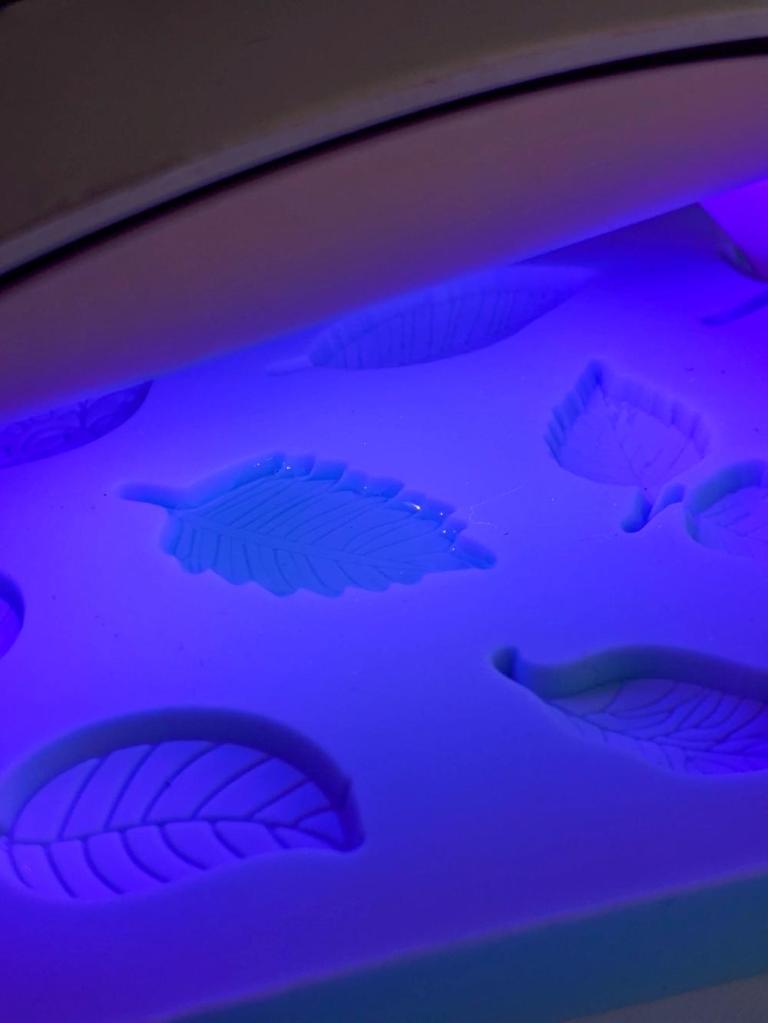
Step 3 – Cure the Resin
The deeper the pour, the longer the resin will require to cure.
I cured this first layer for 3 minutes. The surface of your cured resin should be hard and shiny, and shouldn’t be sticky to the touch.
My advice here, when in doubt, cure a little longer!

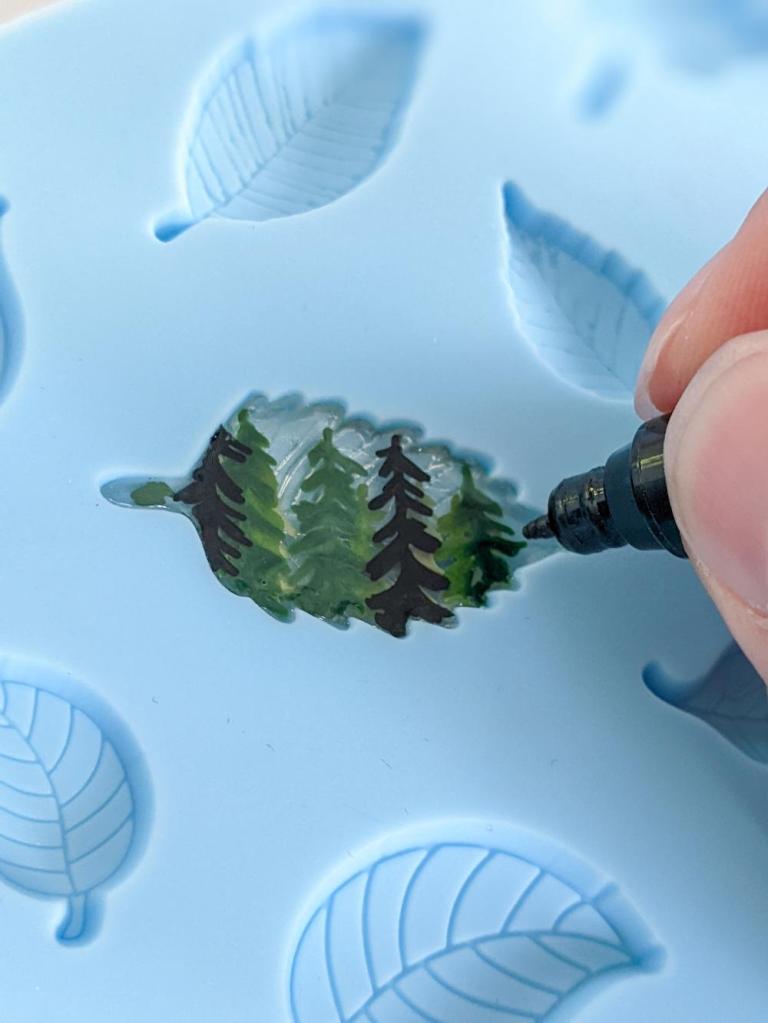
Step 4 – Draw the First Layer of Your Design
I decided on a forest motif for my design. I picked 4 paint pens and drew the first layer of my masterpiece, starting with the lightest shade. Unfortunately, Tooli Art pens don’t come with a colour code or name stamped on the pen, so I don’t know which shades I used. The lightest green is a faded sage shade, the next is olive green, forest green, and I used a black Posca Paint Pen for the last layer.
I made these trees by drawing a vertical line, then added diagonal lines like you would to make an upward-pointing arrow. I repeat those diagonal lines all the way to the bottom, slightly elongating them as I go. Easy!


I’d planned to add a layer of resin between each pen layer, but my first layer turned out a bit thicker than planned. So, I drew trees in the two lightest colours for this layer.
Allow the paint to dry before moving on to the next step.
Step 5 – Repeat Steps 1 to 4
Now we get to do it all again. Resin, bubble removal, cure, add more trees, repeat.
Once I’d drawn the final layer of trees (the black ones), I sealed the design with a layer of resin and moved on to the next step.


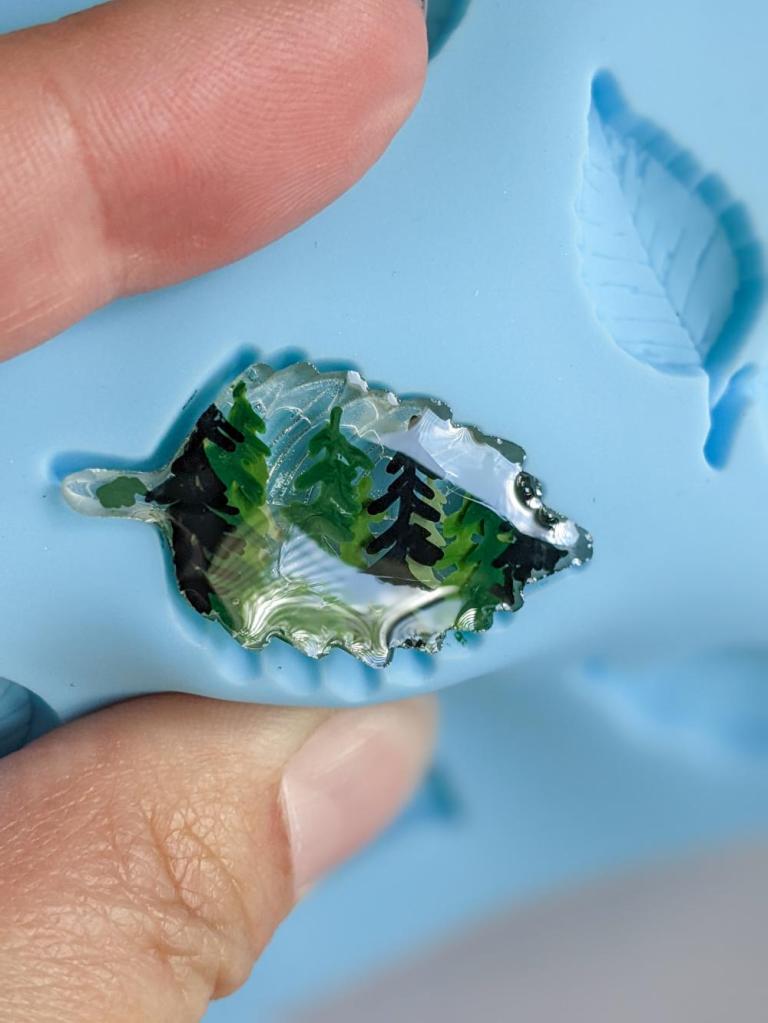
Step 6 – Remove the Charm
The charm popped right out of the mould and the edges were crisp, so yay.
But this mould was intended for use with polymer clay, not resin.
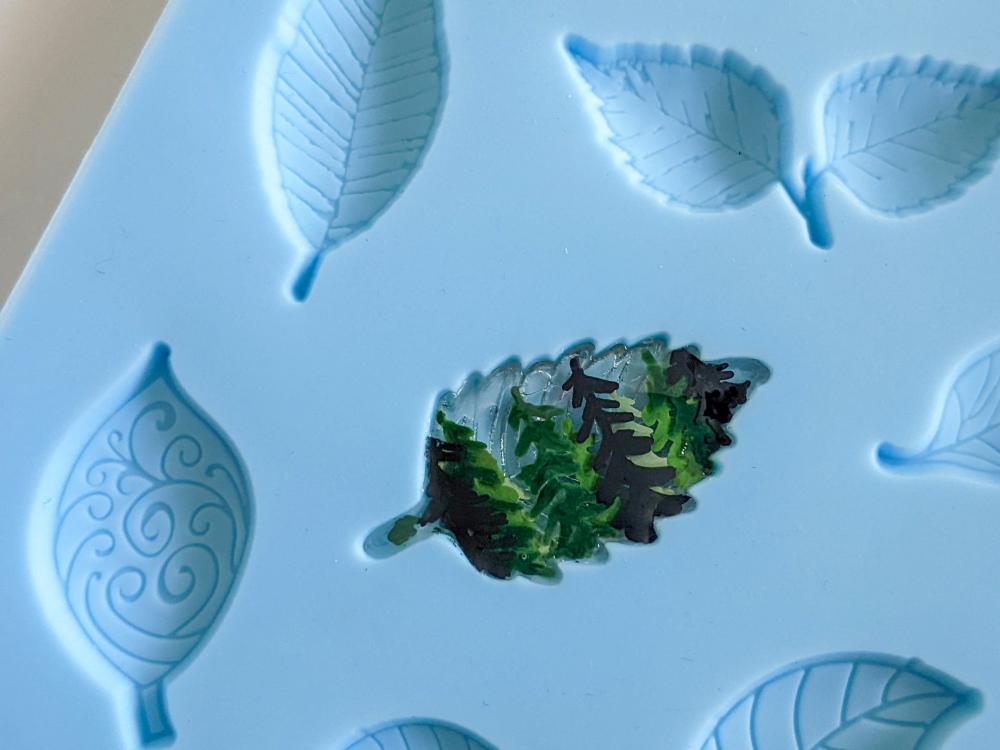
The mould was created with a matte, almost velvety finish, which ensures clay products baked in this mould will also have a matte finish. If polymer clay is baked on a shiny surface, shiny patches form on its surface. Resin, on the other hand, will become cloudy if cured in a non-shiny mould.
As you can see in the following photos, the resin left the mould with some matte splotches. I continued to make another charm, this time with glitter mixed into the resin, and it turned out much more cloudy than the first charm.
But don’t worry, we can fix it!


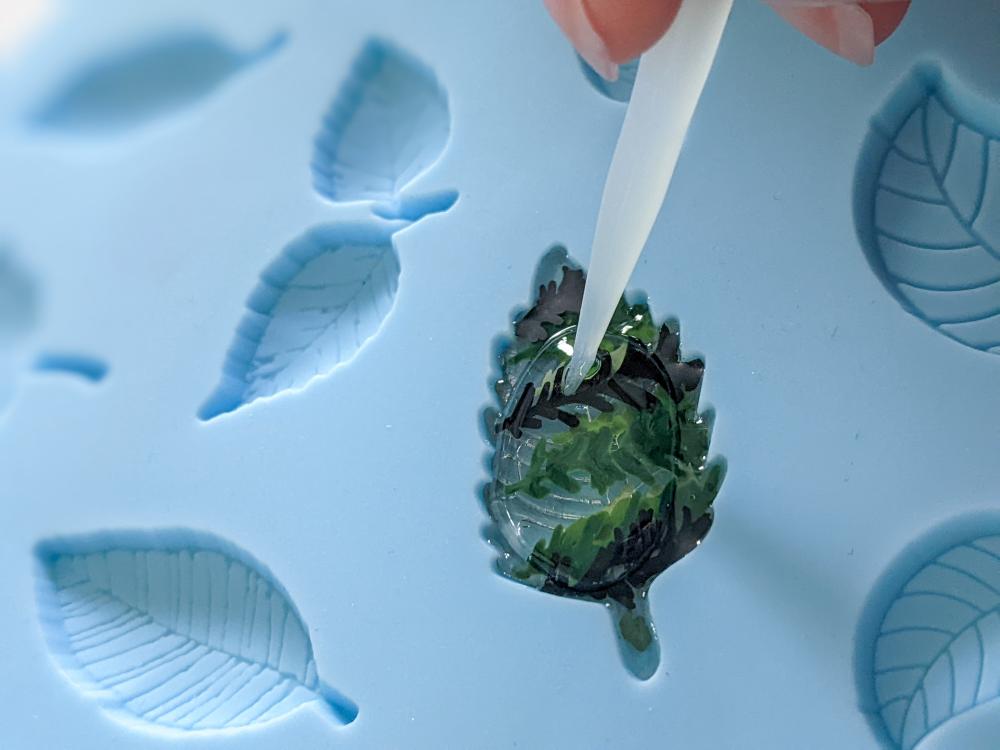
Step 7 – Paint a Thin Layer of Resin on the Surface
I found a soft paintbrush and applied a suuuper thin layer of resin on the surface of the charms, removed the bubbles, and cured them again. But don’t use a brush you’re precious about for this step! The resin will ruin it. 😂


I made a few more charms, playing with pigments and other shades of glitter. I really like how crisp the designs turn out, but I have to be honest—I don’t see myself making more of these.
My tree design might have looked good in a plain leaf mould with a smooth surface, but the vein etchings distort the artwork beneath it and I don’t know how I feel about that. Also, I should have added blue pigment to the final layer to represent sky. What are your thoughts?
I had more fun making the glittery charms, but I still didn’t find the process as satisfying as when I’m crafting with clay.
And that’s okay! The whole reason behind trying new craft projects is to reconnect with my creativity. I learned a lot from this experiment and I got to share the process with you, so I count that as wins all around.
Do you make resin charms? Please share your knowledge with us in the comments!
Until next time,
Yolandie


Let’s Chat!