
I’ve had a few of these on my wish list for quite some time, so I’m stoked to have received a silicone mould (mold in the US) as a part of my birthday haul.
On that note, my husband had the really awesome idea to bring me to Michaels and let me pick out all the stuff I wanted for my birthday. I had a blast shopping for yarn, clay supplies, pens, and other random craft stuff!
Before we start, this disclaimer. Though the product was a gift, I’m not being compensated for mentioning Michaels, Craft Smart, or any other product in this post.
Let’s get to it.
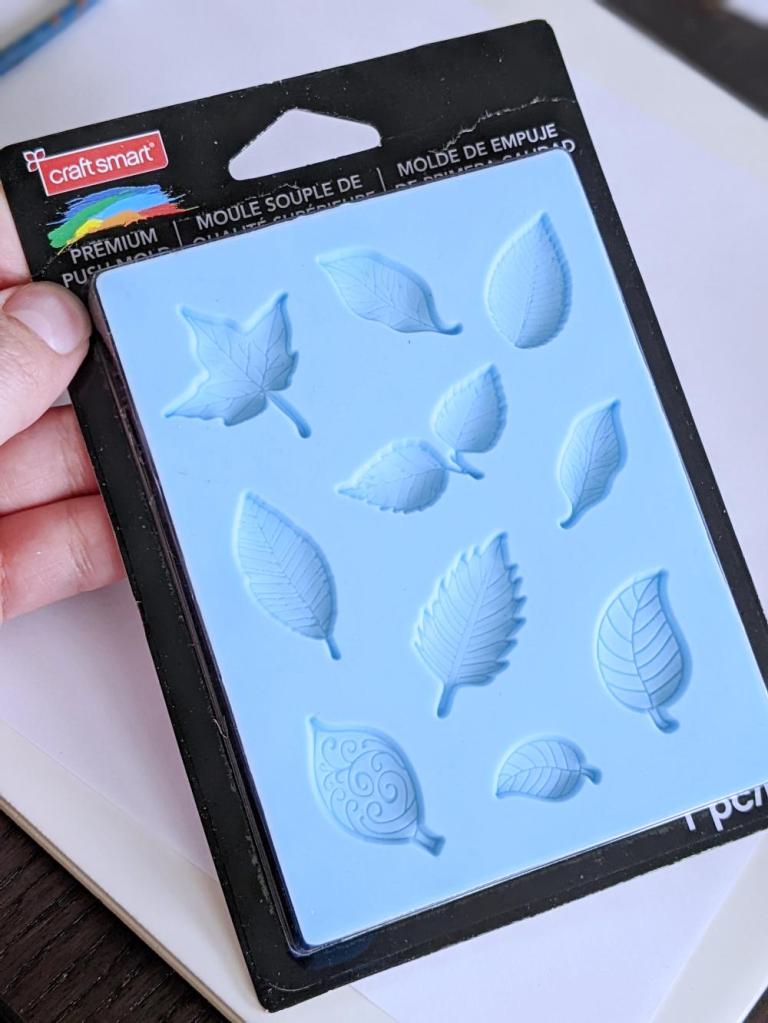
About the Leaves Premium Silicone Push Mould by Craft Smart
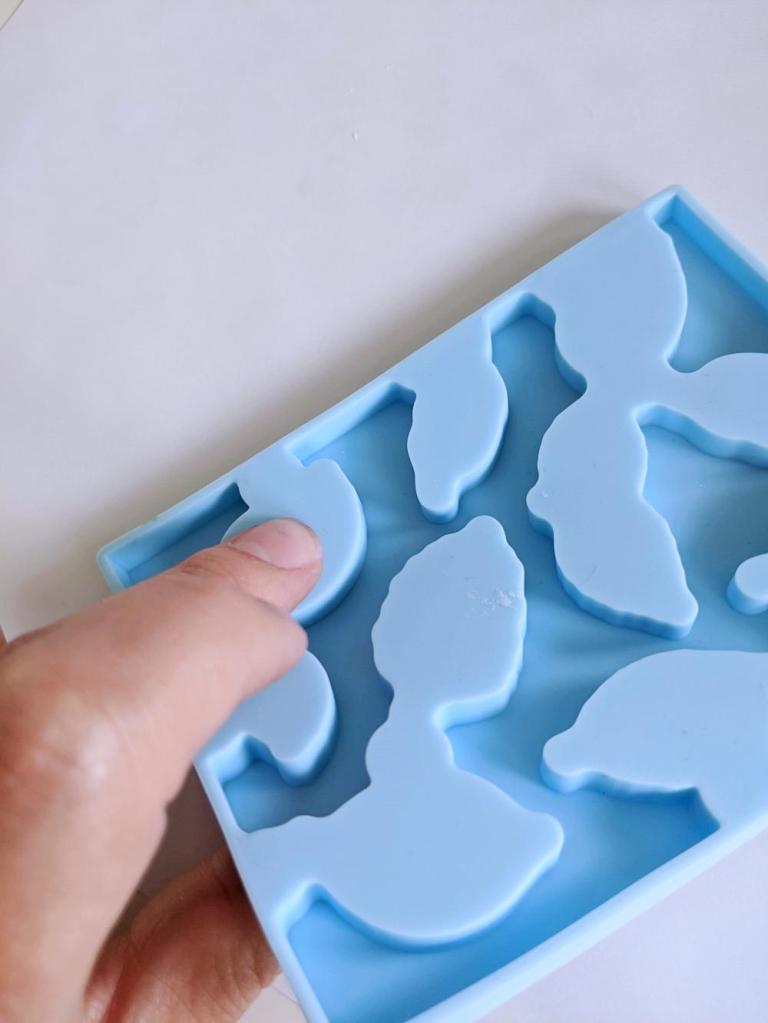
This mould is made of soft silicone, is flexible, and each design has clean-cut detail lines. Nine of the ten leaf designs are realistic, with vein patterns etched in different depths. The tenth leaf features a swirl pattern and is more whimsical than the others. Two of the designs are flipped and also featured in a smaller size.
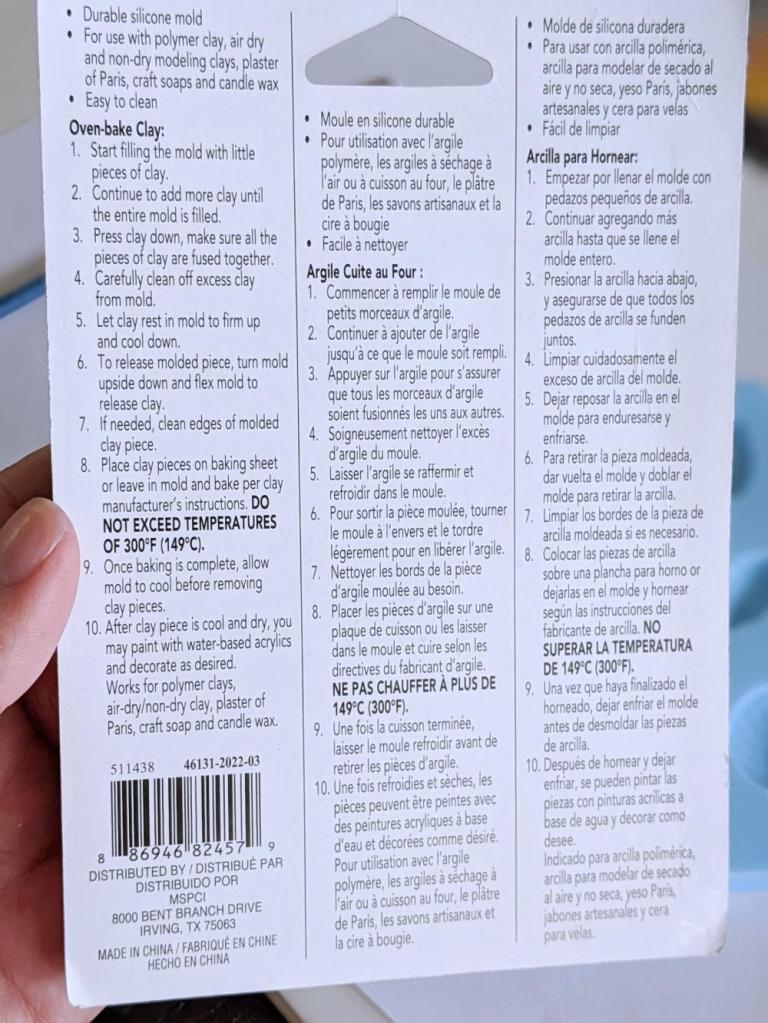
The information on the back states that the product is intended for polymer clay, air dry and non-dry modelling clay (which I presume means liquid clay), plaster of Paris, soaps, and waxes. But in reviews, customers said they use this mould with UV or epoxy resin without any problem. I’ll do a follow-up post in which I try the mould with UV resin.
Users can either de-mould each item before baking or leave them in the mould to bake, so long as the temperature doesn’t exceed 300°F/149°C. But since most polymer clay brands bake around 270°F/132°C, that shouldn’t be a problem.
Unfortunately, the mould doesn’t have any serial number or specific product name on the packaging. This isn’t an end-of-the-world issue, just a personal preference.
How To Use the Mould
Materials
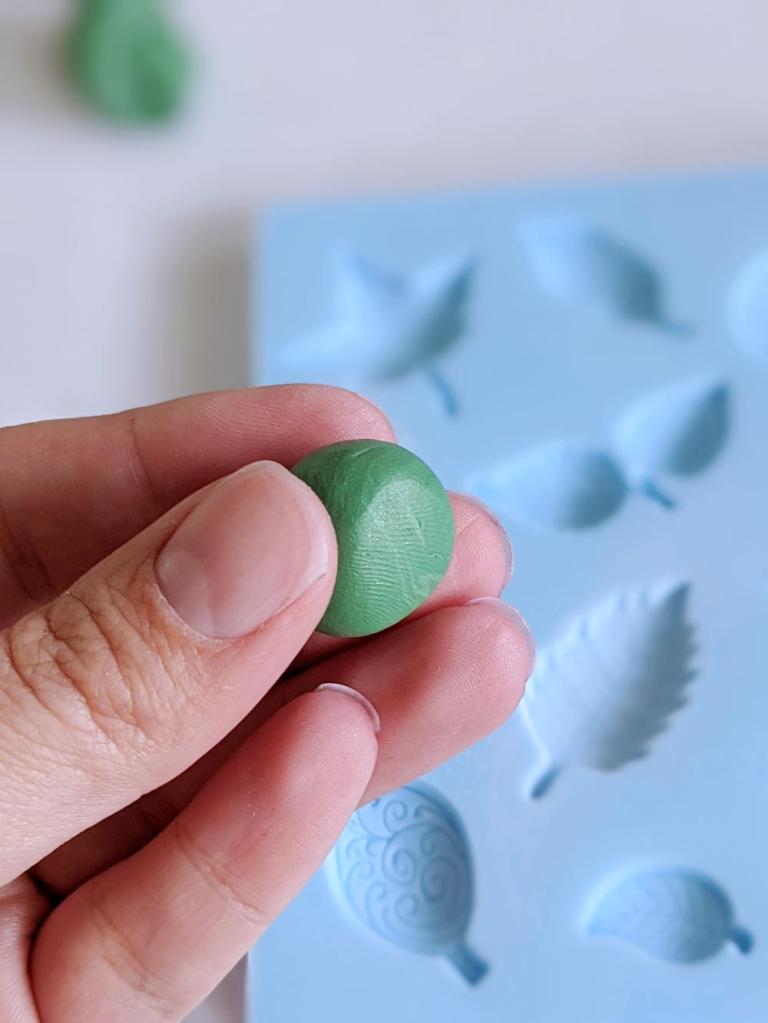
For this experiment, I mixed a dark green clay using:
- Sculpey Premo in Cadmium Yellow
- Fimo Soft in Pacific Blue
- Fimo Soft in Apple Green
- Sculpey Premo in 18K Gold for a touch of glitter
I also used a straight blade cutter to remove the excess clay off the back of the mould.
Step 1 – Condition the Clay
I did this by kneading the clay until it was soft and pliable. Usually, I’d spend a minute or so running the clay through the roller machine, but I skipped that step here.
Also, I photographed this on a super hot day and the heat definitely impacted the overall softness of the clay, as you can no doubt tell by the big old fingerprint in the photo below. 🤣
Step 2.1 – Mistakes were Made
I know from experience that clay can get really stuck in texture mats and cutters, especially on a hot day, so I figured a good place to start would be to dust the mould with cornstarch for easy removal.
Two things happened.
- One, the clay would not stick to the mould. It kept moving and fell out before I was done.
- Two, the etchings were sharp in places but barely visible in others.

So, I decided to try again without the cornstarch.
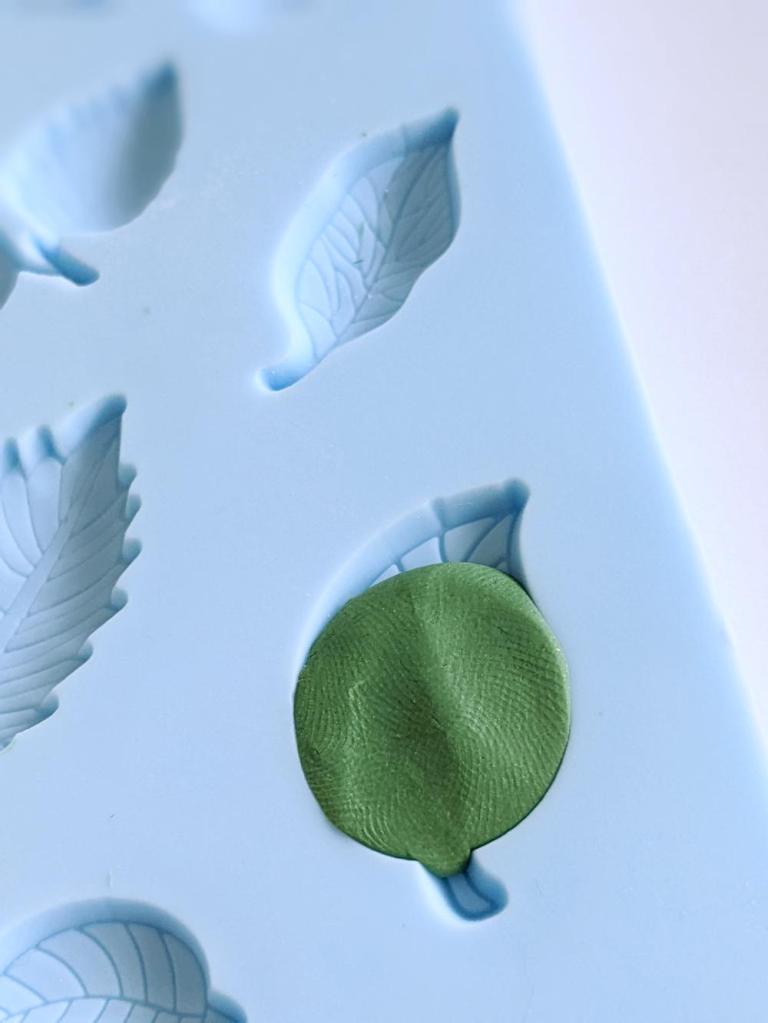
Step 2.2 – Adding Clay to the Mould
This time, I tried a mould with deeper etchings.
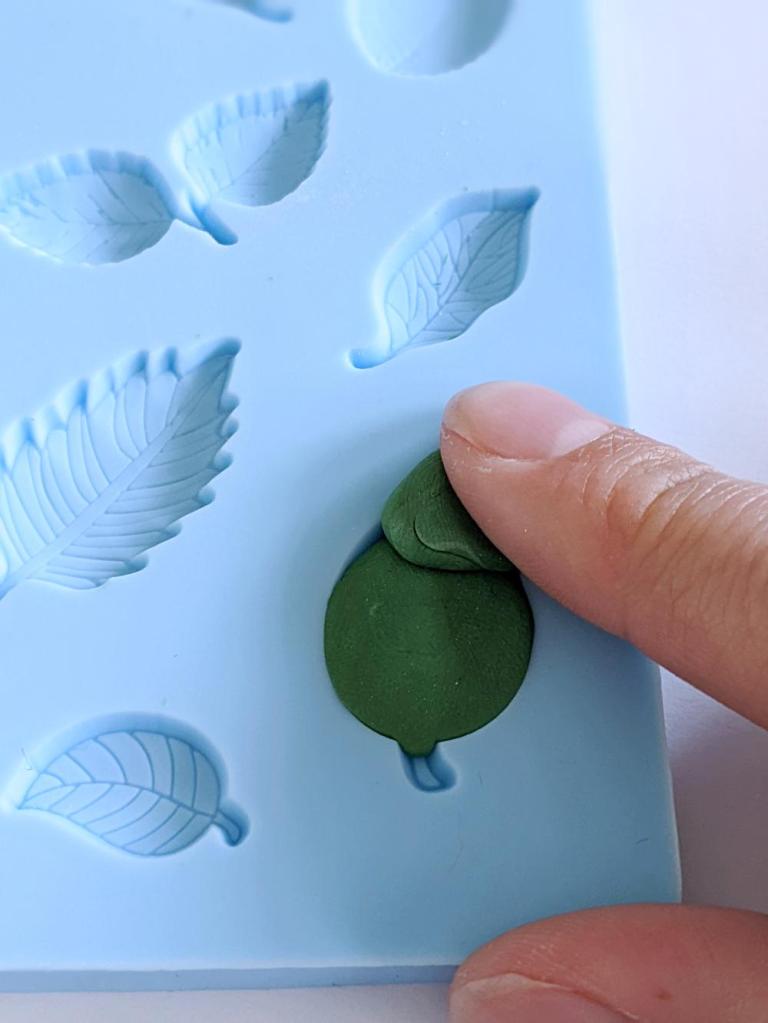
I pressed a small ball of clay into the centre, then added little chunks until I had filled the mould. Without the cornstarch, the clay stuck so much better and didn’t continuously escape the mould. #win
But I wanted to avoid more dull lines, so I took my time kneading and knuckling the clay into all the nooks and crannies.

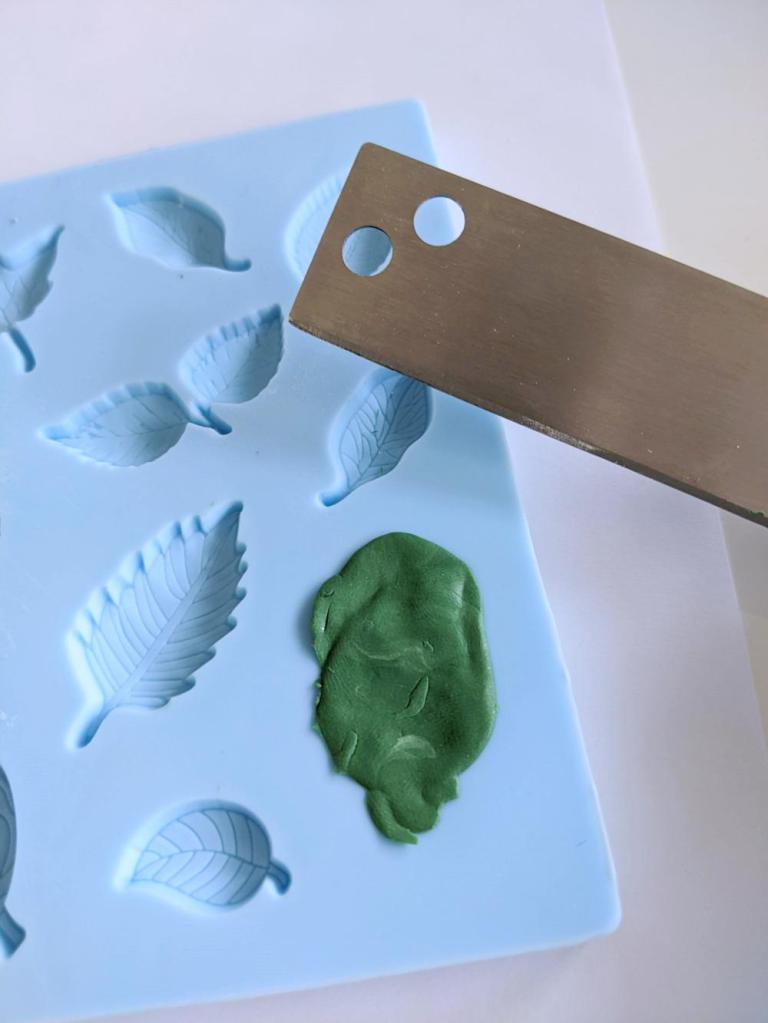
Step 3 – Remove the Excess
I used a straight blade to cut away the clay I didn’t need at the back.
Now, the directions suggest allowing the clay to cool and set before you attempt this, but of course, I have ADHD and don’t like to wait. Popping the mould in the fridge for a few minutes likely would’ve simplified the process. Especially in the heat, but alas.
The bottom line is, I didn’t wait.
The result was a really uneven edge and loads of frustration. I spent a good 5 minutes smoothing the back (which seemed successful at first, but we’ll get back to that).
Step 4 – De-mould the Clay
Without cornstarch, the clay got really stuck in there and I had to flex and coax the mould to give way. This was especially bad on one side of the mould, where the clay was so stuck to the silicone that it pulled away upon separation and left bubbles between the etchings.
The good news is that I could smooth the imperfections with a dotting tool, and this shape worked better when I tried it again after a wash. I reckon there might’ve been something sticky left behind from its time in the factory. Pro tip: wash the mould before use. 😂


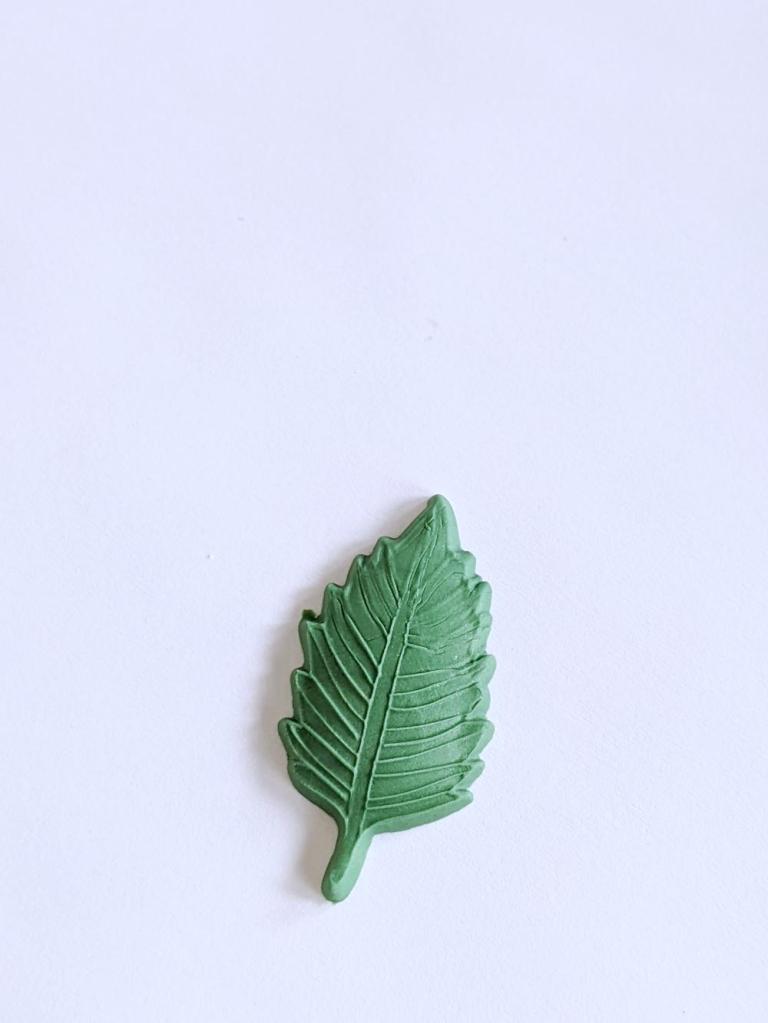
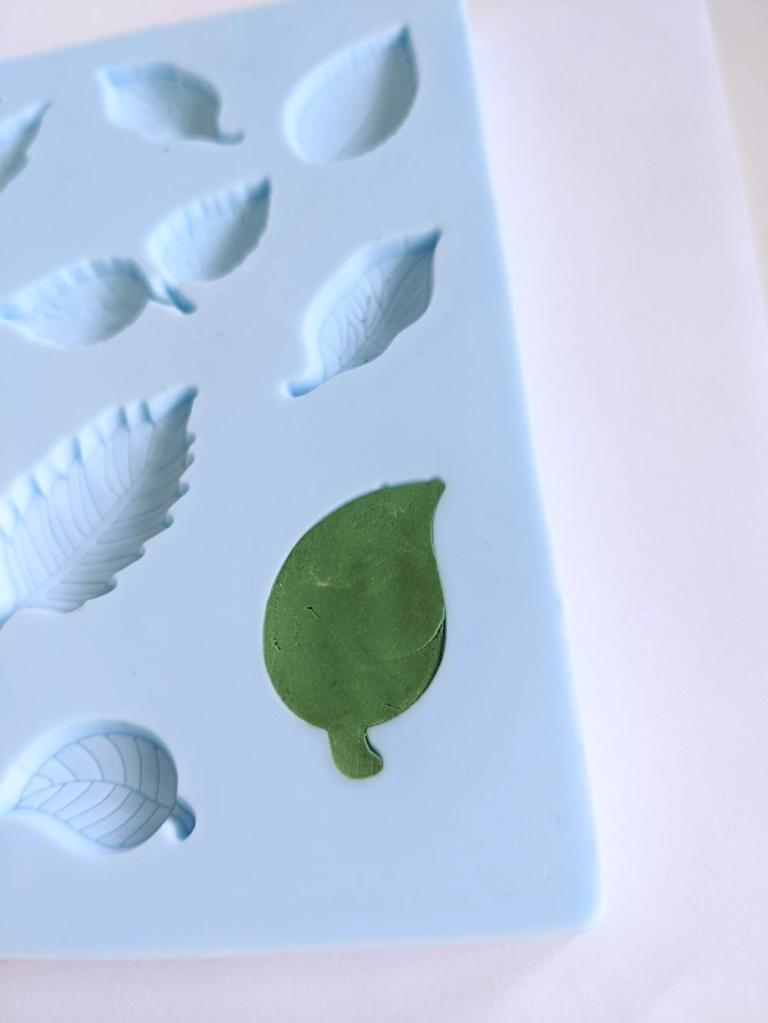
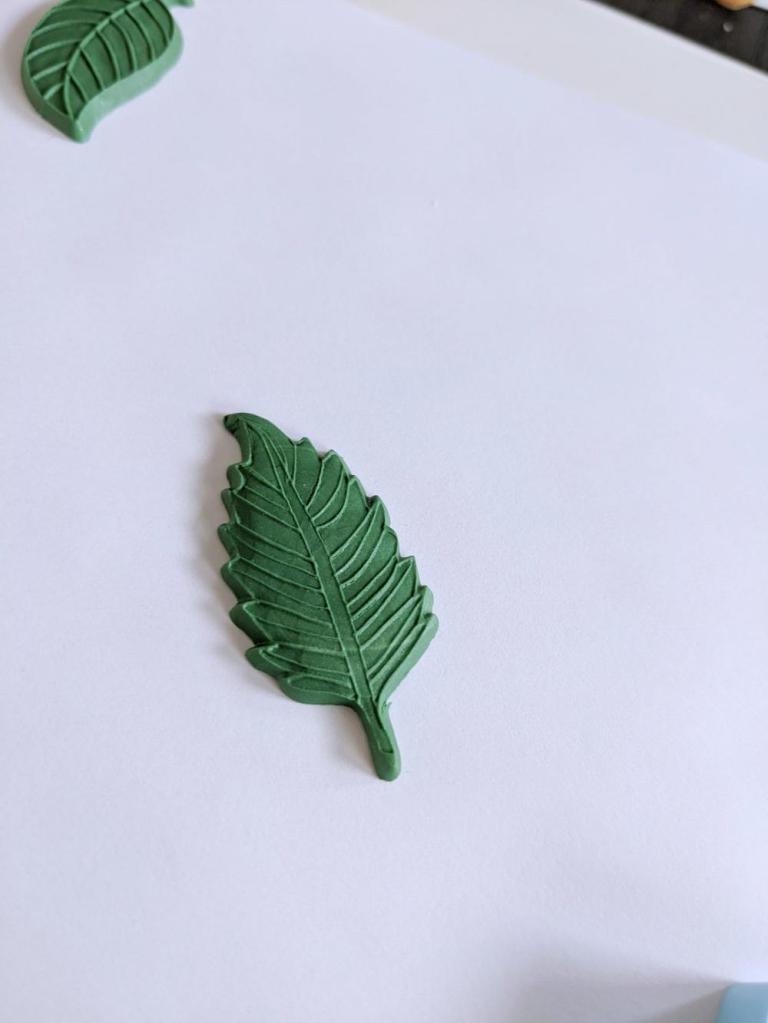
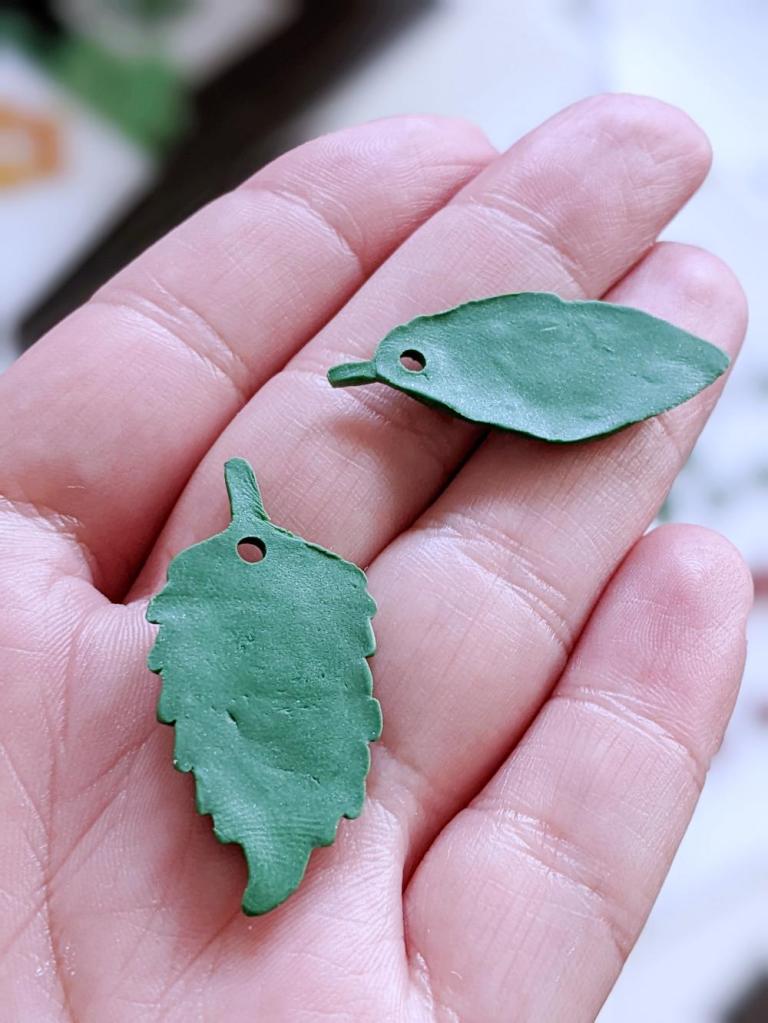
Despite the bubble drama, I was much happier with the result without cornstarch. The lines were crisp and smooth, and the design looked great.
That said, I suspected the cornstarch wasn’t the only problem with my failed first attempt. This second leaf has streamlined outer edges and deeper etchings, which could account for the overall clarity of the end product.
Curiosity piqued, I washed the mould and tried again.
The results were much different this time.
However, I struggled a great deal to de-mould this leaf. The clay stuck relentlessly, and each attempt to remove it led to stretching and deforming. Finally, on the fourth attempt, I succeeded.
Though the shape was much crisper this time, the lines were still too subtle for my liking and fed my growing frustration. Isn’t the purpose of a mould to speed up the process of clay craft?
But annoyance aside, I believe this design is too intricate for moulding clay. A fluid medium like resin or liquid clay would probably yield better results, and I’ll explore this idea in a future post.
Step 5 – Bake
I bake my clay items on a piece of printer paper on top of a ceramic tile at 270°F/132°C for around 45 minutes.
I took the first photo before and the second after baking.

The details remained crisp after baking! Yay!
Side note. The kind of clay we use will impact the structural integrity of the end product.
Some clay brands are robust and resemble vinyl once baked. These clays retain shape well, and imperfections can easily be removed from their surfaces.
Delicate clays (like Sculpey III) are more pliable but lack the same structural properties. They often deform (eg, sag in the middle) and are brittle after baking.
My favourite clay brands are Fimo (any of their products) and Sculpey Premo.

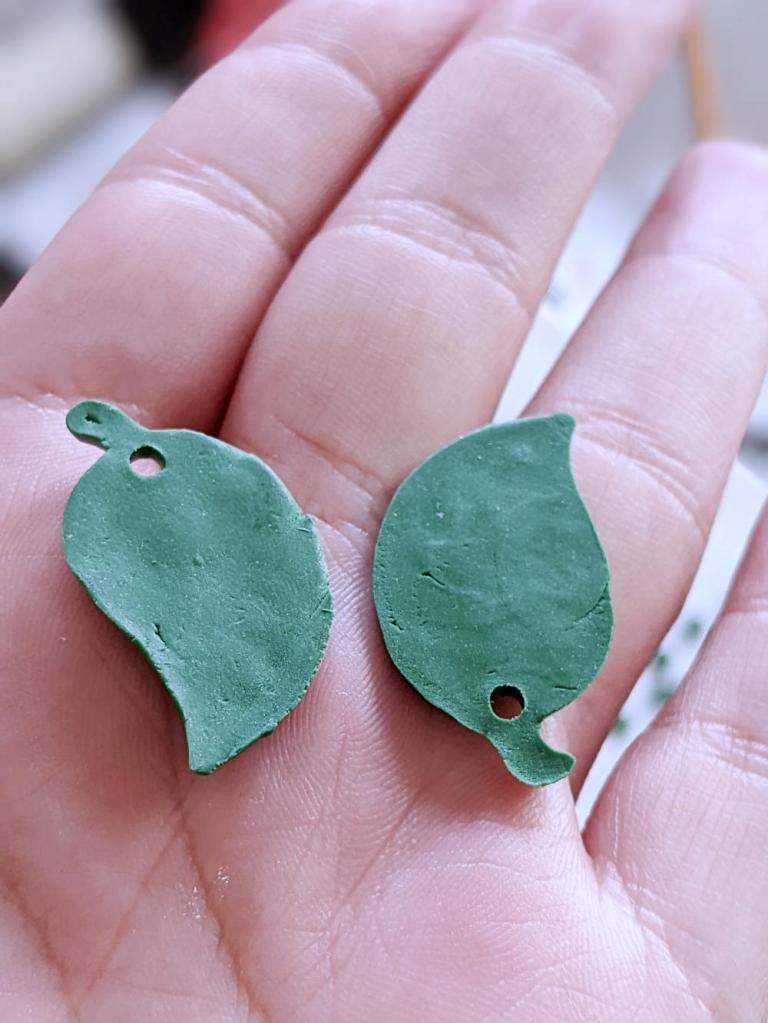
Once the designs had cooled enough to handle, I flipped them over to check the backs. And…was really disappointed.
Despite my efforts to smooth the backs, a lot of imperfections remained. This could be because I de-moulded the clay before allowing it to set. The heat was likely a factor, and I might have made a mistake somewhere during the process. Whatever it was, I have a lot of sanding in my future. 🤣
If you have any advice, please let me know in the comments. I’d love to learn what works for you!
Closing thoughts
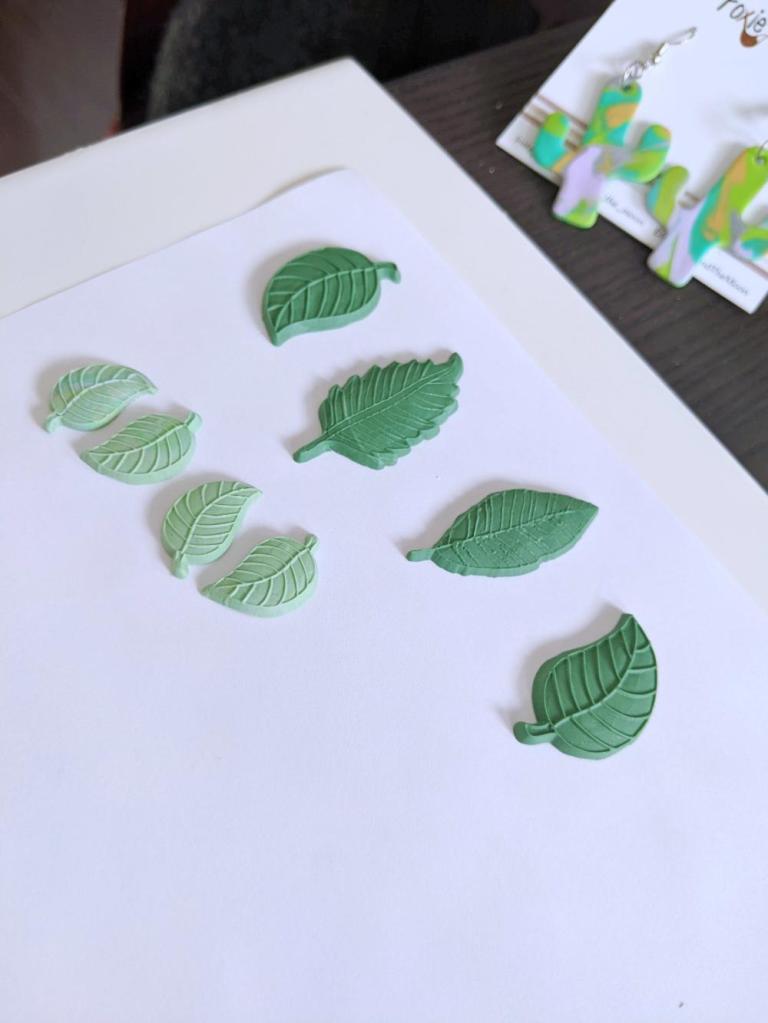
This mould offers a decent variety of designs for a good price. I might not use all of the shapes, but there are a few I quite like. It also cleans easily and seems durable enough to withstand me, which is always a bonus. 😜
And though I still prefer to sculpt my botanical accessories, using the mould could be a quick and easy way to make a greater quantity of products.
Thanks for hanging out with me today!
Yolandie


Let’s Chat!