
The last 8 months have been a major learning curve for me. I picked up not one, but two serious new hobbies, and my house is strewn with half-complete projects. Send coffee. 🤣 Thankfully, my wonderful friend taught me how to work with polymer clay and set me up with some of the basics to start. (Thanks, Liani! Check out her gorgeous work @ Lianco_Clay_Jewellery!)
Anyway, I love sharing new knowledge with you, so we’ll chat about clay and clay tools in back-to-back posts.
In part 1, we’ll talk about polymer clay necessities. We’ll cover clay brands, cutters, and blades, and you’ll be able to bake your first items once you’re done reading. Next week, we’ll continue with the nice-to-haves in part 2. We’ll talk about additional tools that can make your life simpler and explore some useful items you probably already have at home.
These posts are based on my experience with polymer clay jewellery, but most of these tools will still apply to other clay arts.
Before we officially begin, the usual disclaimer. I’m not being compensated for mentioning any brand, store, or product. These are all items I use on a daily basis, either purchased with my own money or received from my birthday/Christmas wish lists.
Right, let’s go.
Everything You’ll Need to Start Crafting with Polymer Clay
Clay
Basics
* Brands
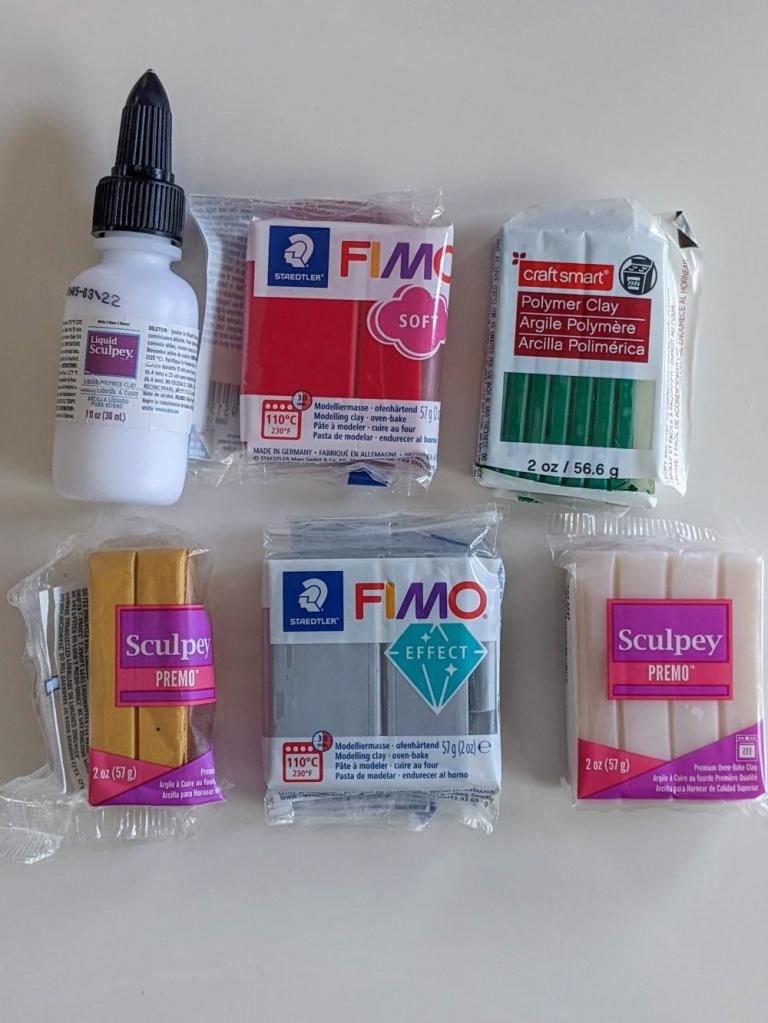
Upon delving into the clay world, we’re bombarded with four main clay brands: Sculpey, Cernit, Fimo, and Das.
- Cernit clay isn’t widely sold in Canada and the import costs are a bit out of my price range. That said, I’d love to try this brand as so many clay artists swear by Cernit translucent clay.
- I’ve also never personally worked with Das polymer clay, but Das is a fairly trusted name in all clay products, so I’ll definitely try their polymer clay products eventually.
- I mainly use Fimo and Sculpey, and I’ve recently purchased a few Craft Smart colours to try out as a budget option. Each of these brands offers product variations, but I’ll only discuss those that I’ve personally used in this post. 😊
* Product details
- The standard clay size is 57g/2oz, though many brands offer a larger clay bar around 227g/8oz.
- Most clay brands sell their products in plastic wrappers that are easy to remove and can be folded around any leftover product.
- Clay is typically scored into equal parts. This allows makers to create their own colour recipes by using exact amounts of each shade of clay and also simplifies keeping track of how much clay is used per product.
- Each brand recommends its own baking time. I bake my clay products at 270°F (135°C) for around 45 mins, regardless of the brand I’ve used. Of course, baking time will extend depending on the thickness of the item being baked.
- Baked clay has a slight flex and should resemble vinyl. But some clays are more delicate than others and become brittle once baked.
- It is safe to use acrylic paints, powder pigments, varnishes and resins, and almost anything you can think of to tint or decorate the clay.
- Special effect clays contain metallic pigments, glitter, or grains of sand for texture. Others resemble leather or turn translucent once it has been baked.

Fimo Clay
Slightly pricier than the other Fimo products, but with a vibrant colour payoff. A tiny corner of any of the bright colours will be enough to mix great custom shades.
It is also sturdier once it has been baked, so it makes a durable base for most clay crafts.
The downside is that Fimo Professional is super hard and requires time and effort to condition.
Conditioning clay:
The process of rolling, kneading, and preparing clay for use.
When you’re kneading clay for a long stretch, softer varieties are much easier on the hands and wrists.
Of course, the fact that Professional is more rigid means it is perfect for sculpting and it doesn’t hold fingerprints like more delicate clays will.
My go-to clay product. It comes in a fair range of colours, is soft and pliable, and bakes nicely.
I don’t find the shades quite as vibrant as Fimo Professional, but I only mention that fact to write a balanced review. I’m still deeply impressed with the colour payoff.
Also, because this clay is so pliable, it mixes well and allows me to create a fantastic range of colours and interesting slabs.
Clay slab:
Clay that has been rolled out to form a flat sheet.
In the polymer clay jewellery community, clay slabs are often decorated with florals, paint, marble effects, textures, and other embellishments.
Despite its softness, Fimo Soft passes the fingerprint test. Mostly.
Temperature can affect the consistency of many clay brands, and Fimo Soft becomes stickier when the weather is hot. During those days, small imperfections like fingerprints do bake into the clay. This isn’t a major setback but does require extra effort later in the crafting process.
Exactly like Fimo Soft, except the clay is typically metallic, contains glitter, or turns translucent once baked. Fimo also has an entire range of leather effect clays, but I’ve never tried them.
Sculpey Clay
My experience with Sculpey Premo is quite similar to Fimo Soft. It’s a great clay that I enjoy working with!
It takes a bit longer to condition but still isn’t too hard on the hands. I’d say it’s the midpoint between Fimo Professional and Soft. It bakes to a flexible, durable finish and doesn’t hold on to fingerprints.
I love the range of available colours. That said, because Sculpey is such a popular brand, many of the colours are often out of stock at my local craft stores. I could shop online, but I prefer to buy clay in person. You can easily tell whether or not a product has expired just by how pliable the clay is between your fingertips.
Soufflé is much softer than Premo and feels silky to the touch. It is exceptionally pliable and has an almost marshmallow-y quality. I guess it’s all in the name!
Like Premo, Soufflé comes in a great range of colours. Also like Premo, Soufflé is out of stock more often than not.
I do have one notable peeve about this product. Other brands retain their shape once the clay has been cut and set aside, but Soufflé tends to sag in the middle while baking. Again, it’s in the name. 🤣
I’m pretty sure the weather is to blame for this issue, but I’ve given up on using Soufflé. I’d still use the clay in a pinch, though! I just prefer the other available brands.
This is the most delicate clay I’ve ever worked with. IMO, it’s also the softest and most lightweight.
Sculpey iii isn’t suited for projects that require any level of durability. I’ve used it as the backdrop for slabs, but it becomes brittle once it has baked and will break between your fingers. (With a satisfying snap, I’ll give it that!😂) It also completely deflates in the oven. Next, I crafted dainty flowers, certain that iii would be fine if I used sturdier clay for the slab. I was wrong. My gorgeous little flowers crumble under the slightest pressure.
Sculpey iii isn’t a good fit for my creations, but that doesn’t mean it’s useless. My hypothesis is that projects that use more clay will be sturdier, like figurines or 3D charms.
Clay in liquid form is awesome for a great variety of projects! Use it to:
- Fill clay moulds.
- As an adhesive. Liquid clay can stick raw clay to raw clay, baked clay to baked clay (great for repairing broken clay items), and raw to baked clay. It can also be used an as adhesive for earring posts or embellishments, such as glitter, gold leaf, beads, etc.
- Embellish. Liquid clay can be painted onto projects, so we can paint patterns, write words, apply highlights, and so much more!
- Alter colour. Mix liquid clay into any other kind of clay and create stunning palettes.
- Moisturise dry clay. Liquid clay is a well-known cure for clay bars that have dried out. Just a few drops could revitalise clay headed for the bin! It’s also a great way to soften clay that is a bit too hard to condition.
Craft Smart Clay
I picked up a few bars of Craft Smart clay to try them out and was pleasantly surprised.
The clay is pliable and conditions easily. I’ve never had problems with fingerprints remaining on the surface, except in hot weather conditions, and the bake is quite similar to Fimo Soft, if slightly more flexible.
There’s a great variety of colours, including special effect clays, and the pigmentation is wild! Which is also the drawback of this product. When working with Craft Smart clay, expect your hands, tools, and everything you touch to be tinted. I often wash my hands three or more times to get rid of the pigment! But this is honestly a side-effect I’m willing to live with. I’m genuinely impressed with the quality and vibrant colours, especially for the price.
Rollers and Blades
Rollers
We use rollers to condition our clay and to create slabs.
Most polymer clay artists use clear acrylic clay rollers because of their non-stick surface. But if you’re on a budget, you can make a roller out of stuff you find around the house!


My roller is a simple PVC pipe. Granted, the clay does stick to it sometimes, but a thin layer of corn starch fixes that in no time.
Quick Hack:
If you don’t have guides but need to roll out clay to an even thickness, stack the same number of playing cards or popsicle sticks on either side of your clay instead!
Blades
Flat blades (also called tissue blades) are probably the most used tools in polymer clay art. They come in different levels of sturdiness, ranging from unbendable to flexible. With this blade, we can:
- Cut segments of clay and slice canes
- Lift clay from surfaces
- Create straight lines in our works in progress
- Create custom curved cuts
I own this set from Craft Smart, but I removed the plastic handles because they got in the way. It comes with three blades: a rigid flat blade, a flexible flat blade, and a wavy blade. I haven’t used the wavy blade yet, but I’m excited to try it for florals.
For detail cutting, I recommend a precision blade. This nifty little tool has more uses than I can list and it’s a tool you likely already own. And if not, no worries! I got mine from the dollar store for around $2.
Cutters
Strictly speaking, not a necessity, as you could start your polymer clay journey without clay cutters. That said, cutters will make your life easier!
Clay cutters work just like cookie or fondant cutters. In fact, many polymer clay artists use cutters meant for the food industry in their crafts. They come in all shapes and sizes, and some also emboss the clay.
The most important aspect to consider is the sharpness of the cutter. Dull cutters won’t create sharp lines, which means more sanding after the bake.
Other than that, you can use basically anything as a cutter.

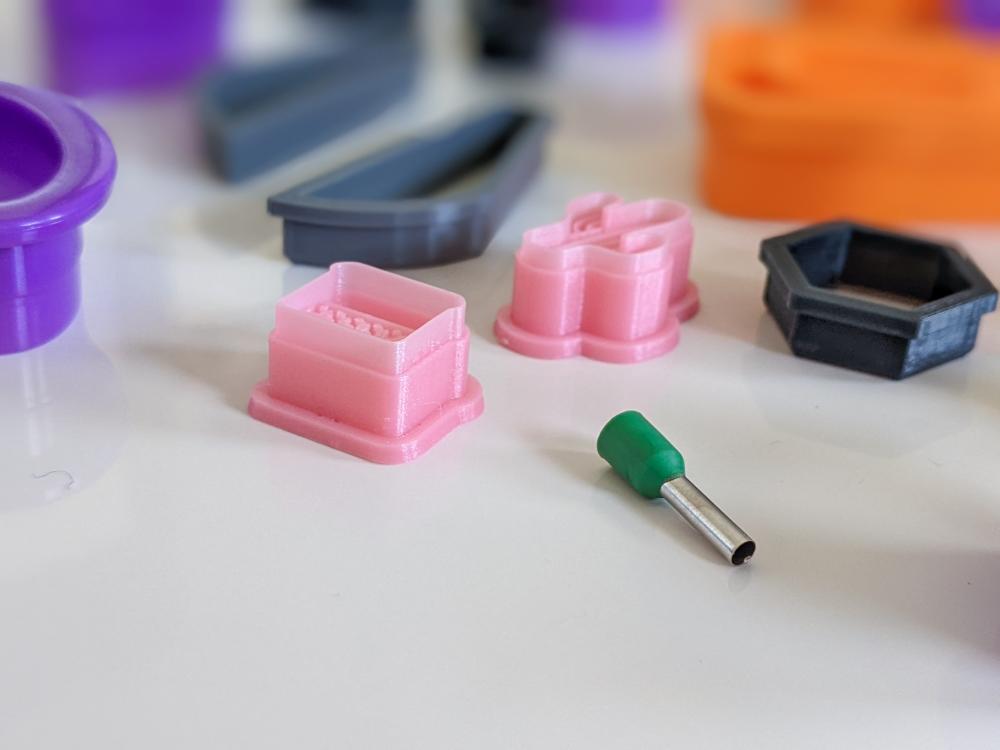


I use circle cutters more than any of the others I own. Circles are versatile and can transform into many other shapes. Some of my smallest circles, like the little green-topped one in the picture above, are great for punching holes for hanging earrings. Other polymer clay artists prefer drilling holes after the clay has been baked, but I’m clumsy and fear for my fingers around power tools. (Ask me about the time I shot a nail right through my finger.)
Baking and Cleaning
Baking
Many polymer clay artists use large ceramic tiles or other glass surfaces because we can craft and bake on the same surface. My husband purchased such a tile for around $ 3 from our local hardware store.
IMPORTANT:
Polymer clay is not food safe. Prolonged contact with surfaces intended for food is not recommended.
Clay takes on the shine and texture of the surface on which it is baked.
For this reason, I always bake on parchment paper or printer paper. Since paper is matte, the backs of my products are also matte. Clay baked on a reflective surface takes on a shiny quality, often in unattractive splotches. This isn’t an end-of-the-world type problem but requires more effort to remove later.
Cleaning
- Cleaning Clay Cutters
I dig out clay residue with wooden skewers or cotton buds, wash the cutters with soap and lukewarm water, and then lay them out to dry on a paper towel.
It might be necessary to use dish soap or any grease-removing soap to wash cutters after use with a vibrantly pigmented clay.
- Cleaning Other Tools
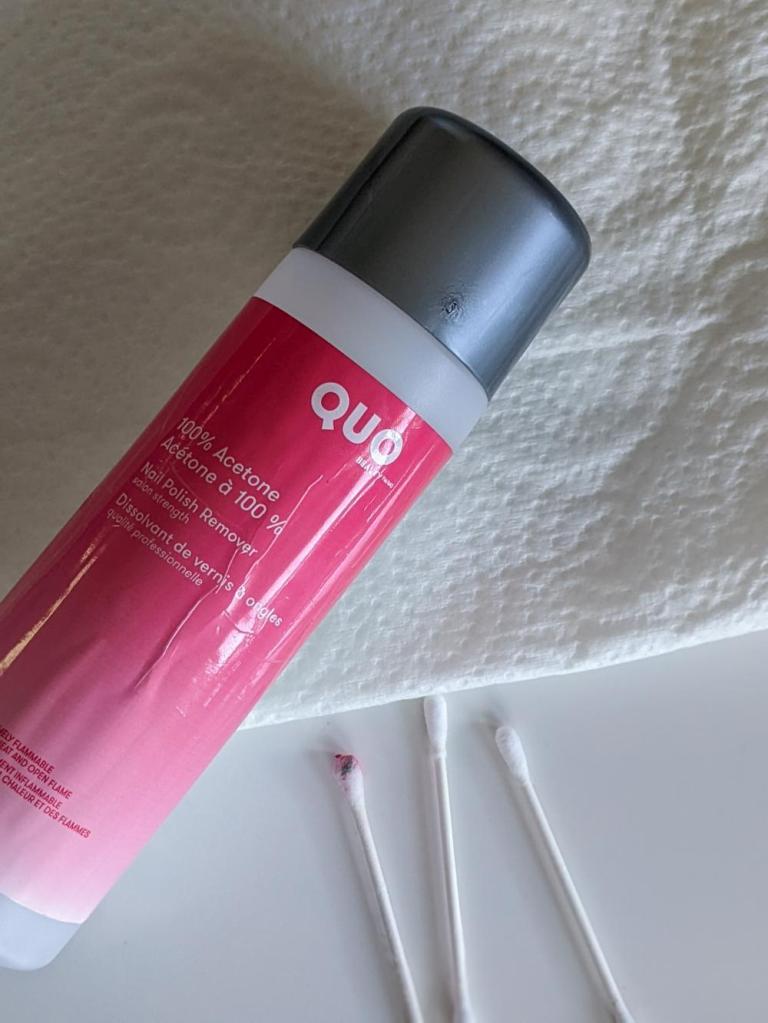
Acetone and paper towels are my cleaning BFFs. Because acetone dissolves polymer clay, cleaning is a breeze. But acetone will dissolve many kinds of varnish and plastic, so be careful around furniture and your cutters!
Acetone can also remove imperfections from baked clay, such as fingerprints or shiny spots. All you need is a drop on a cotton tip.
If you’d like to check out some of my clay creations, give me a follow on Instagram! Find me at Foxie_And_The_Moon.
And that’s a wrap on part one! Let’s meet again next week for part two of this miniseries.
Yolandie


Let’s Chat!