
Welcome to the final instalment of our 4 Weeks, 4 Paintings mini-series!
This week, we’re delving into brush control with simple, flowy florals. The great thing about round watercolour brushes is their versatility. We can achieve thin lines by using only the tip of the brush, and thicken brush strokes by adding additional pressure. We can also create great petal shapes by pressing the brush to the page, and then cleanly lifting it.
I stretched watercolour paper before I started this tutorial, and you can learn how by checking out my post on How To Stretch Watercolour Paper.
You’ll Need:
- Paint. I used gouache, but watercolours would also work beautifully for this technique. My palette included: Rose, Turquoise, Sap Green, Viridian, Cerulean Blue, Purple, and Mauve.
- A round-tipped paintbrush. I used a #8 brush.
- A painting surface. I used 140lb/300gsm cold-pressed, cellulose-based watercolour paper, which I secured with regular painter’s tape.
- Water with which to clean your brush. I’d recommend 2 water sources, 1 for cleaning the brush, and another with clear water for mixing.
- Optional—paint pens. I used Black and White.
Step 1
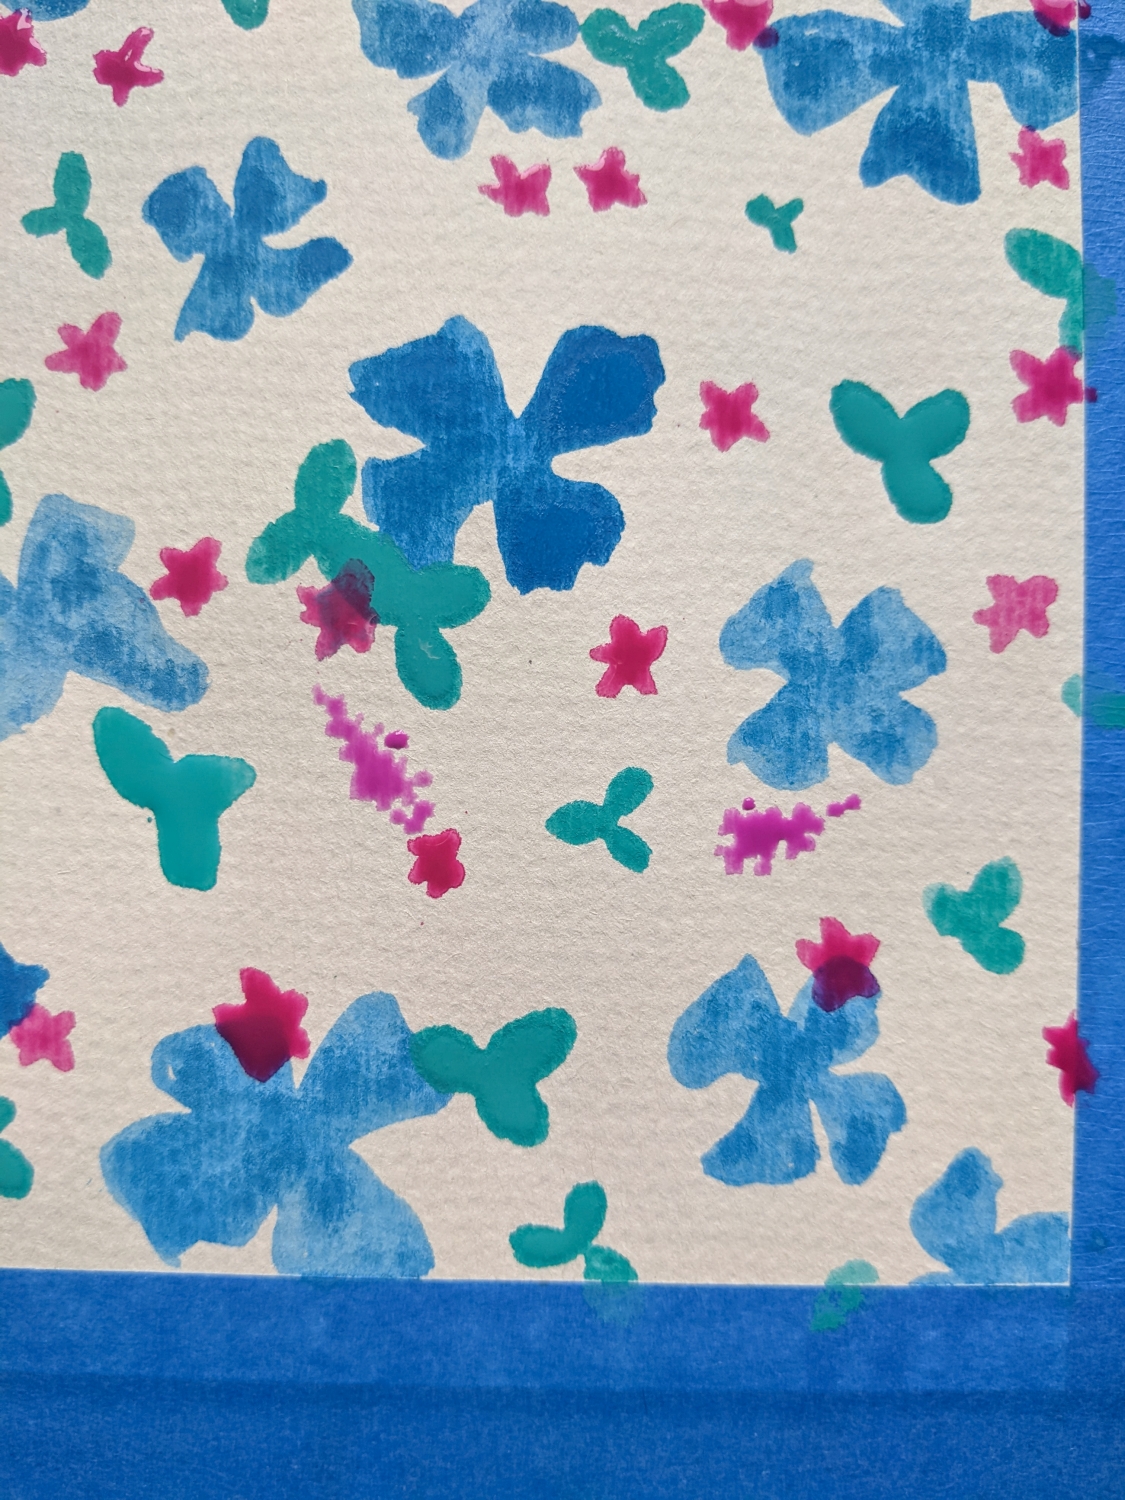
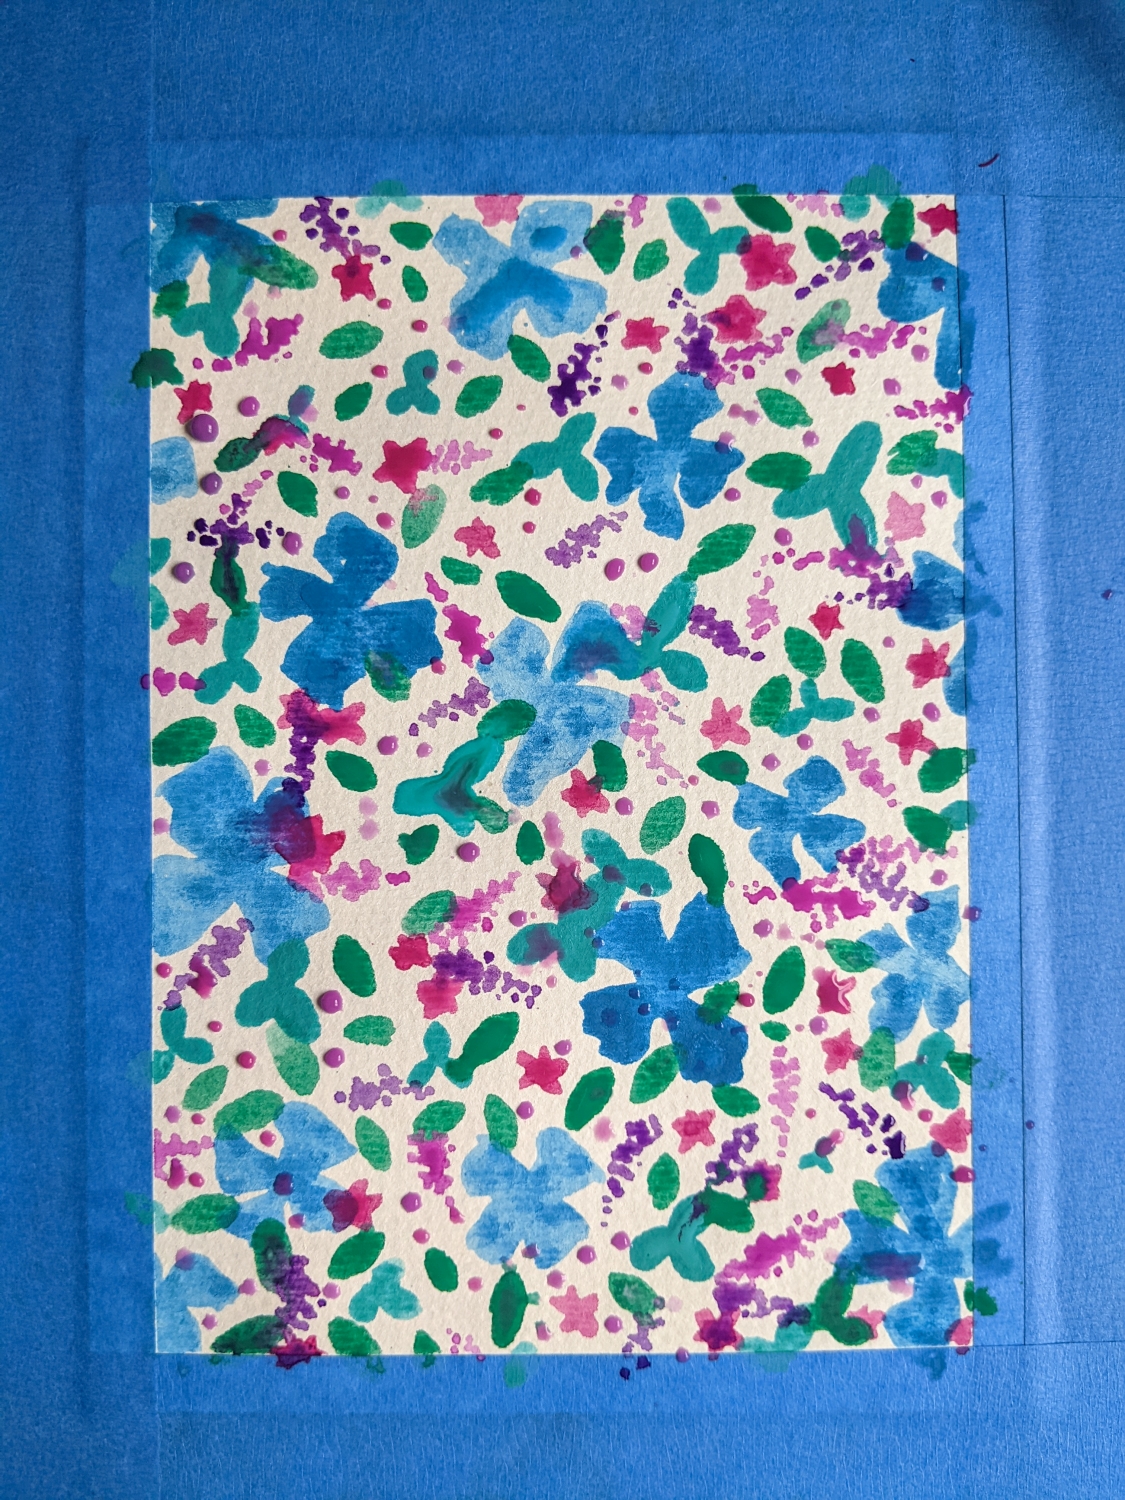
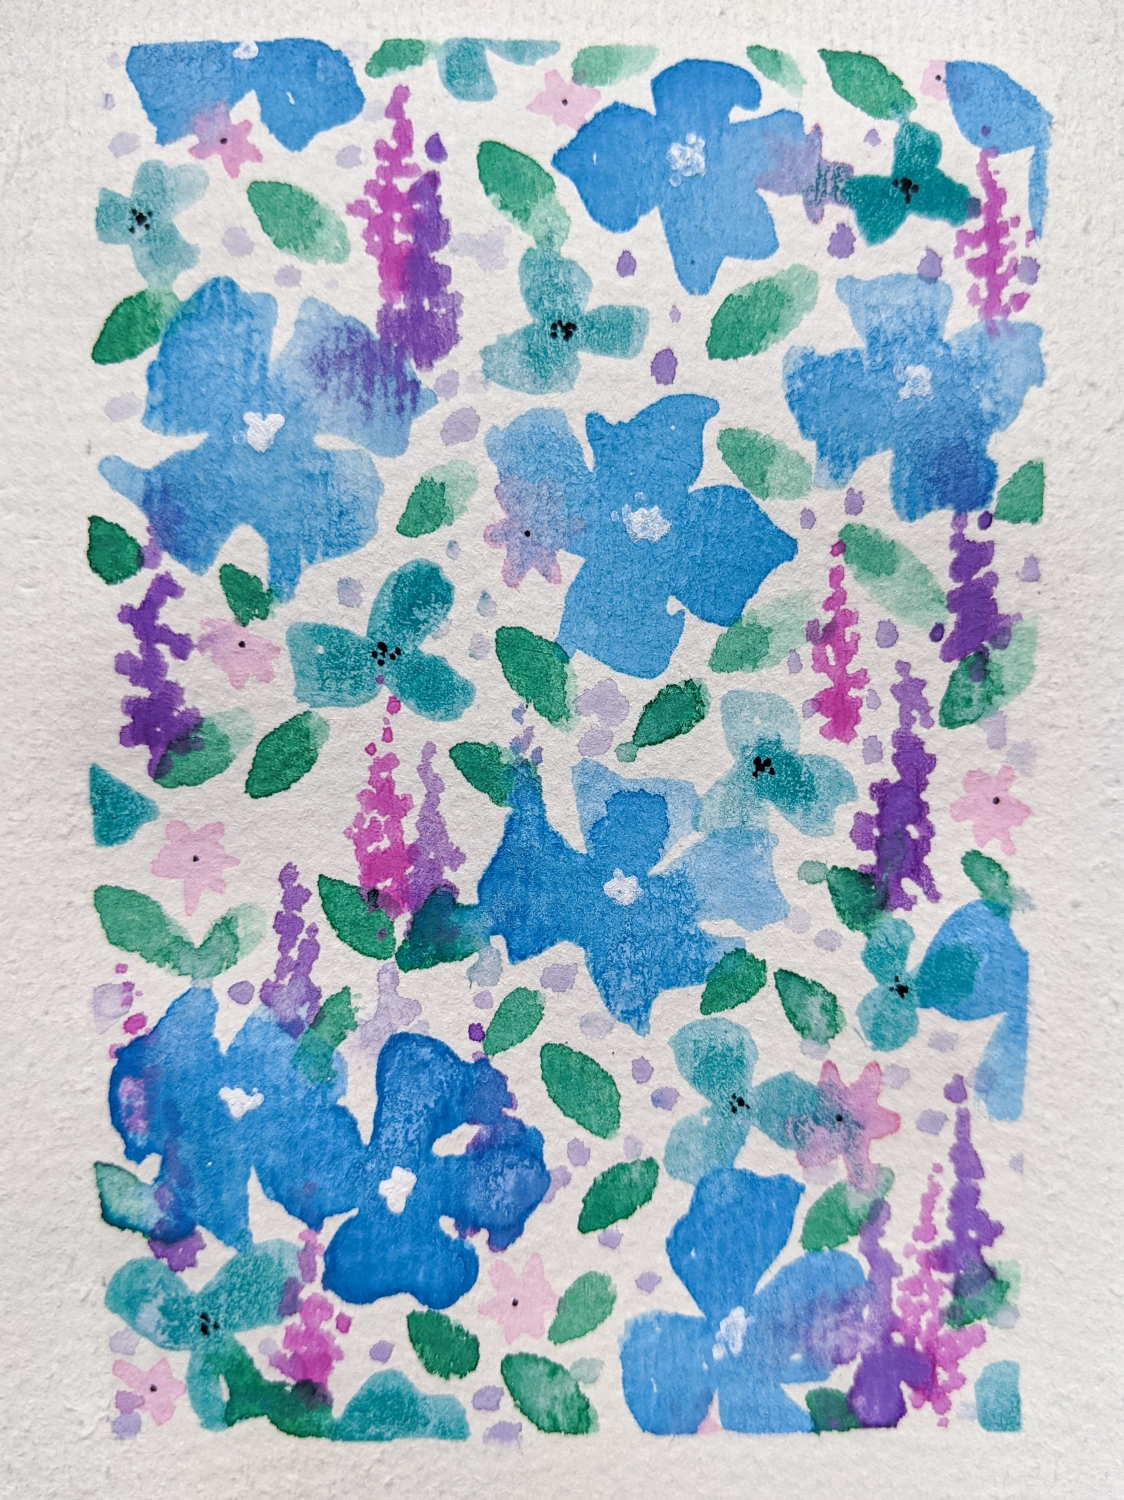
I created flowy, 4-leaved flowers by painting long-edged triangles with a curvy outer edge (using Cerulean). The petals don’t have to be perfect—this style is super forgiving. Just go with it and embrace the process!
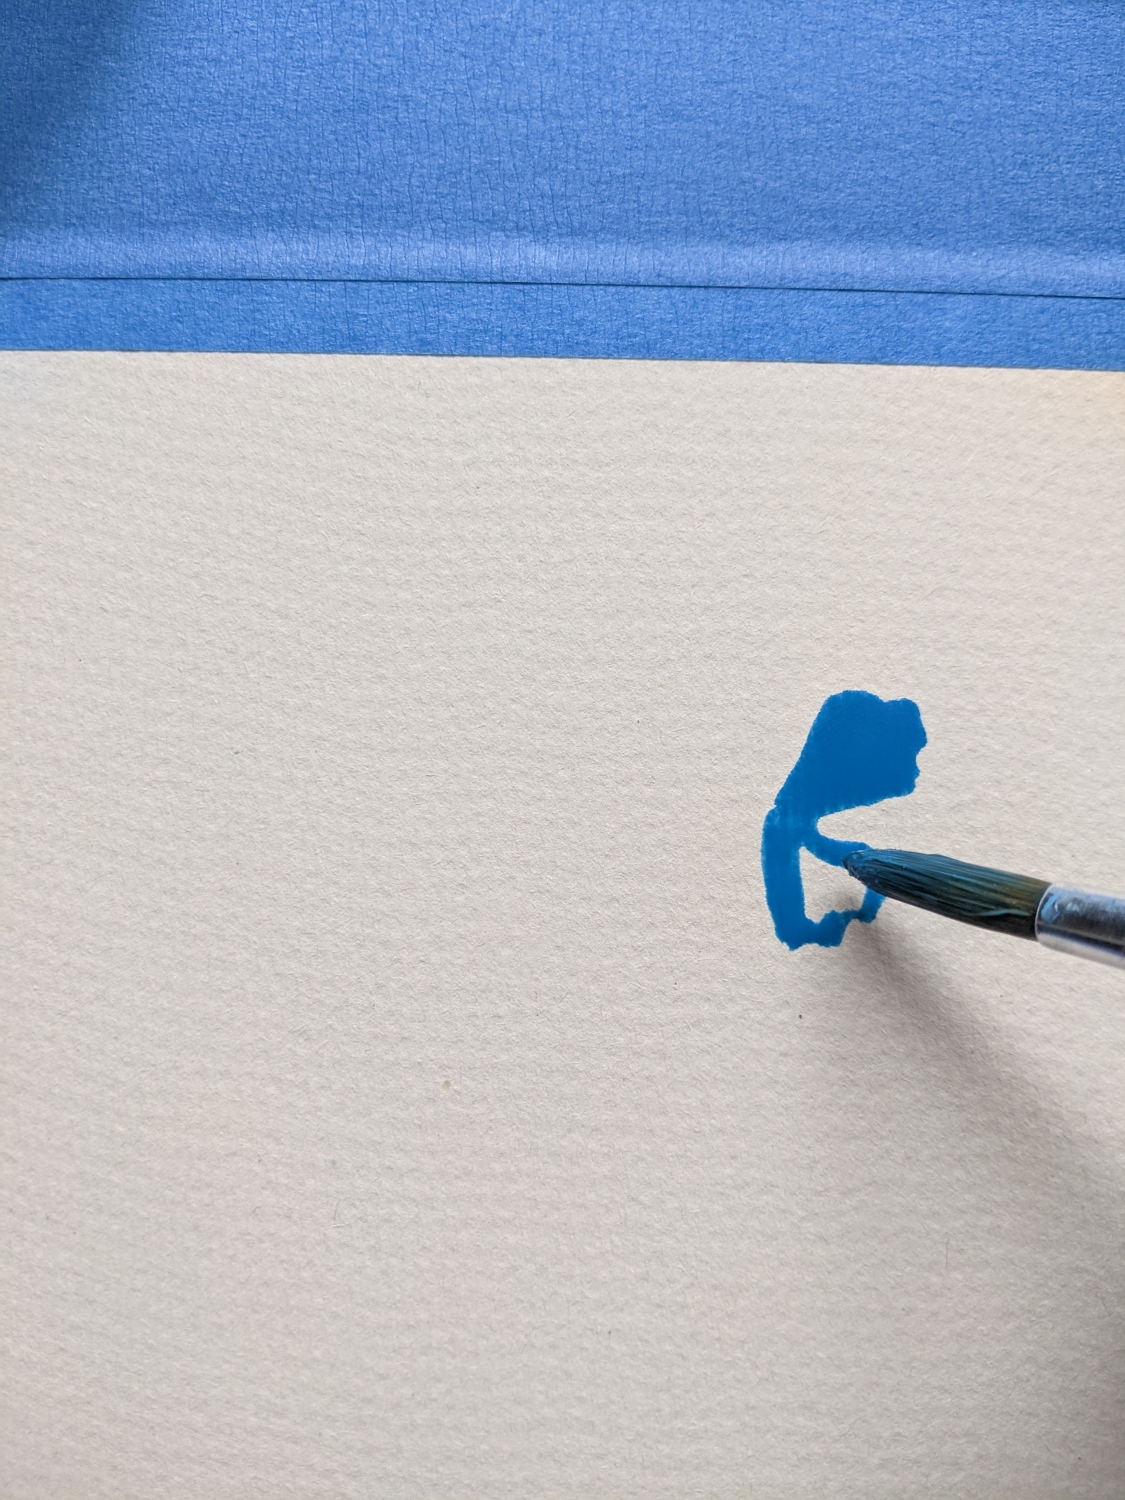


Fill the page with 4-leaved flowers, and continue with the next step while the paint is still wet.
Step 2
Using Turquoise, I painted the petals of 3-leaved flowers by lightly placing the paintbrush on the page, pressing towards the back of the brush, and then lifting.
This technique allows the brush to do the work. Each time we place the brush, we create a petal with a narrow tip at the front and a rounded edge at the back. I added two more petals in the same way, allowing them to join at the narrow end.
Allow the 3-leaved flowers to overlap with the 4-leaved ones from Step 1. The flowy, colour-blending properties of the paint will create a dreamy result that pairs perfectly with the loose petals.
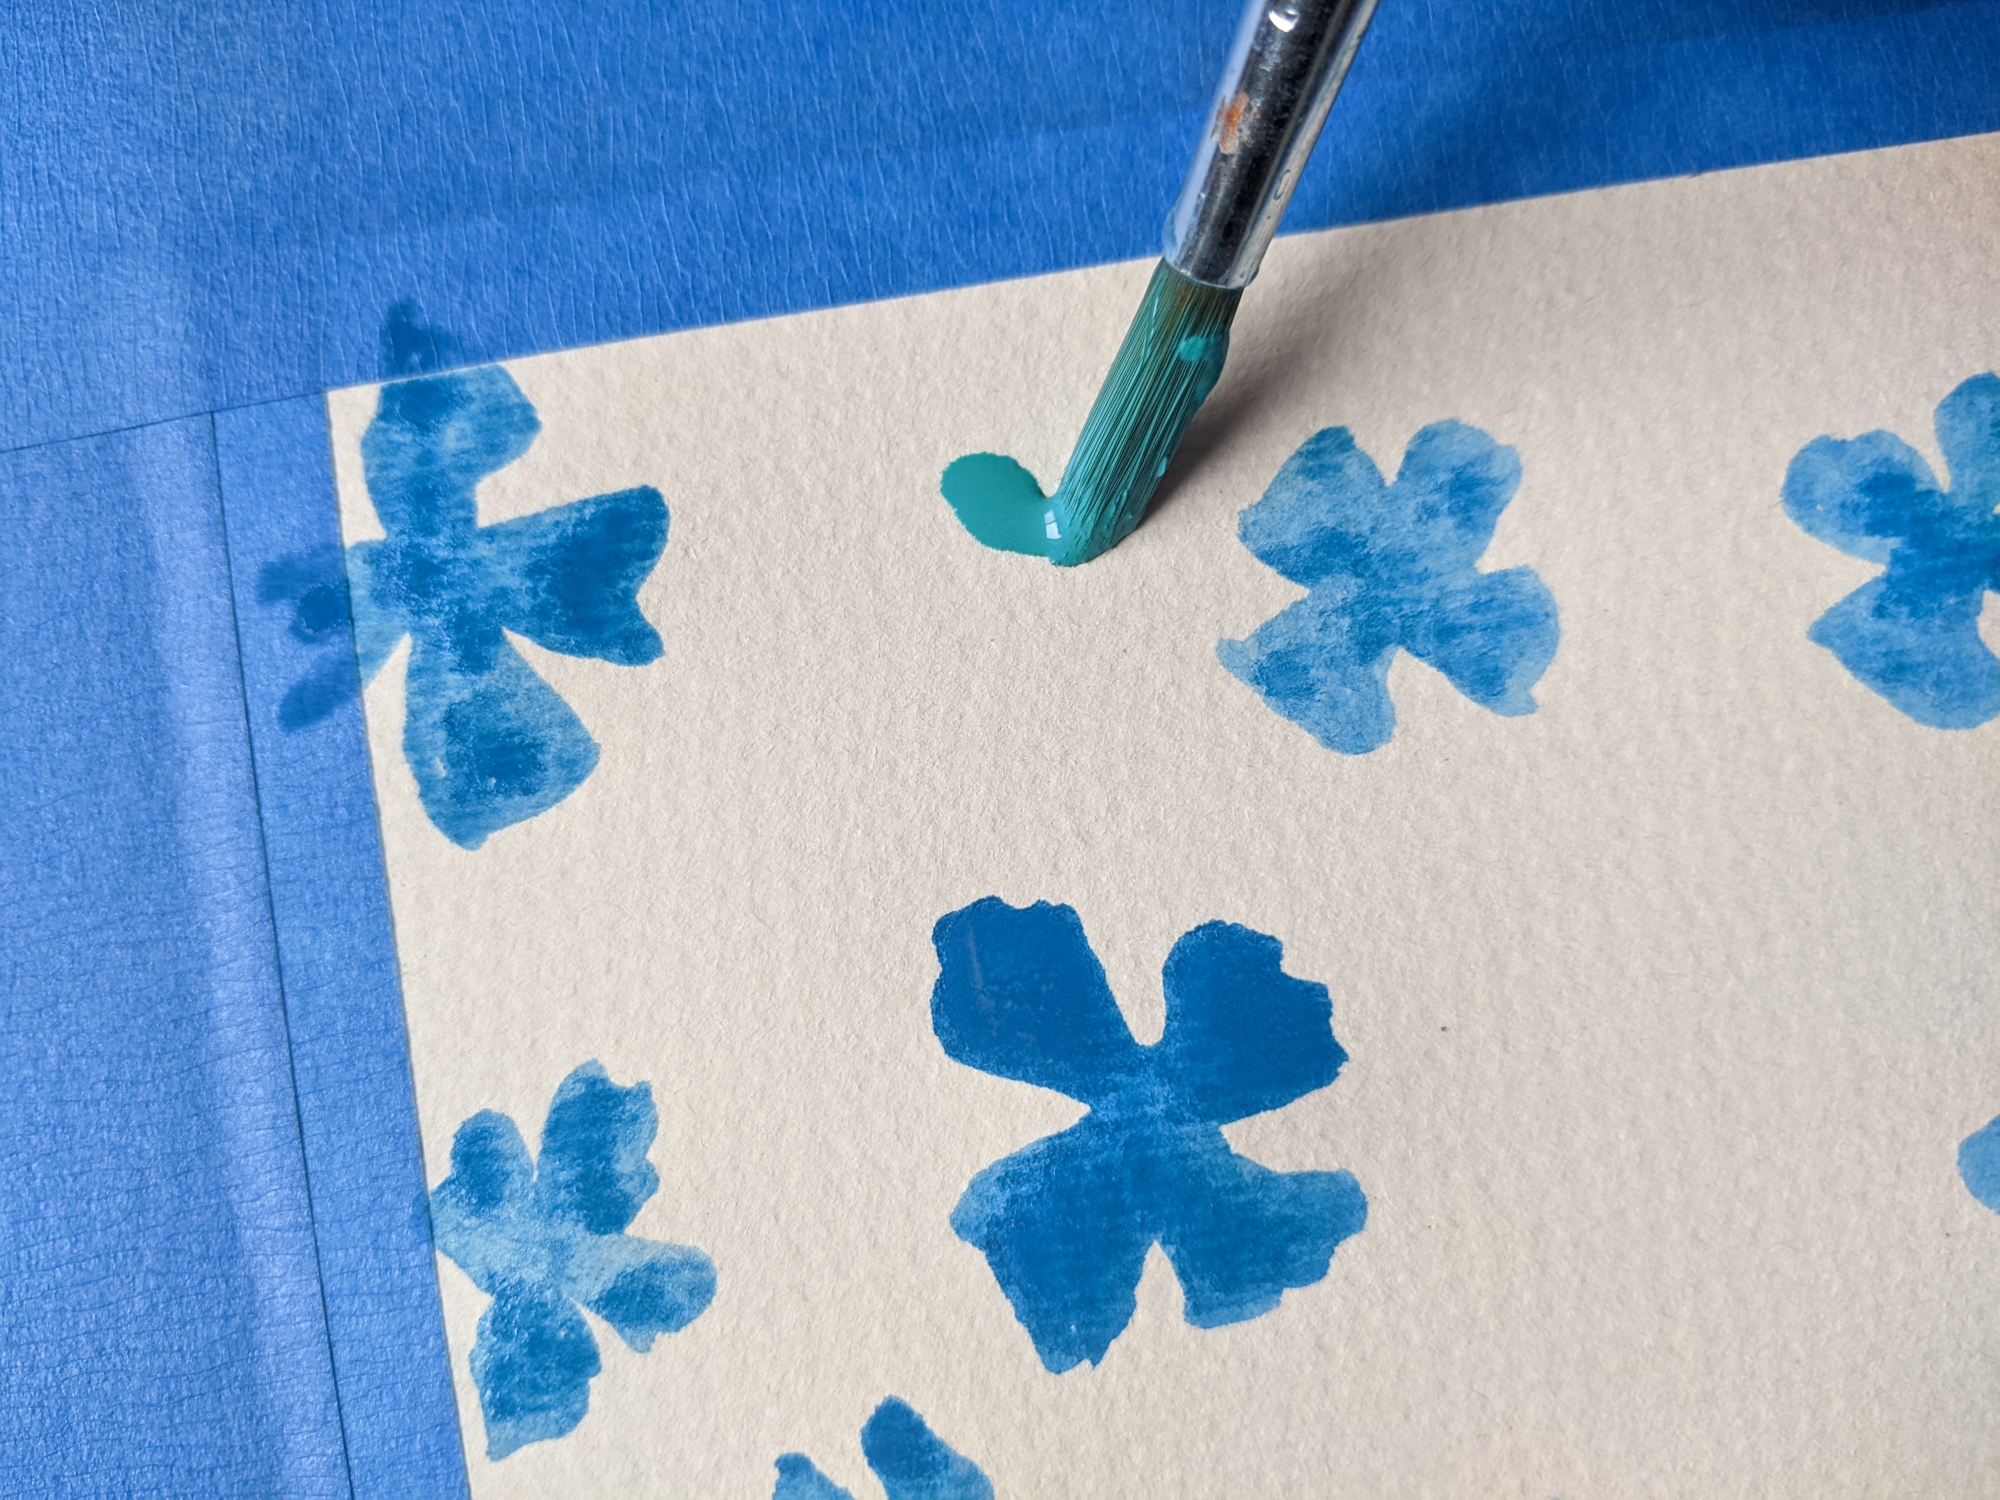
Place 3-leaved flowers all over the page and move on to the next step before they’ve dried.
Step 3
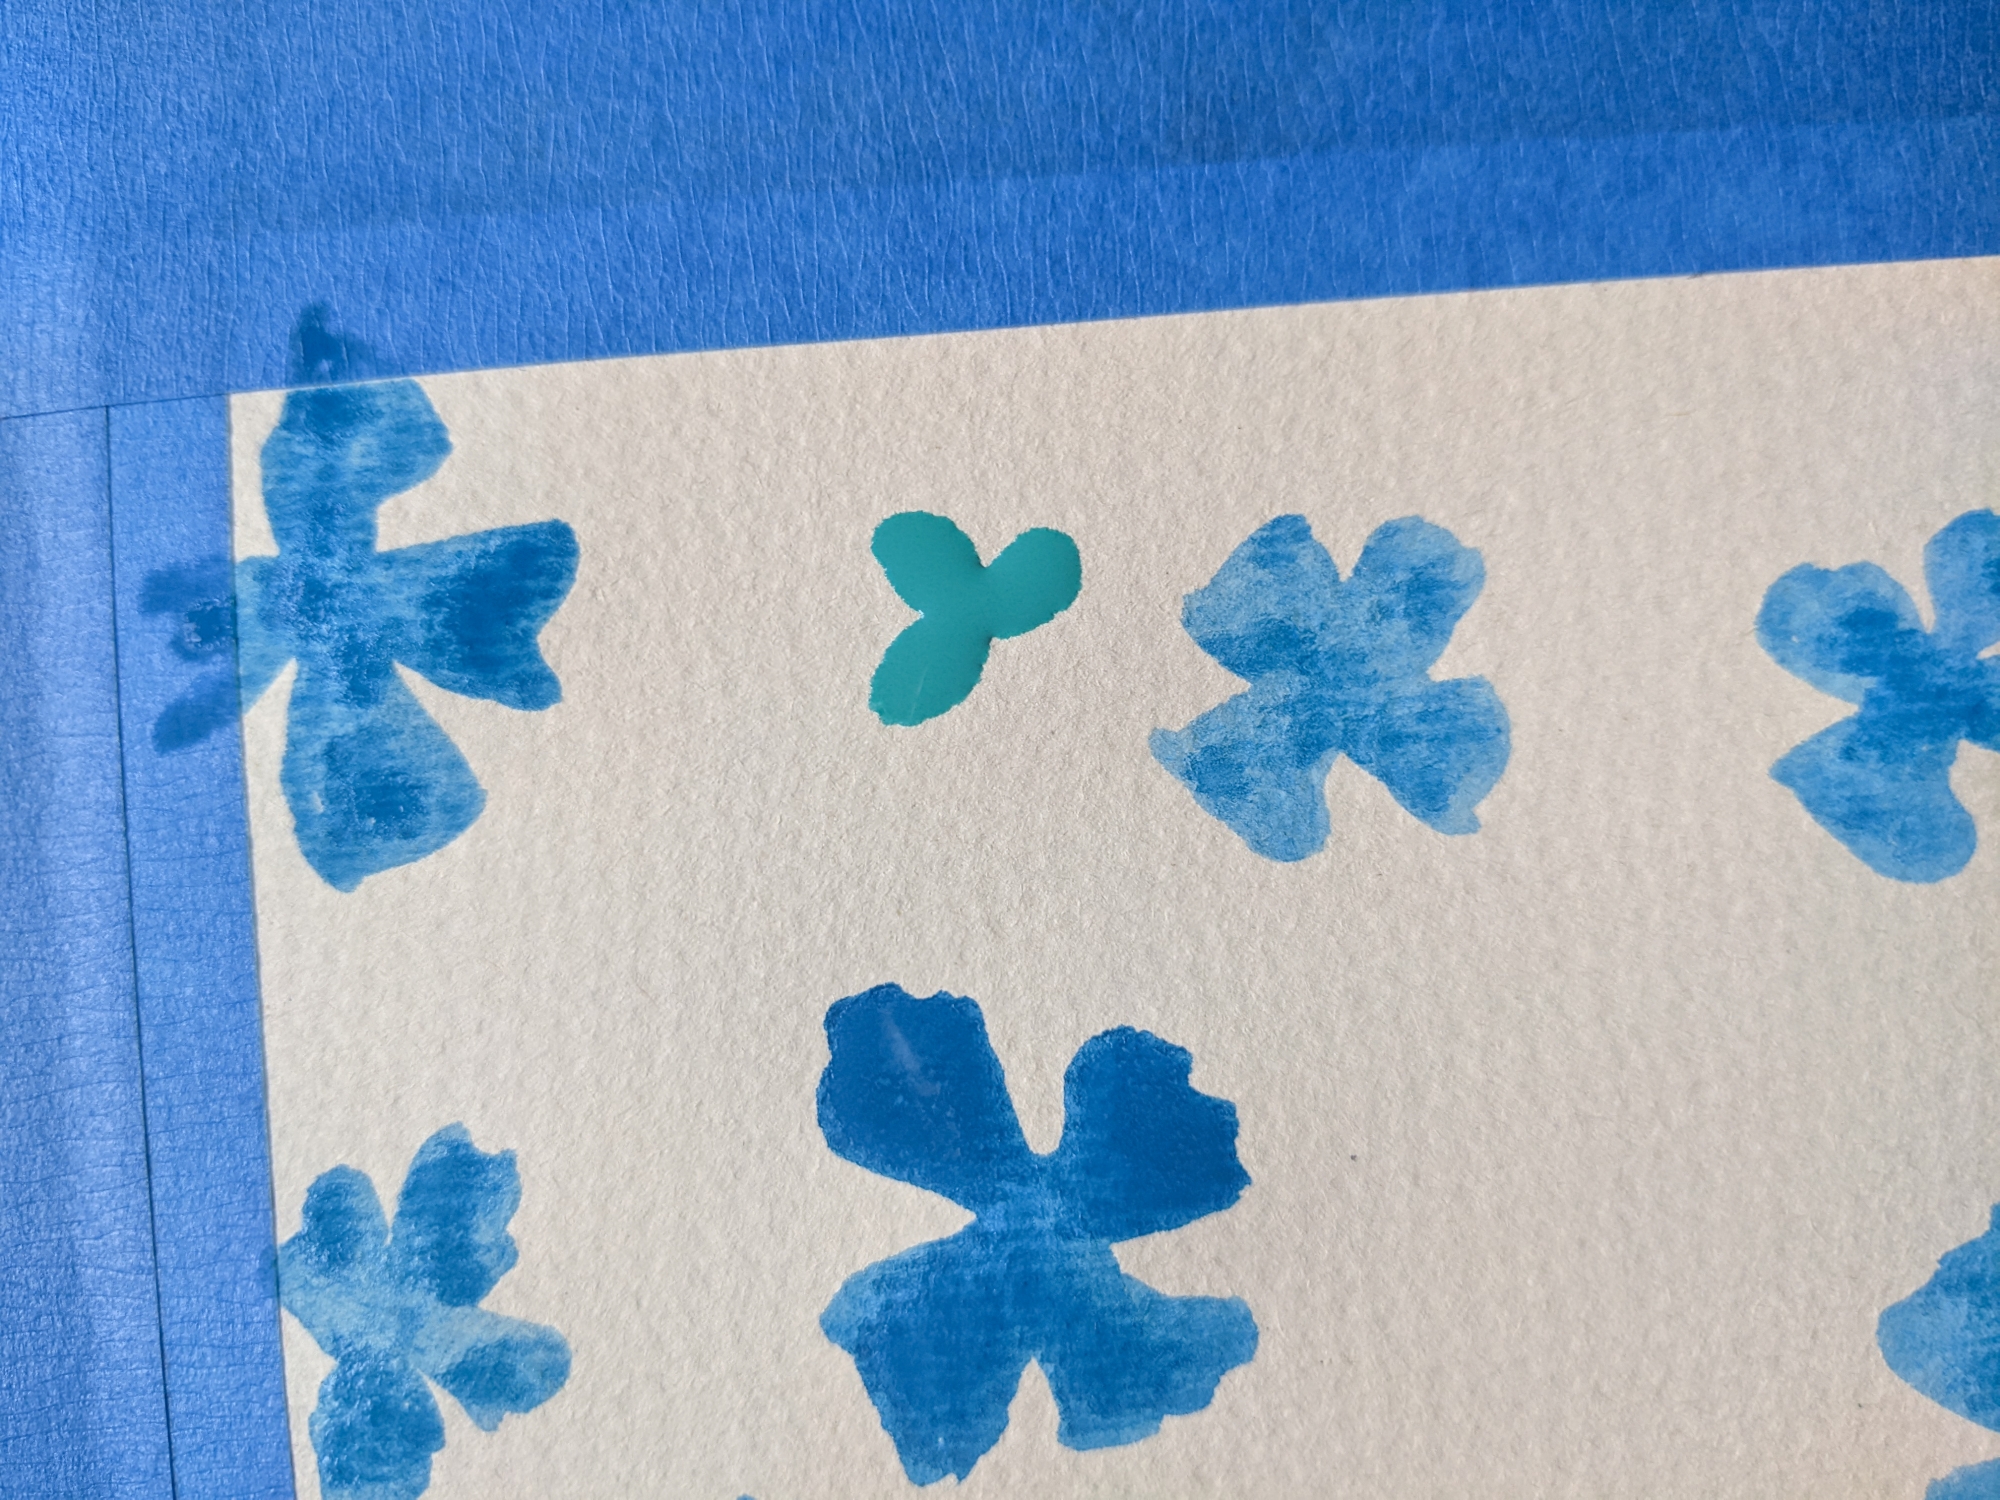
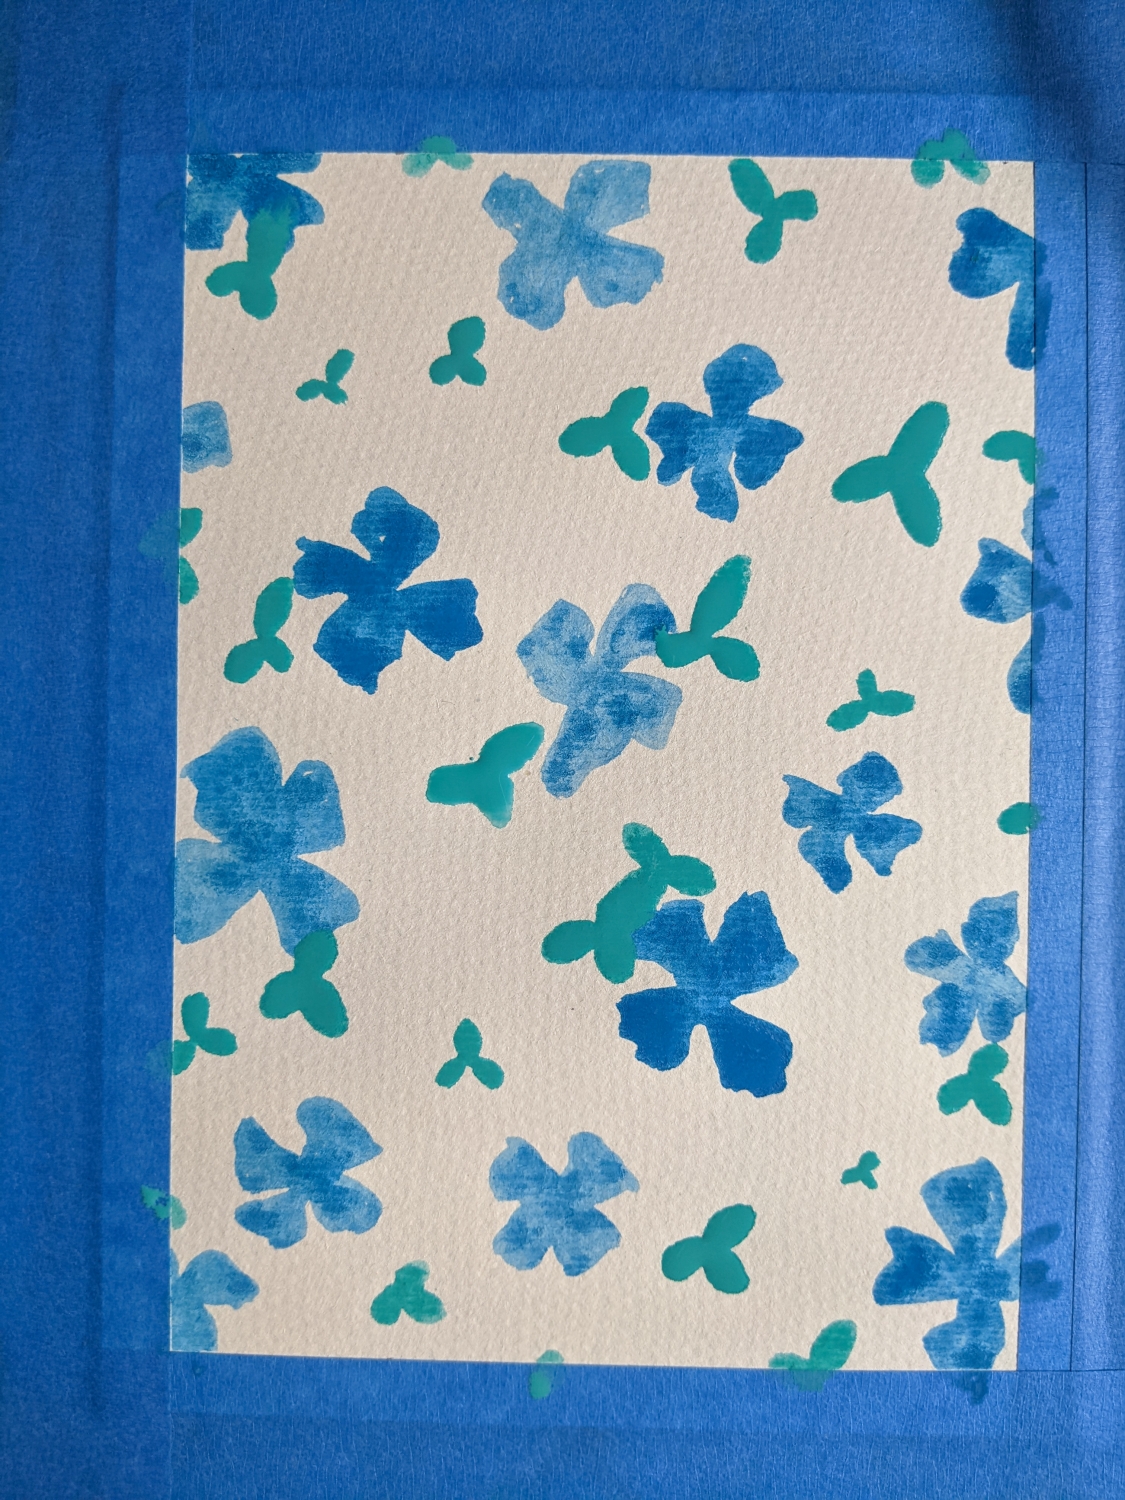
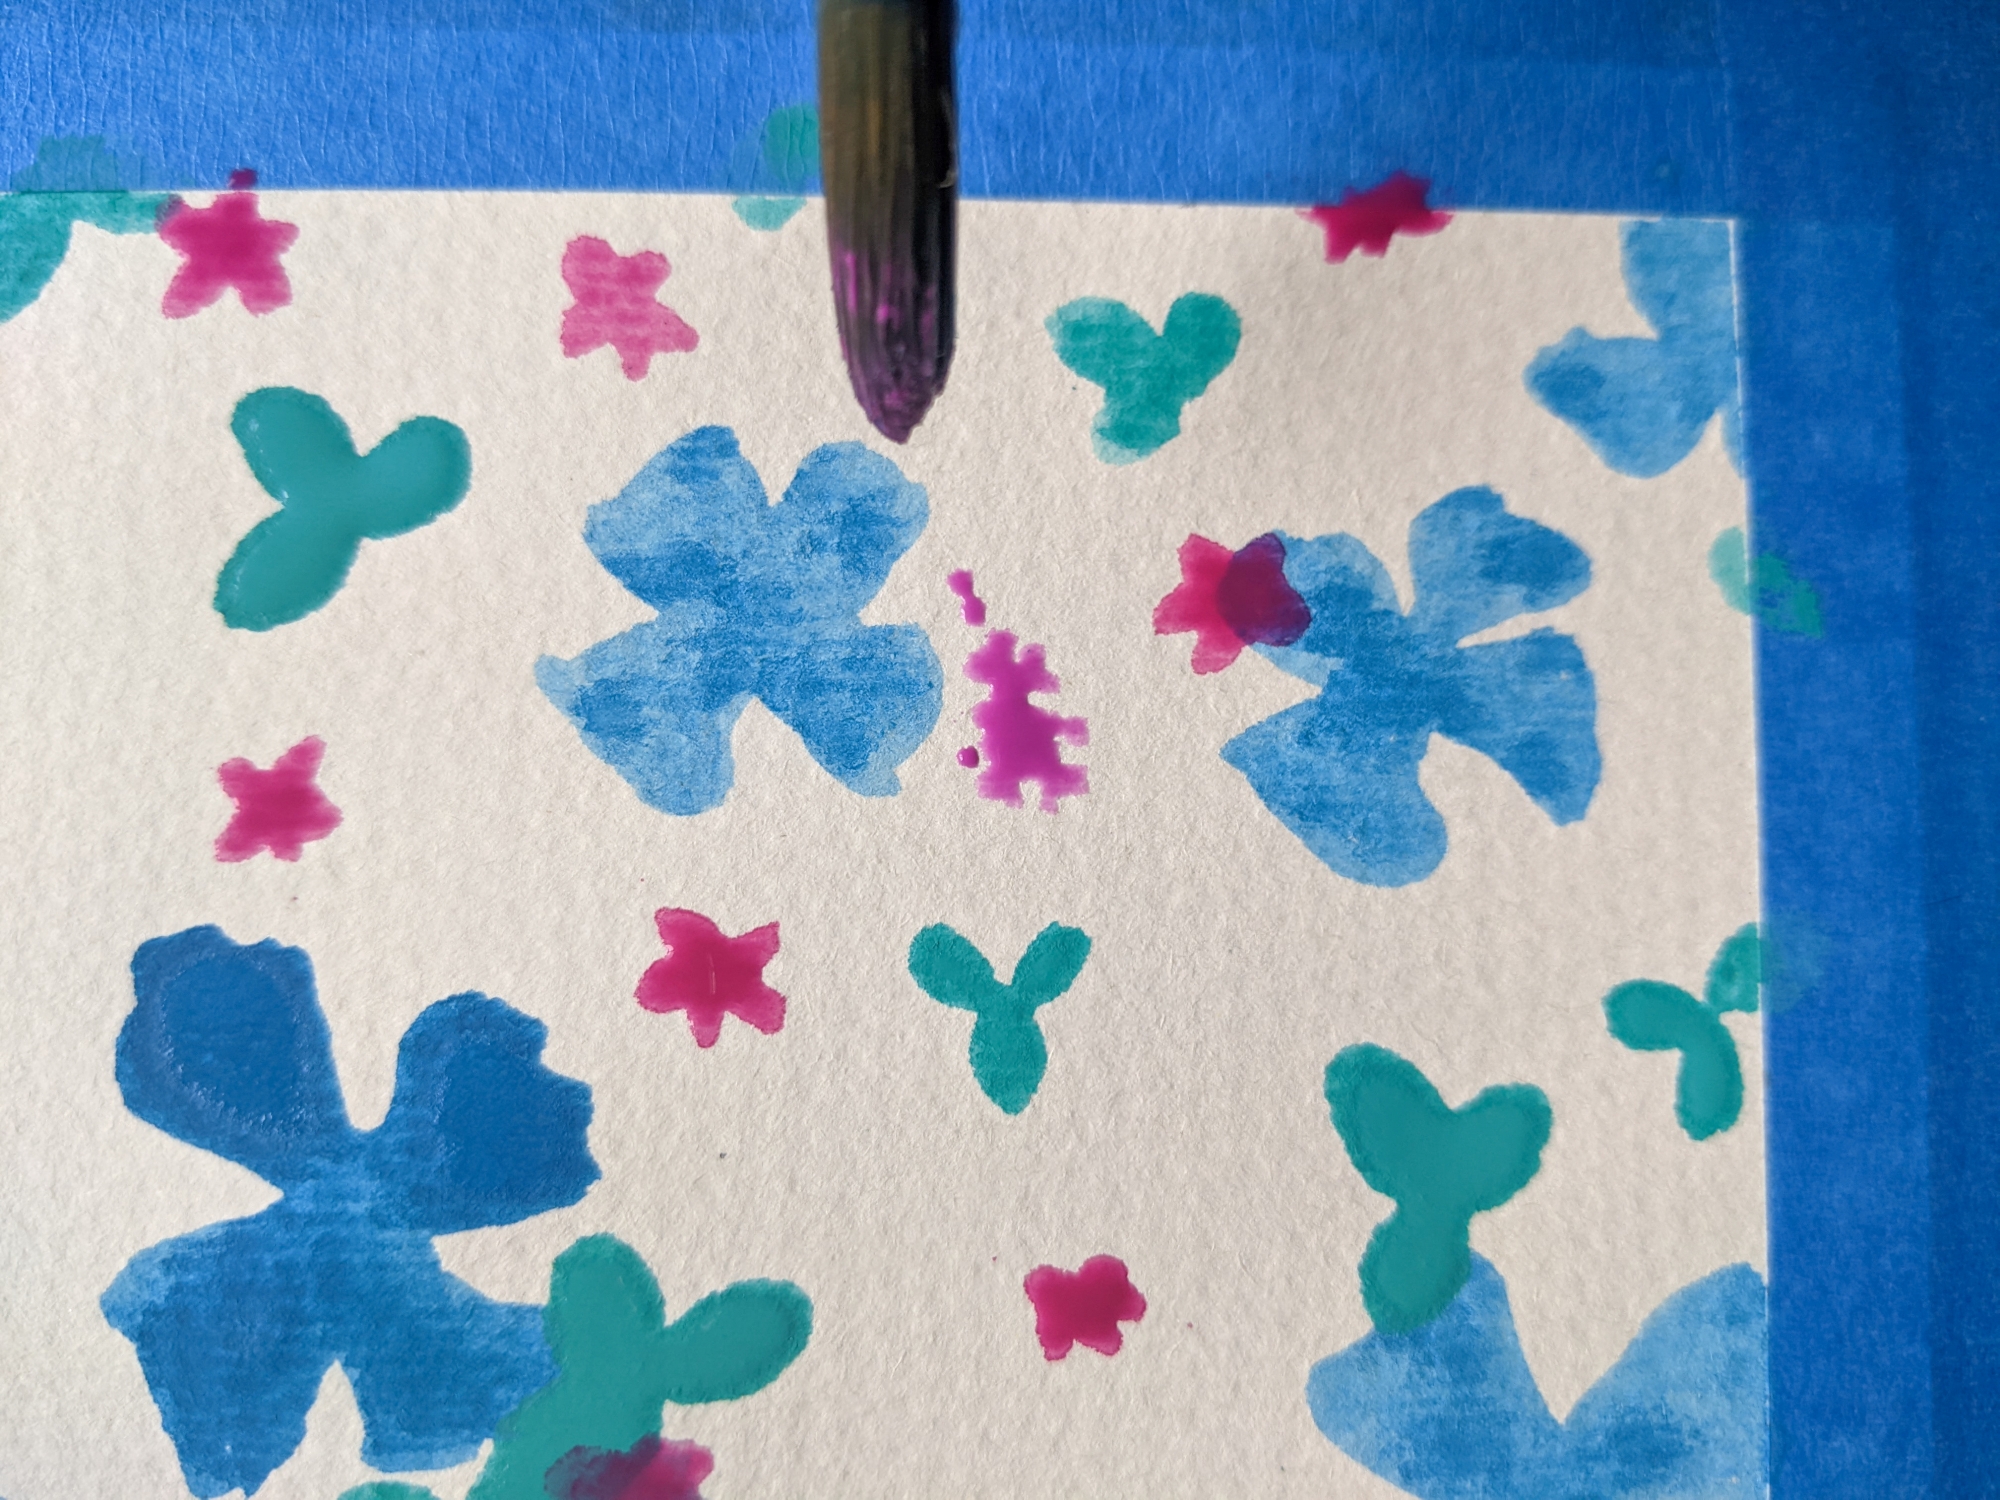
Using only the tip of the paintbrush, we’ll paint cute 5-petal flowers that look like tiny stars. I used Rose for this step.
Create a small dot, then gently flick the tip in 5 directions to create the petals. Again, this doesn’t have to be perfect! It’s also great if the colours from the different layers mix.
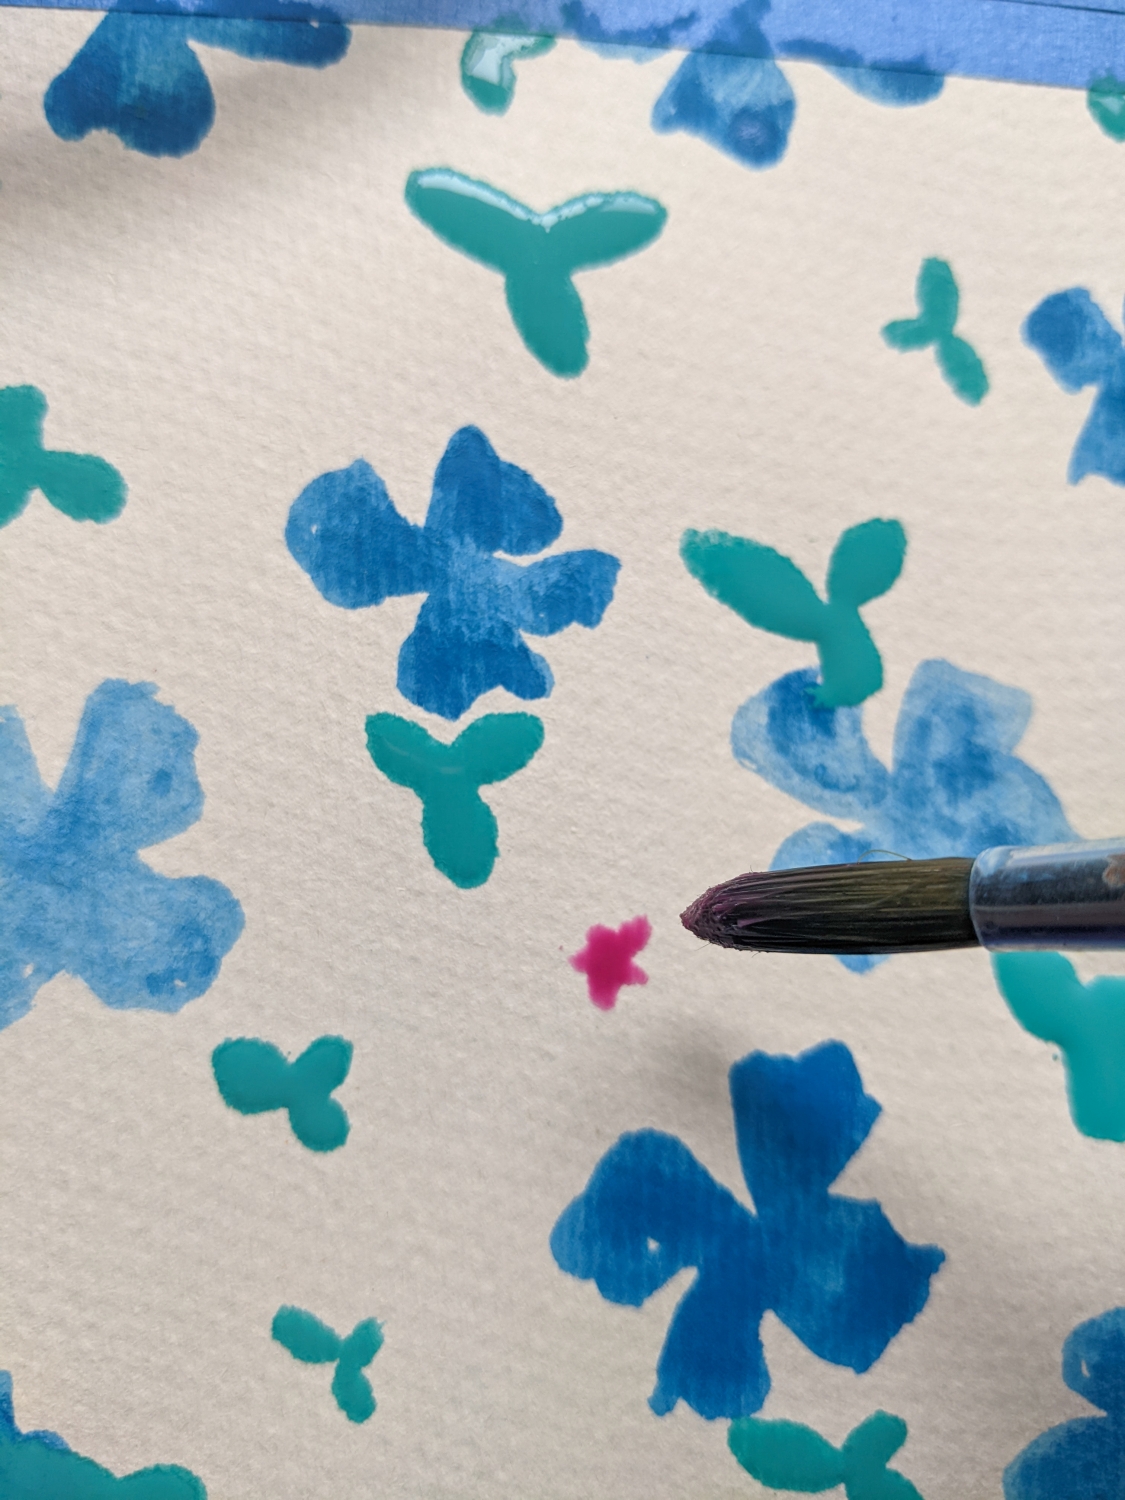
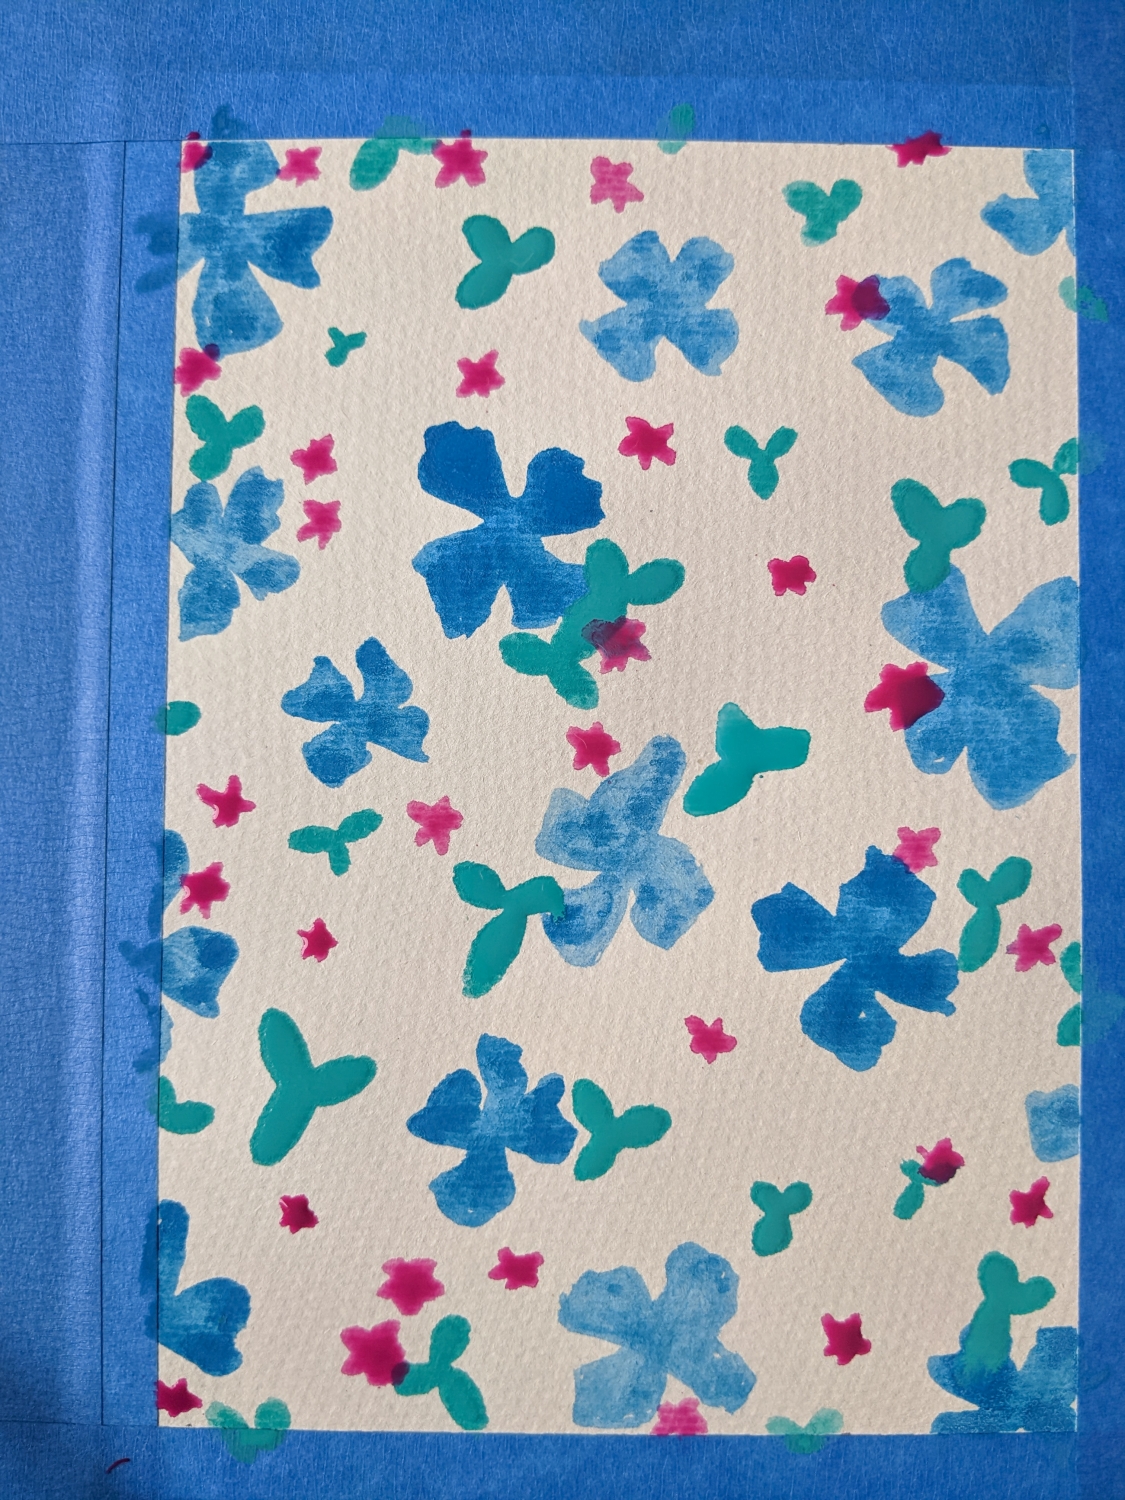
Once you’ve painted these little starry flowers across the page, move on to the next step.
Step 4
Using Mauve and Purple, we’ll add clustered flowers. Use the tip of the brush to paint tiny dots in a long triangular shape. Allow the dots to mesh towards the centre of the triangle—this will create the illusion of small blooms towards the edges that grow denser closer to the stem.
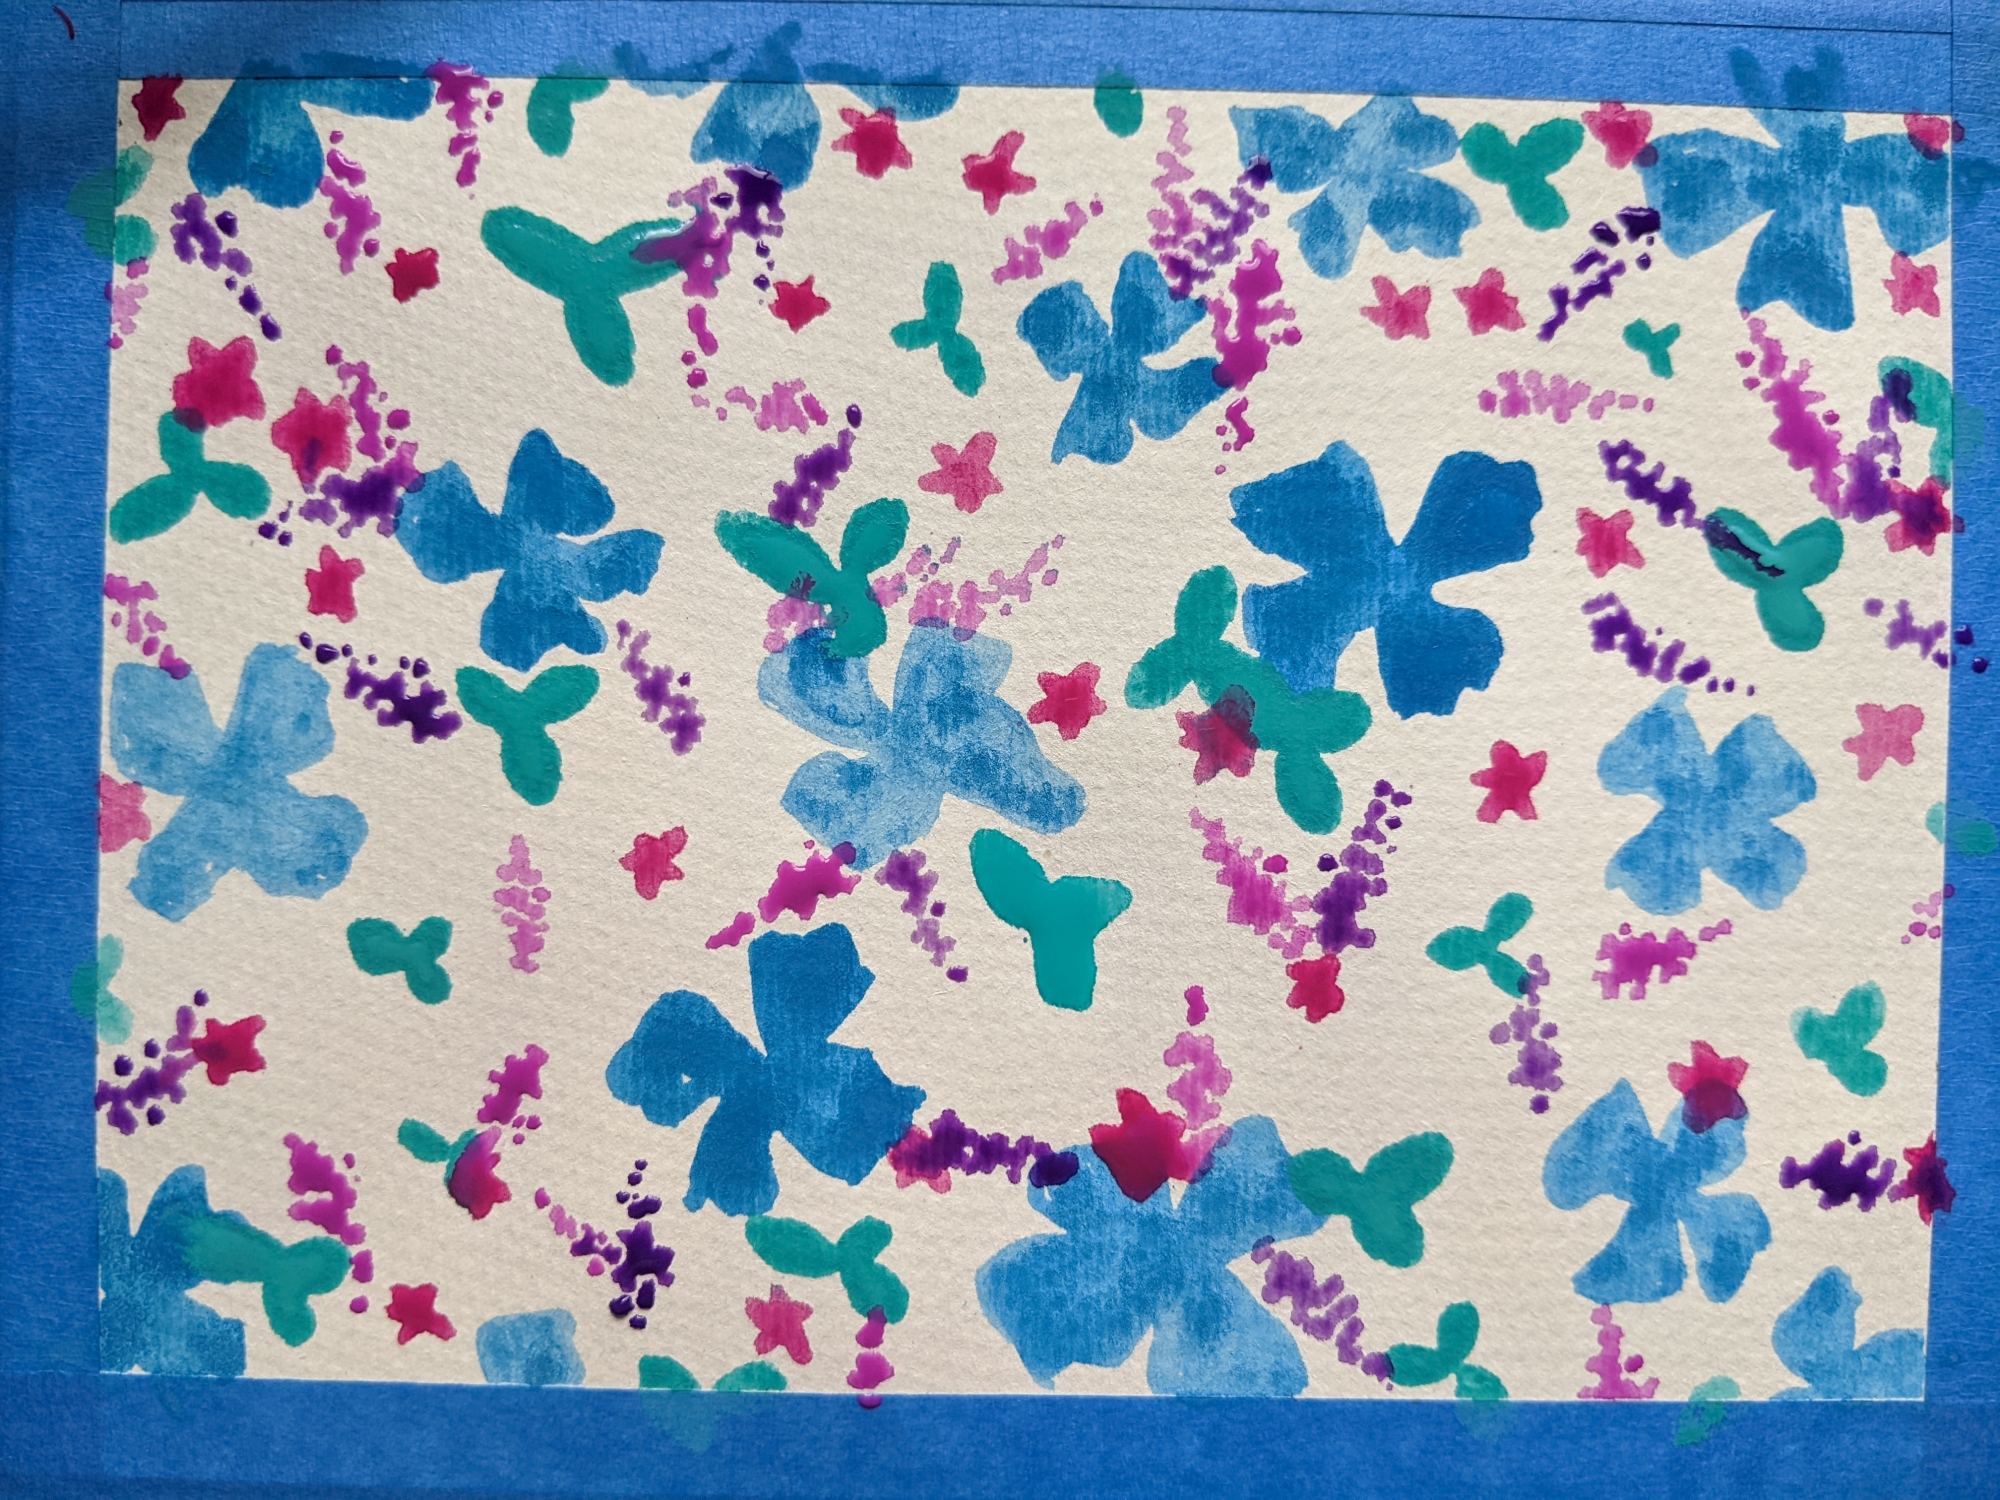
Spread these clusters across the page, then move on to the next step.
Step 5
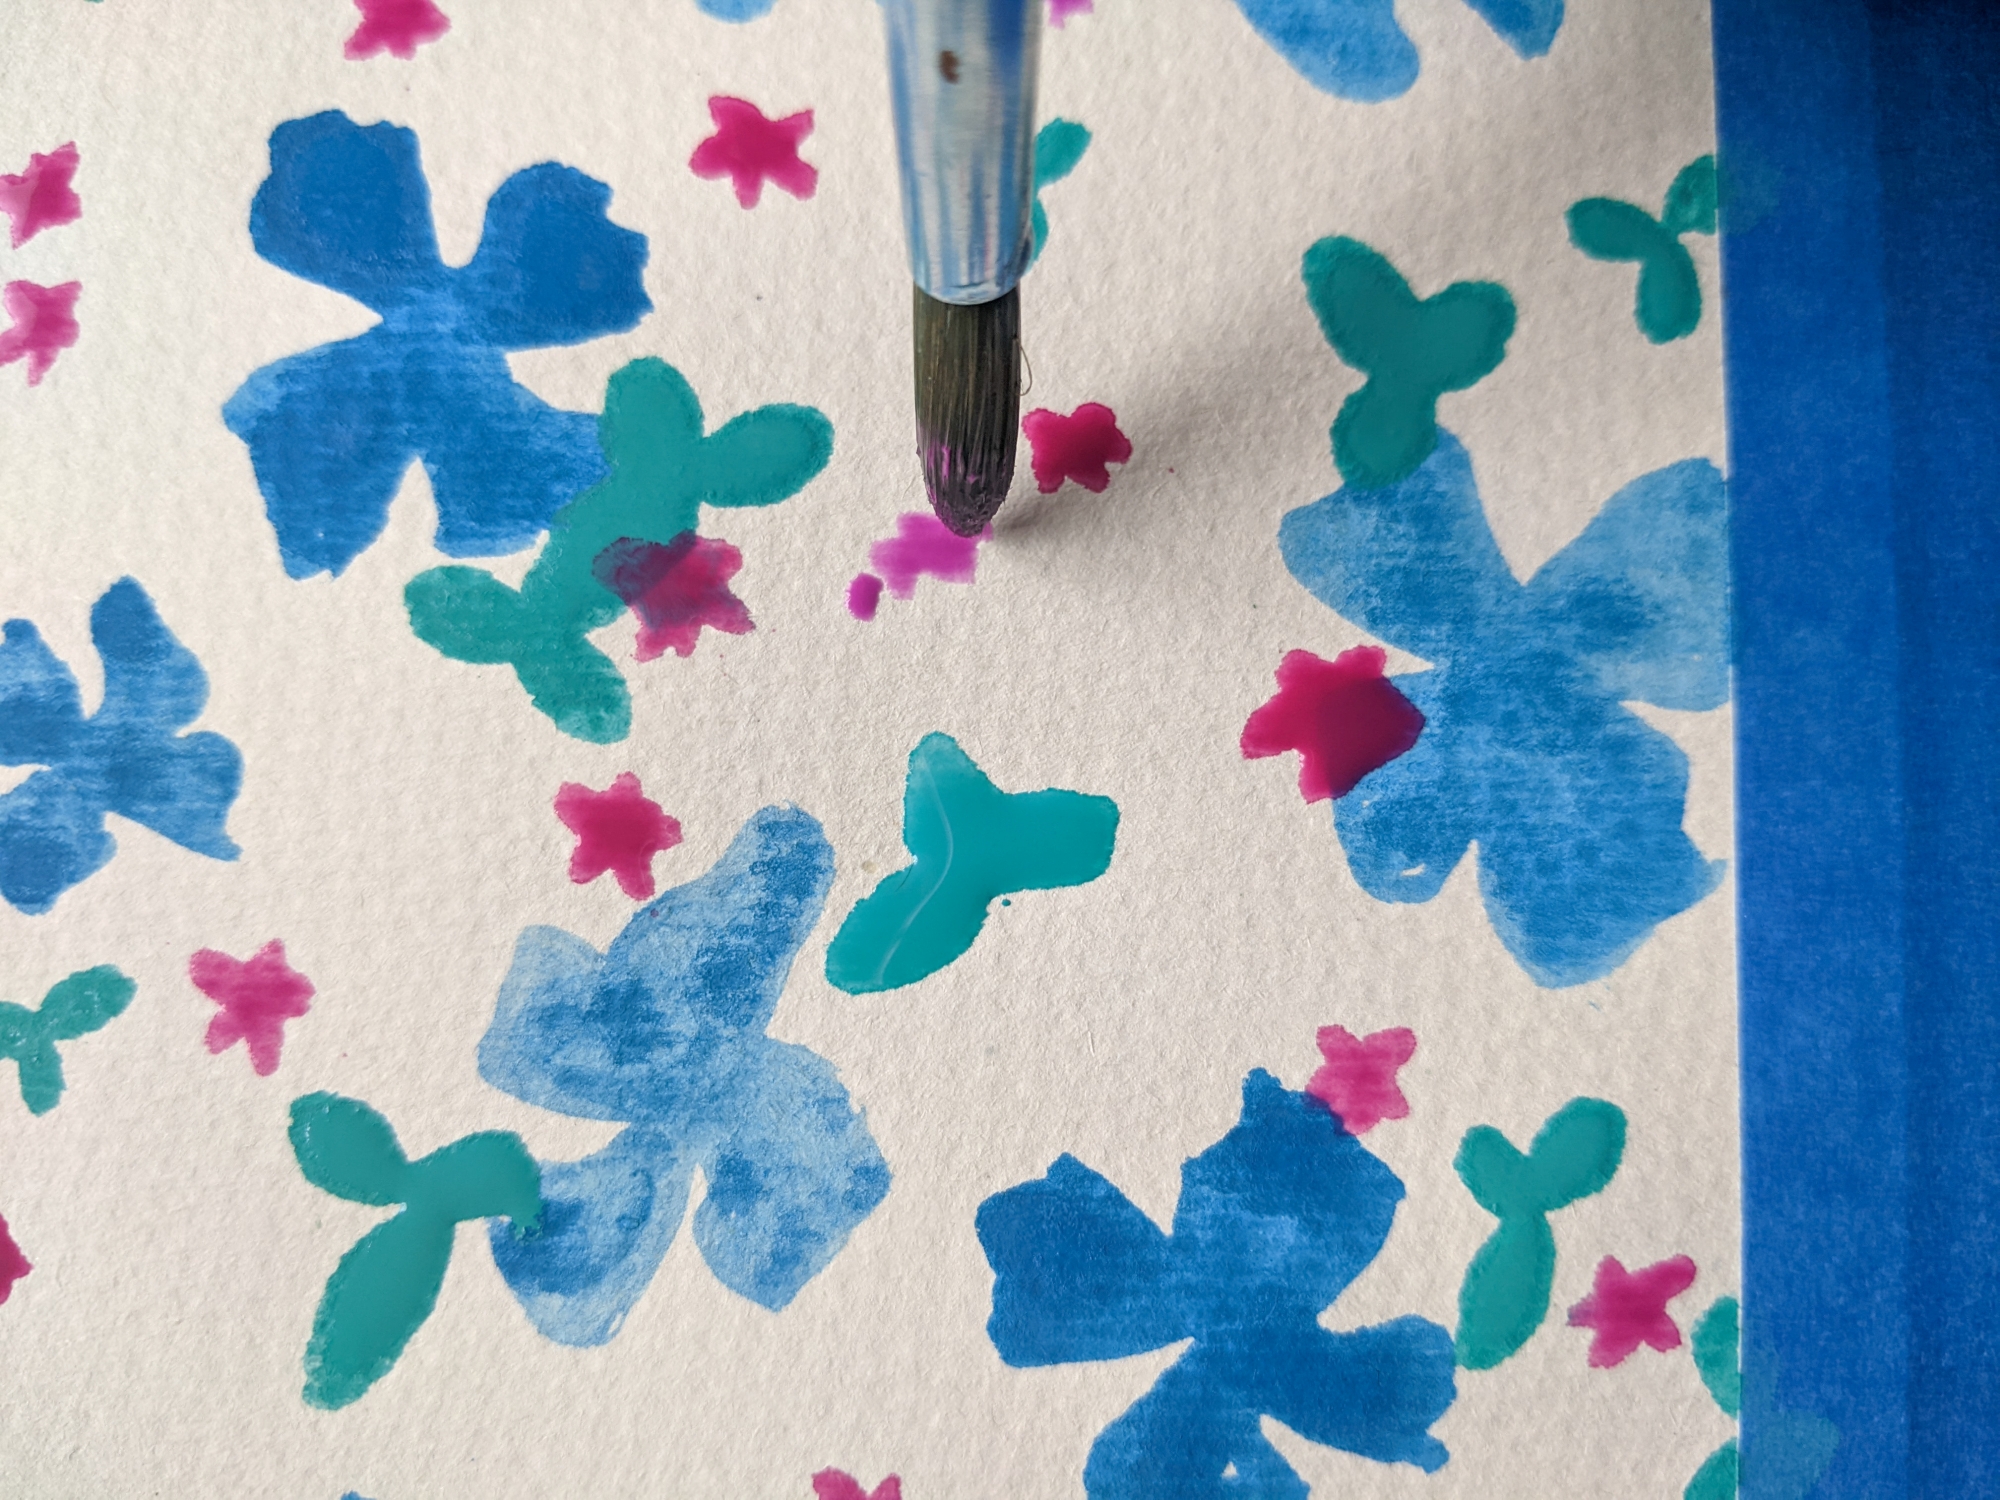
Now we’ll add some leaves using Viridian. We’re going to place our paintbrushes in a similar way as we did when we created the 3-leaved flowers in Step 2. Load the brush with paint and press it to the page, concentrating the pressure towards the back of the brush, and then lift it off the page. This will create a leaf-like shape with a thin taper towards one end and a rounded edge at the other.

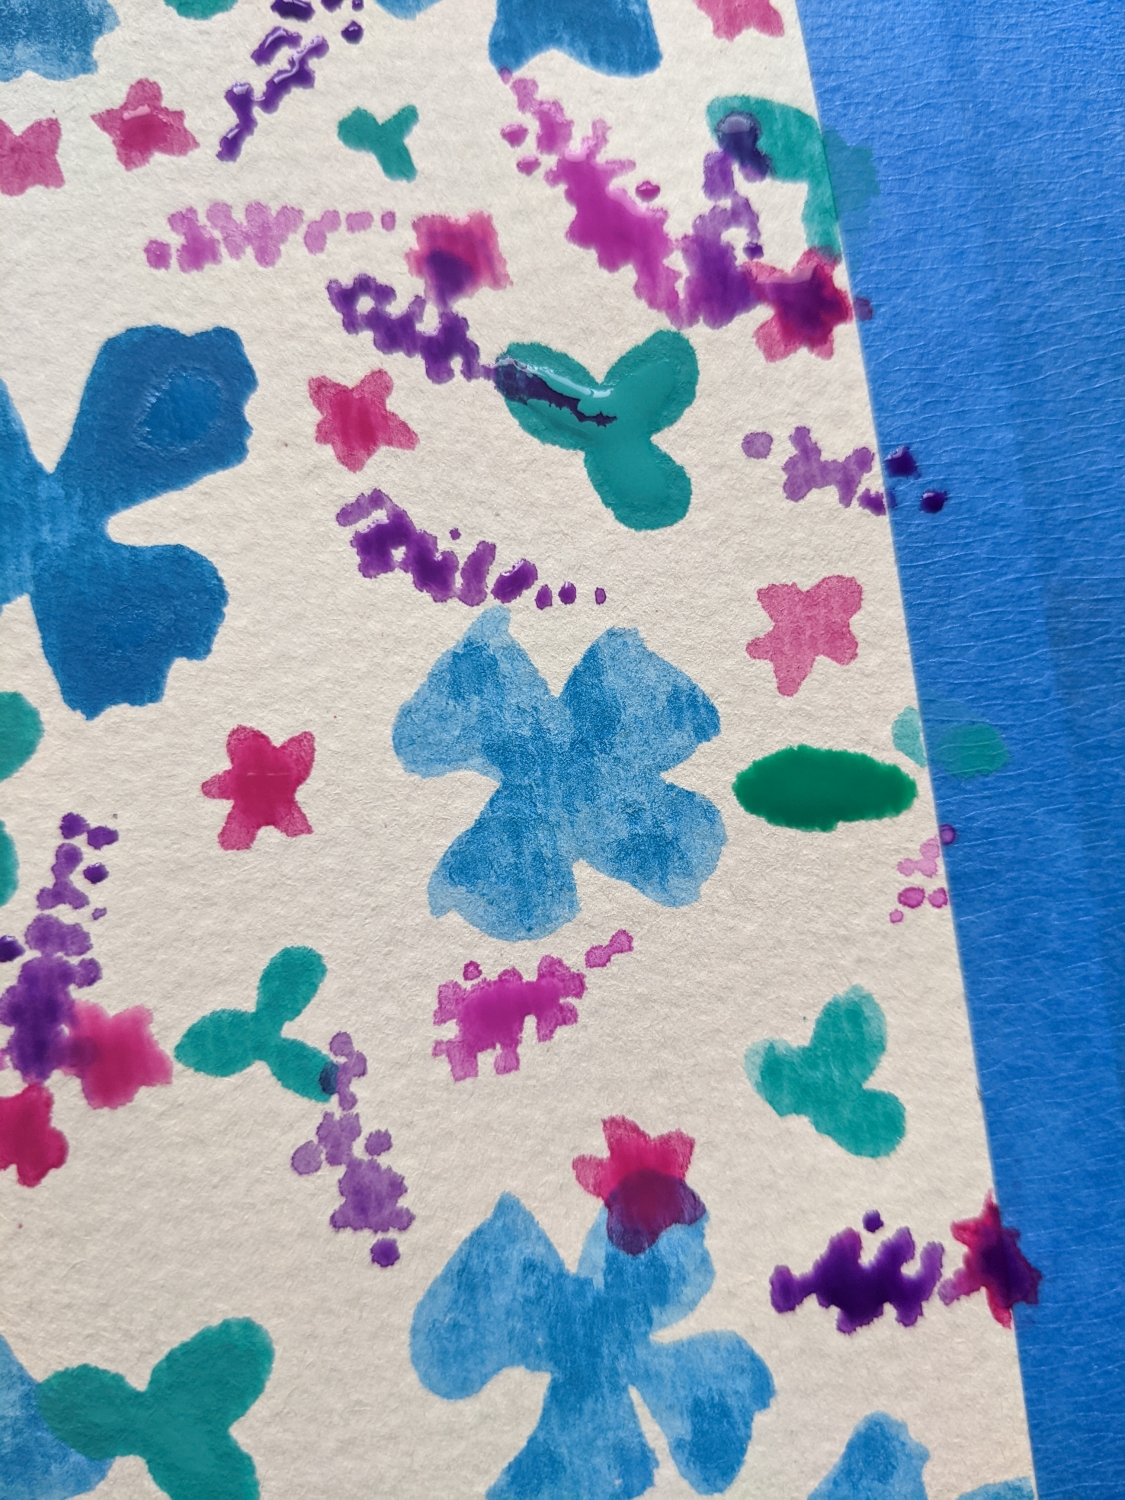

Repeat this process across the page, allowing the paint to bleed where it overlaps earlier layers and continue to the next step.
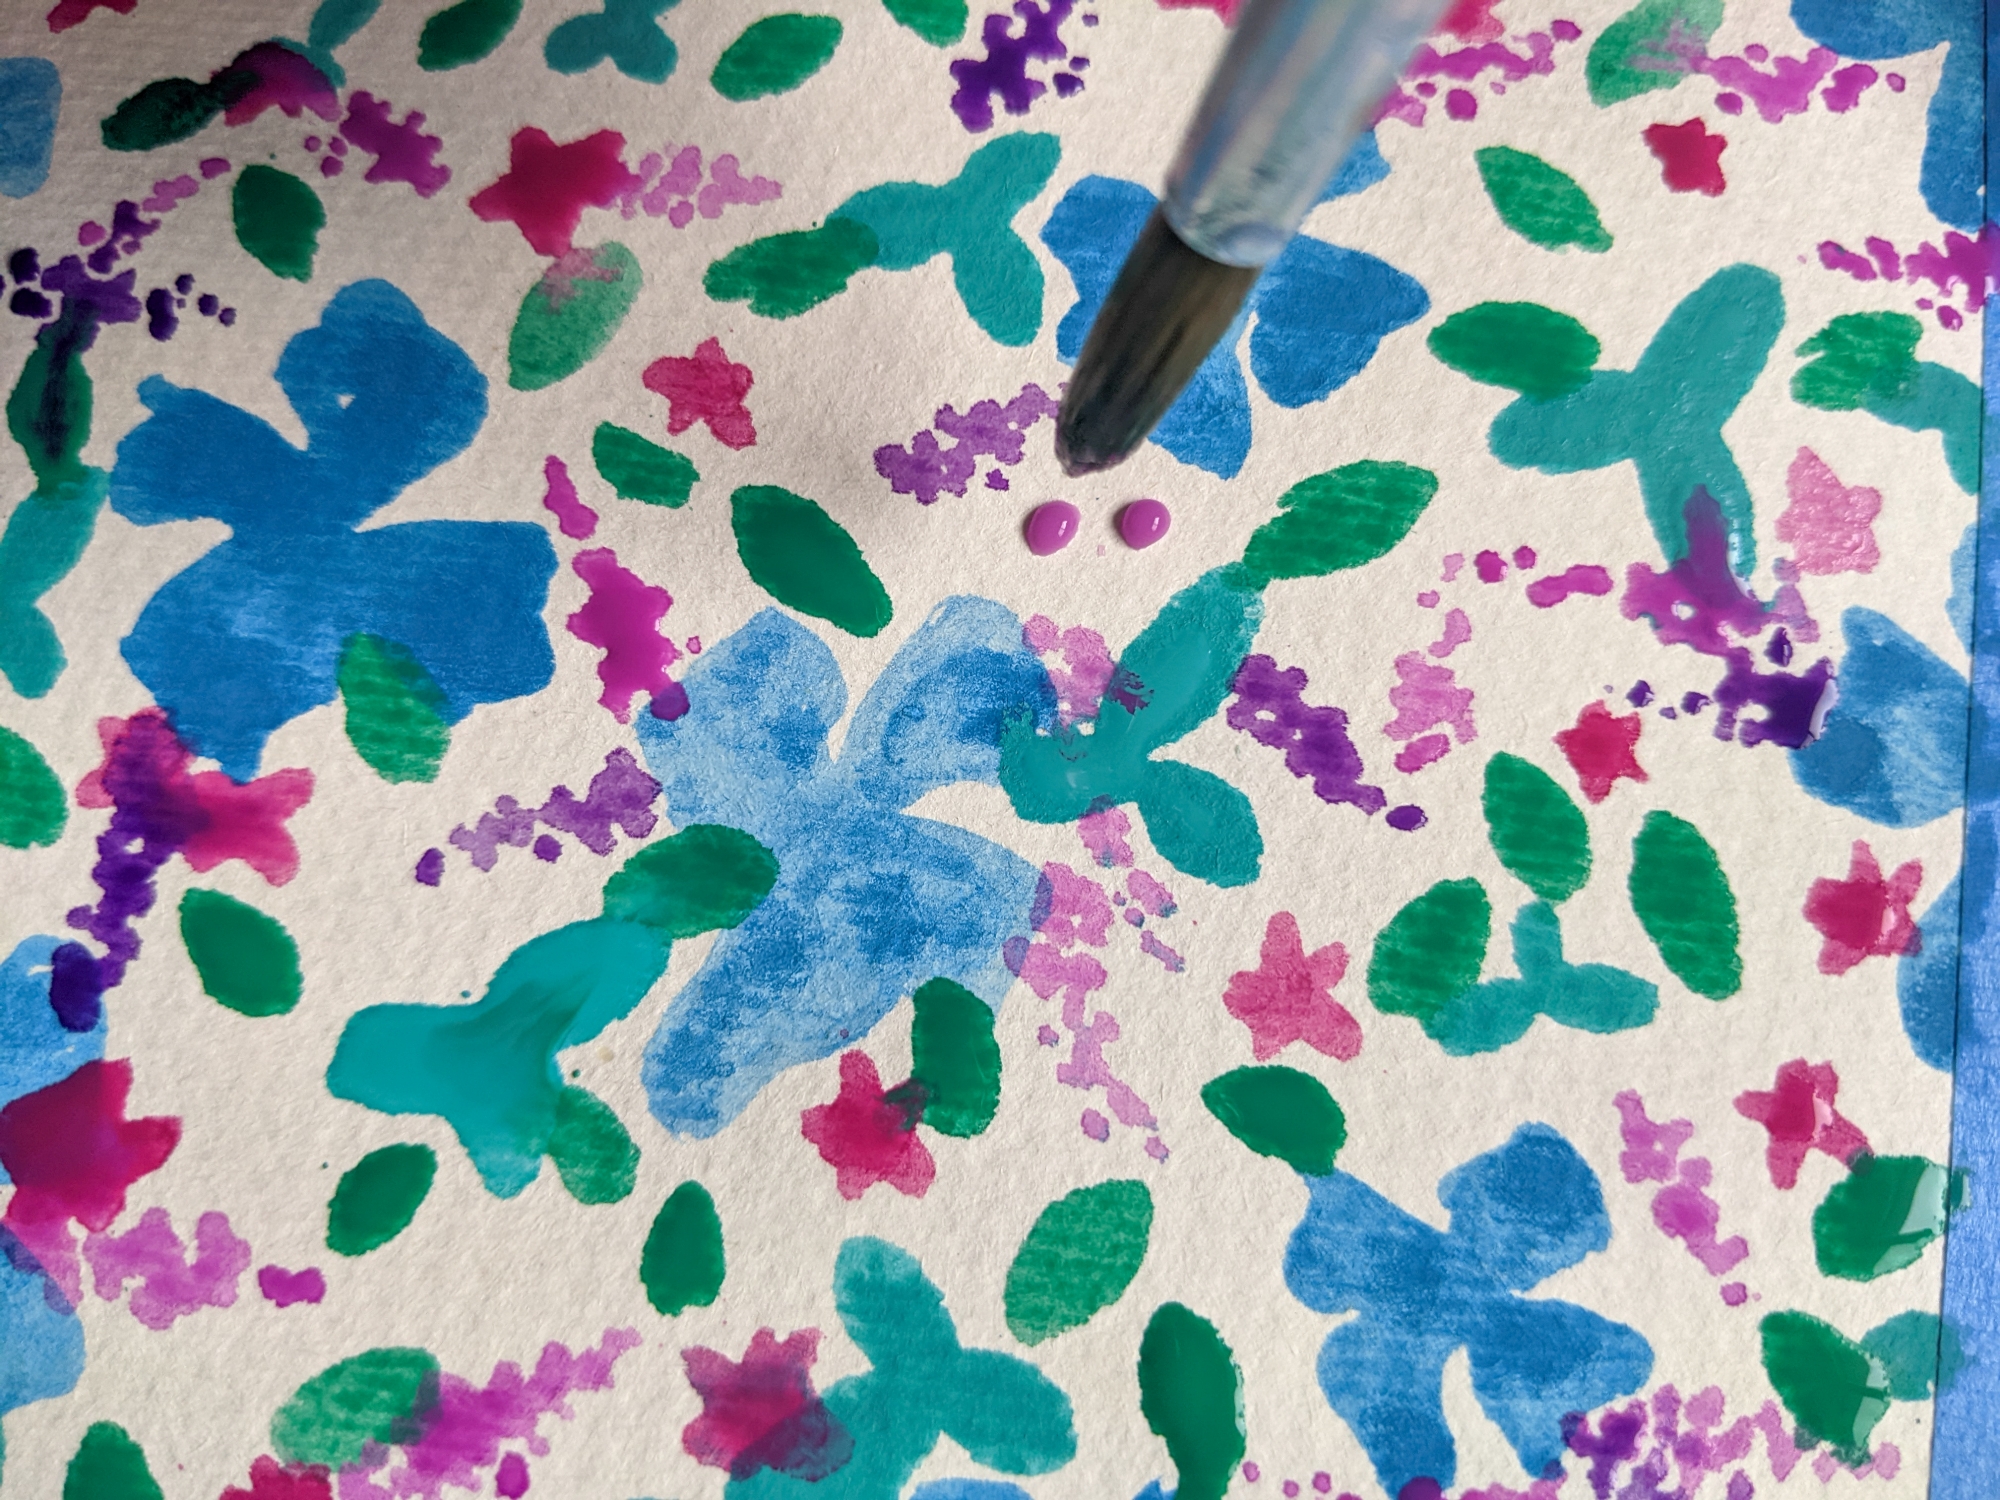
Step 6
Ass water to whatever paint you have left on your palette. For this step, we’ll use heavily watered-down paint to create simple dots and spatters across the page.
We can either create the dots by using the tip of the brush and placing them one by one or create splatter by loading the brush with paint and gently tapping it over the artwork.
At the end of this step, I realised I needed more leaves, so I went back in with Sap Green and the technique from Step 5 until I was happy that the page was full enough.
Allow the paint to dry before continuing.
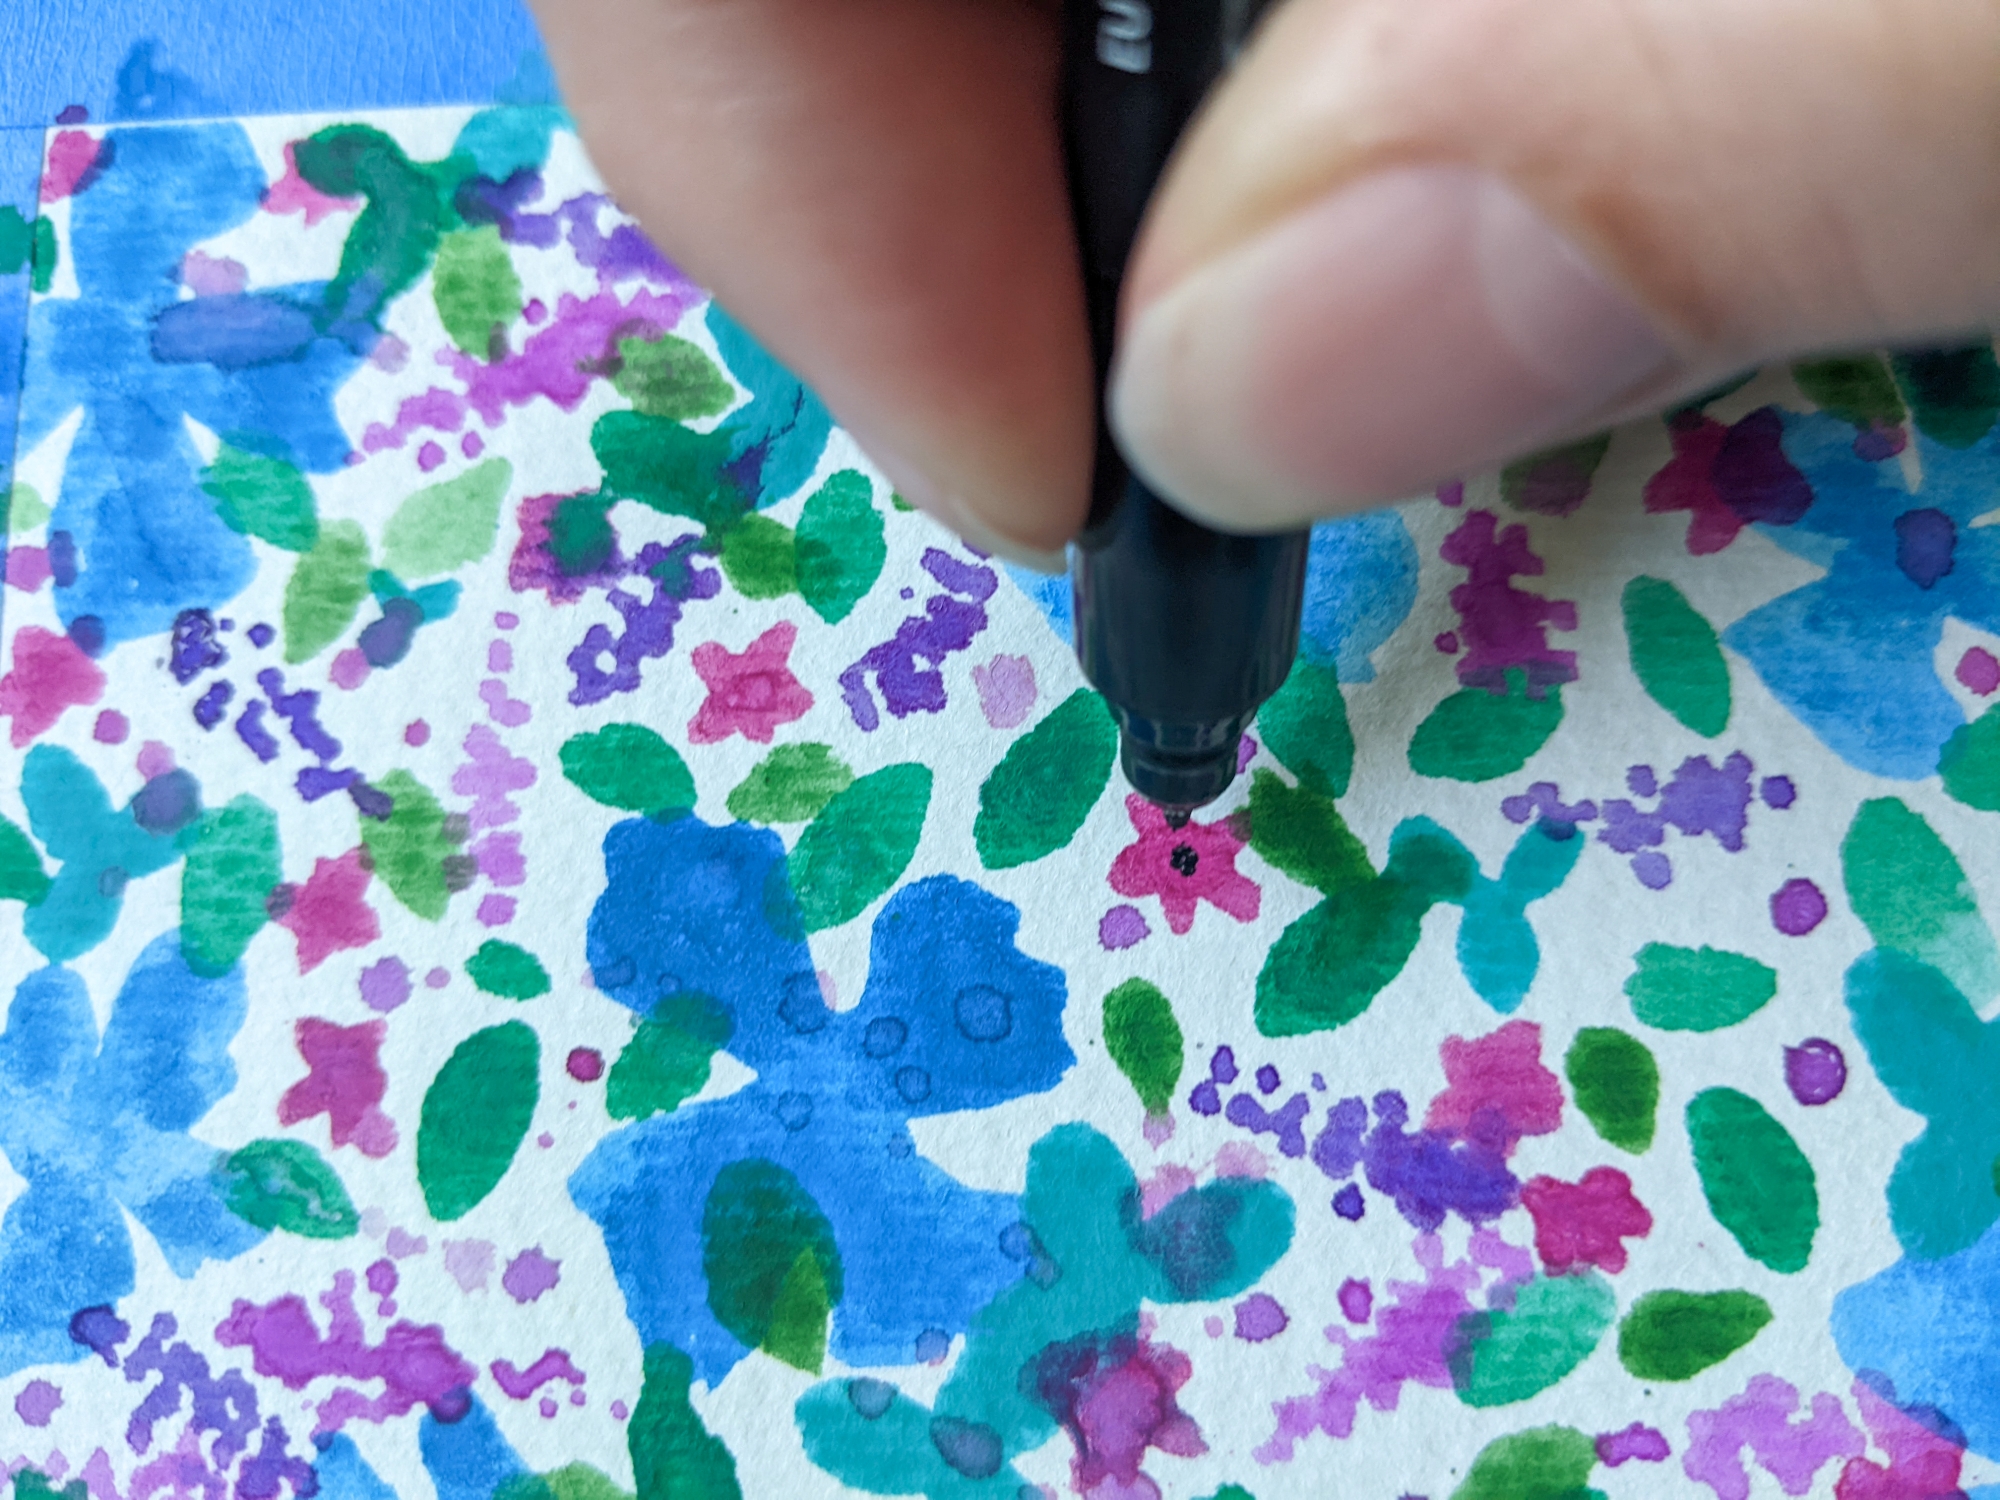
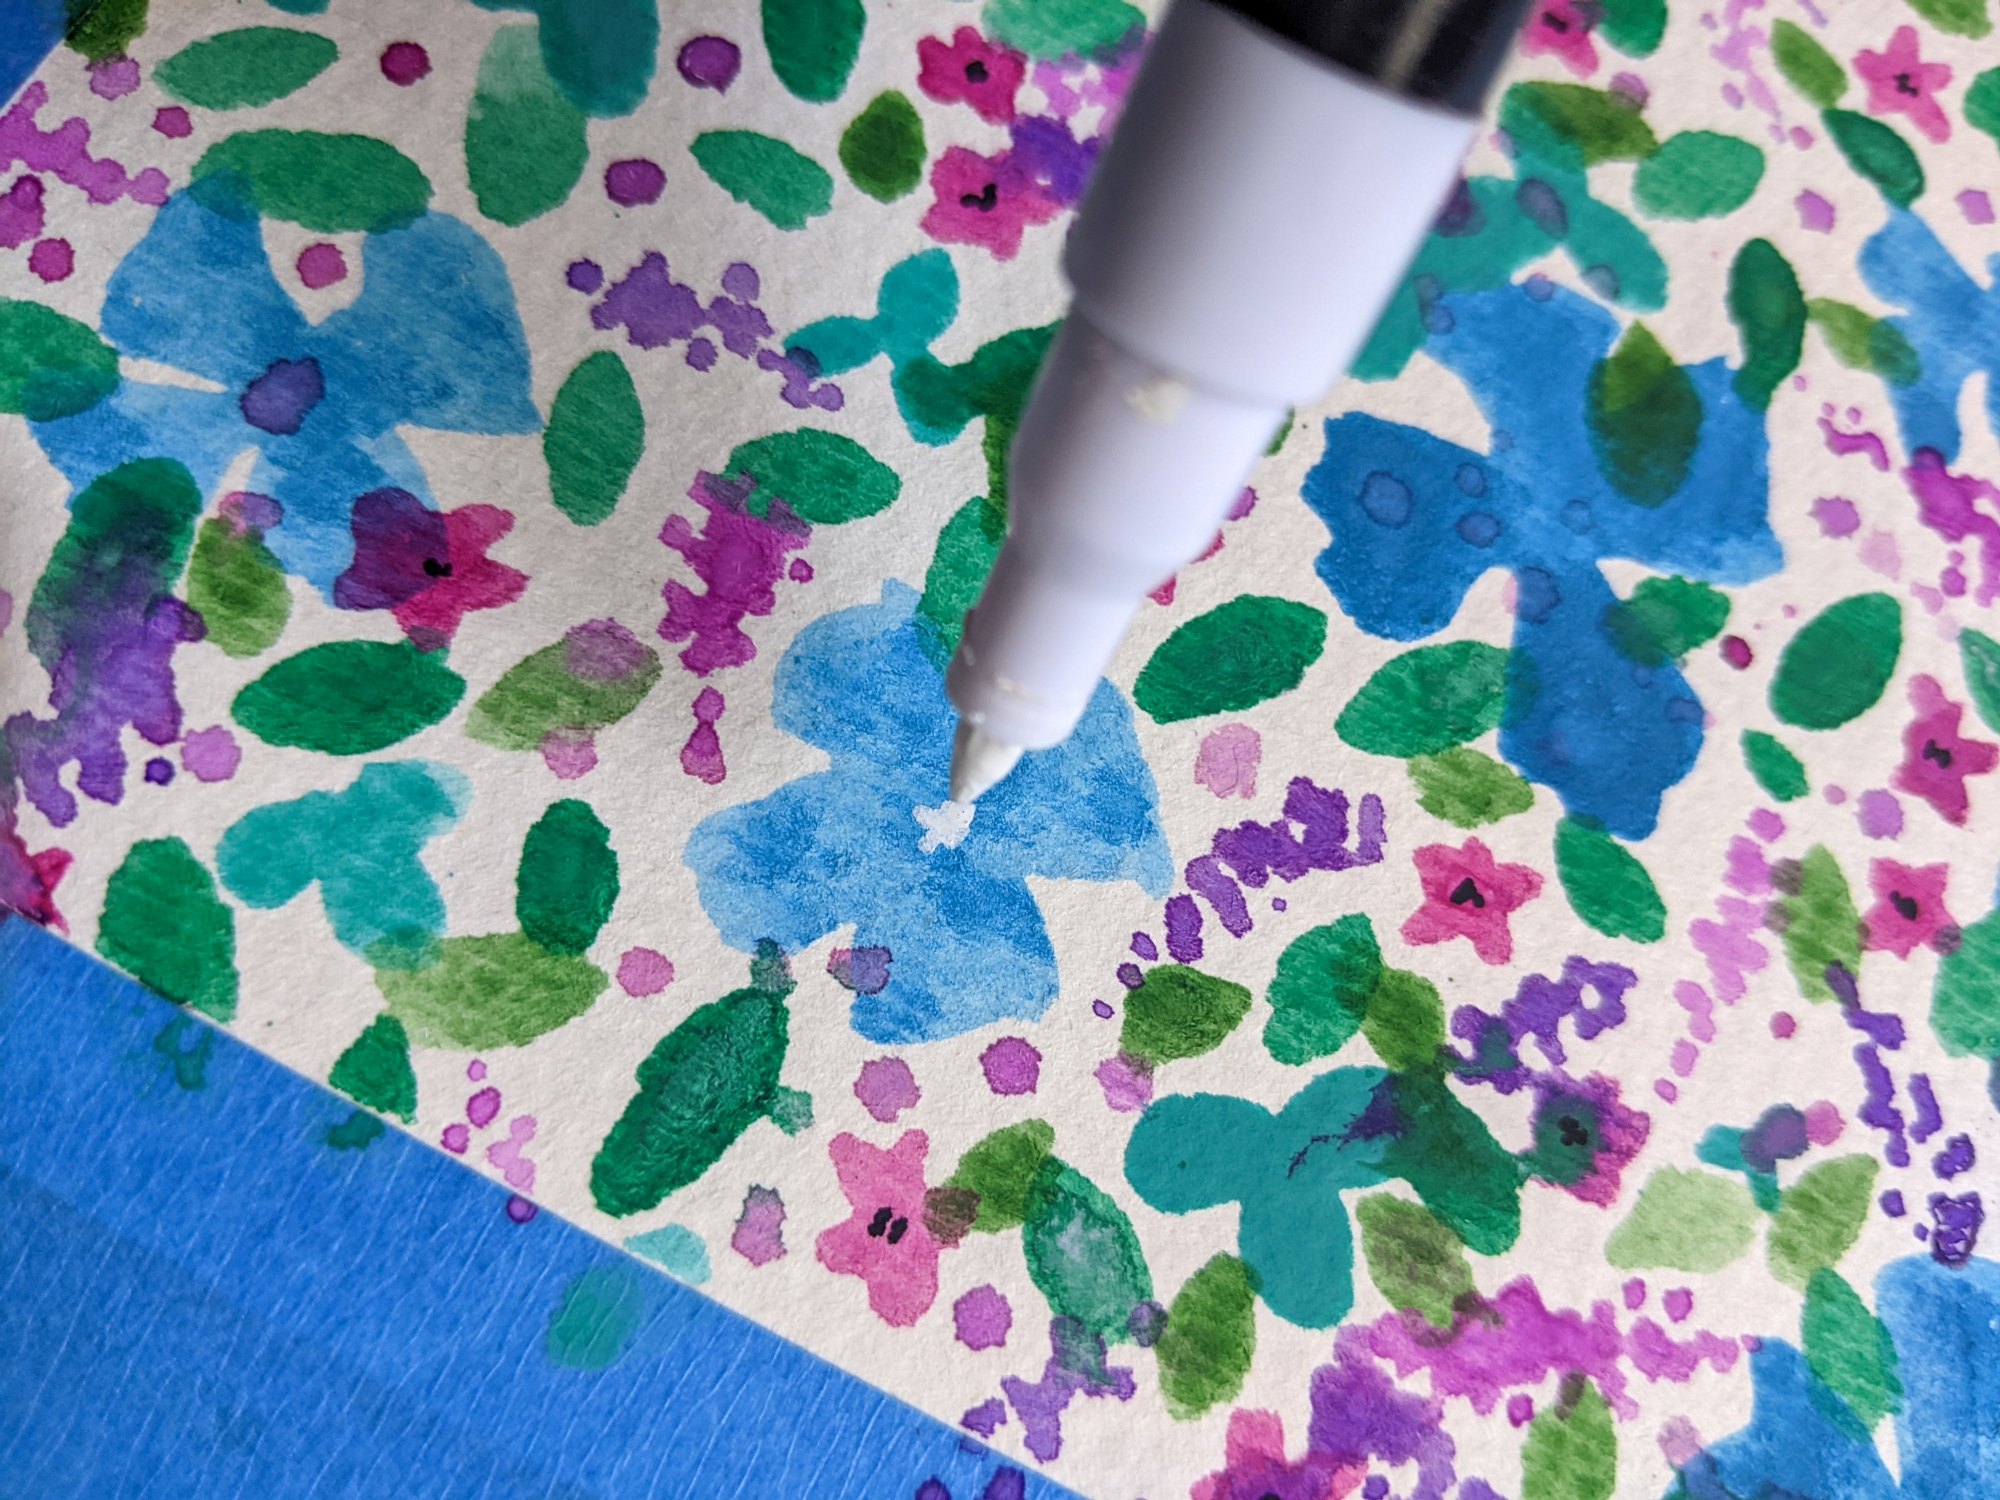
Step 7
For some final finesse, I added centre details to the flowers using paint pens.

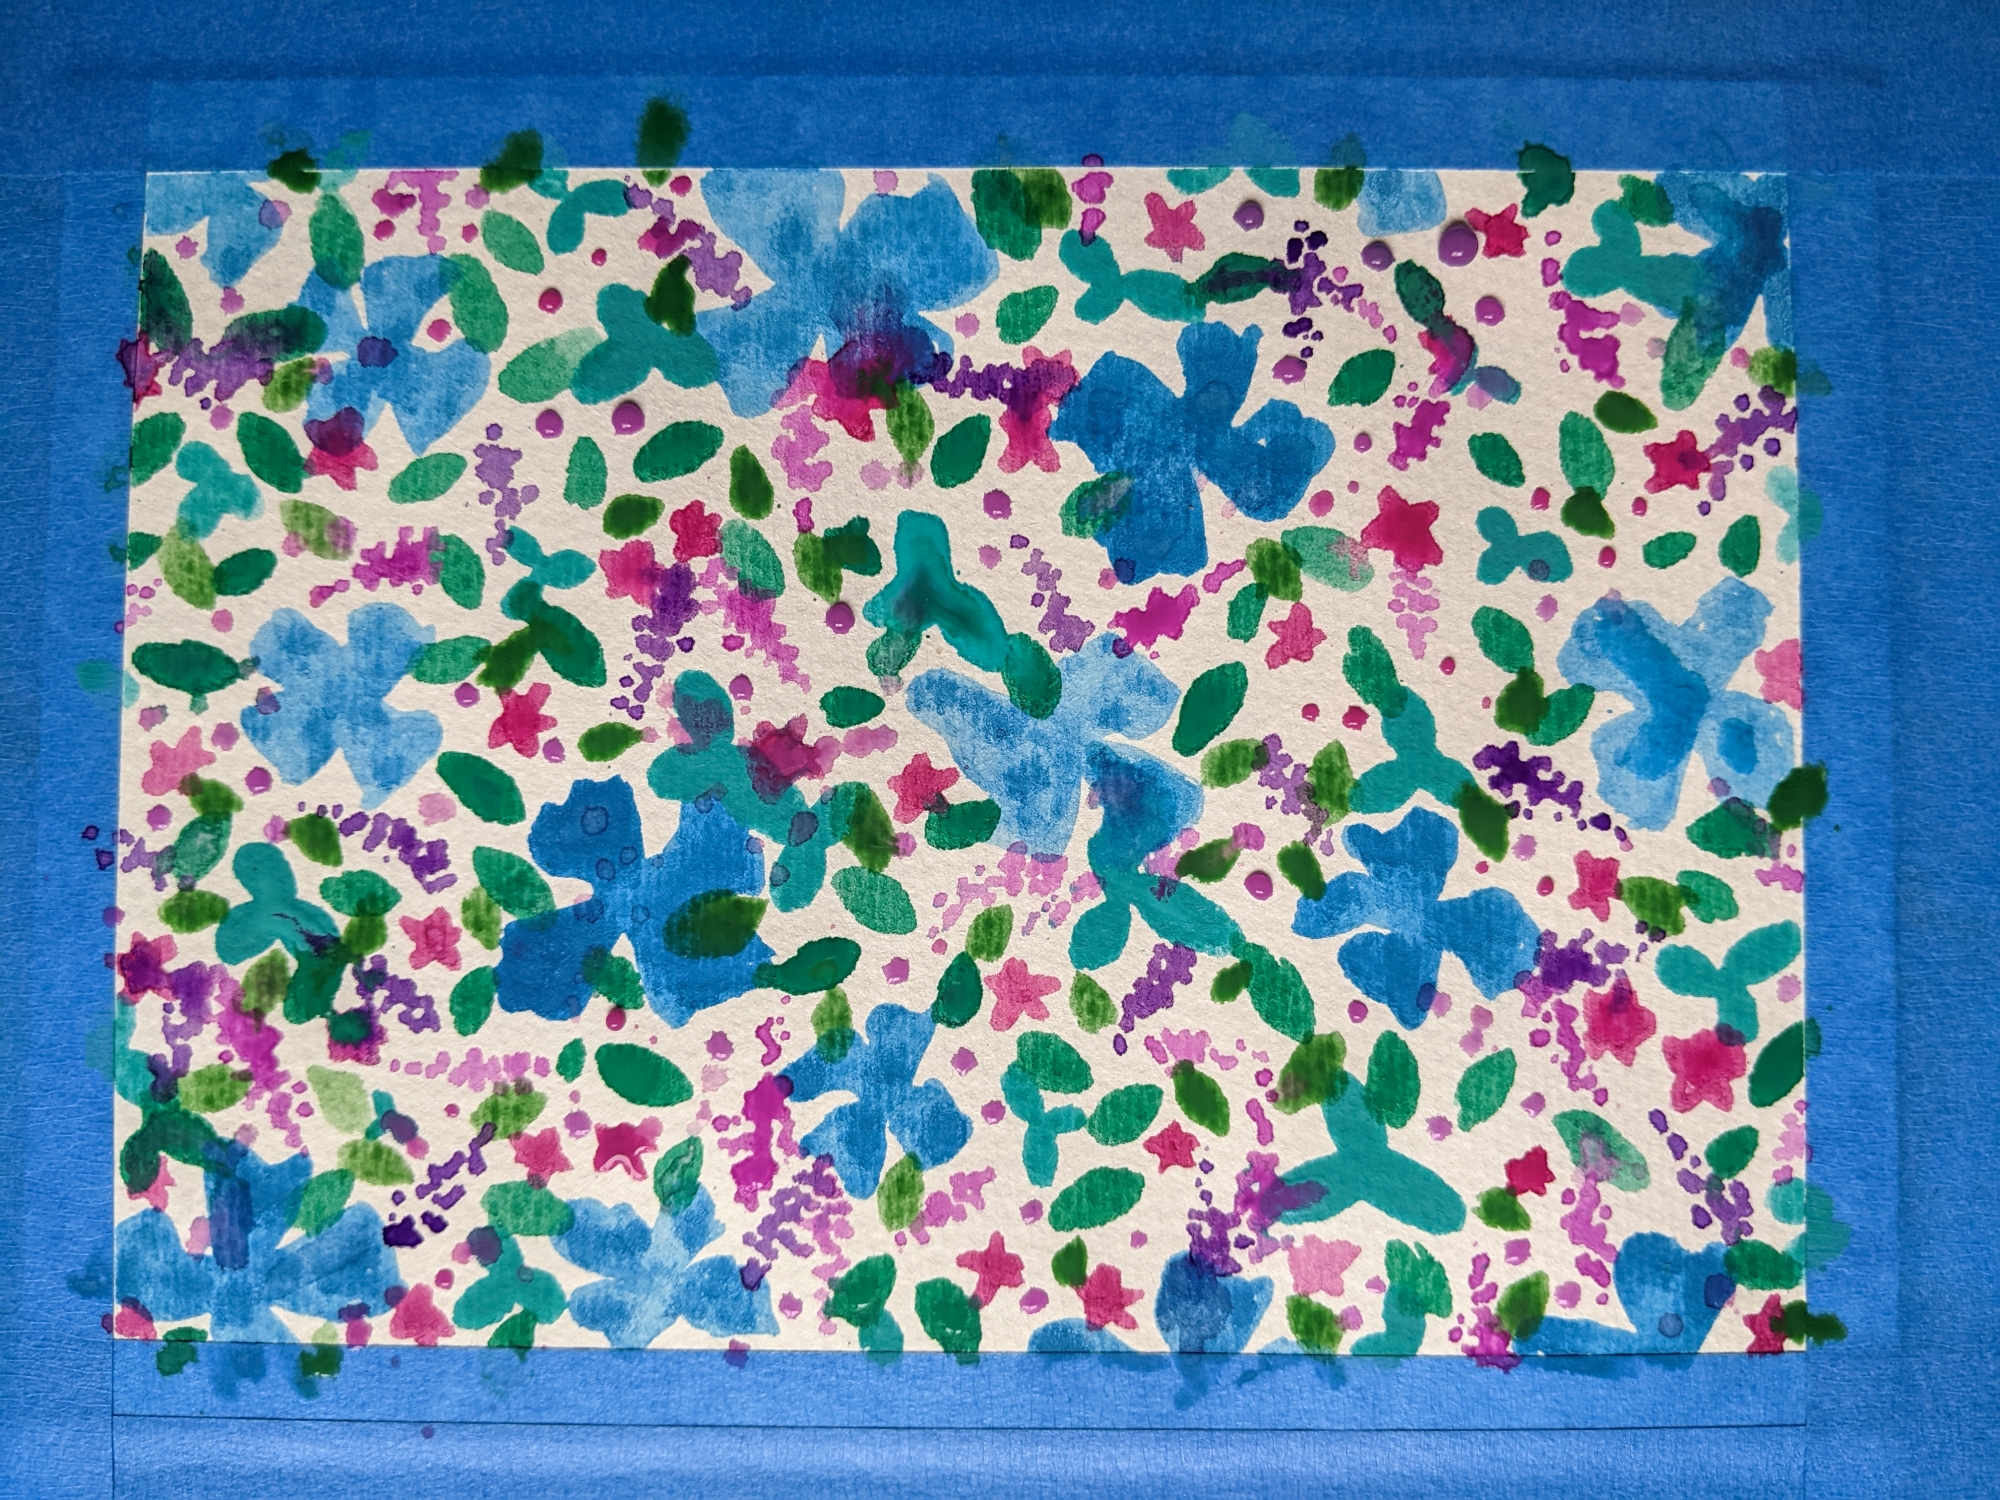
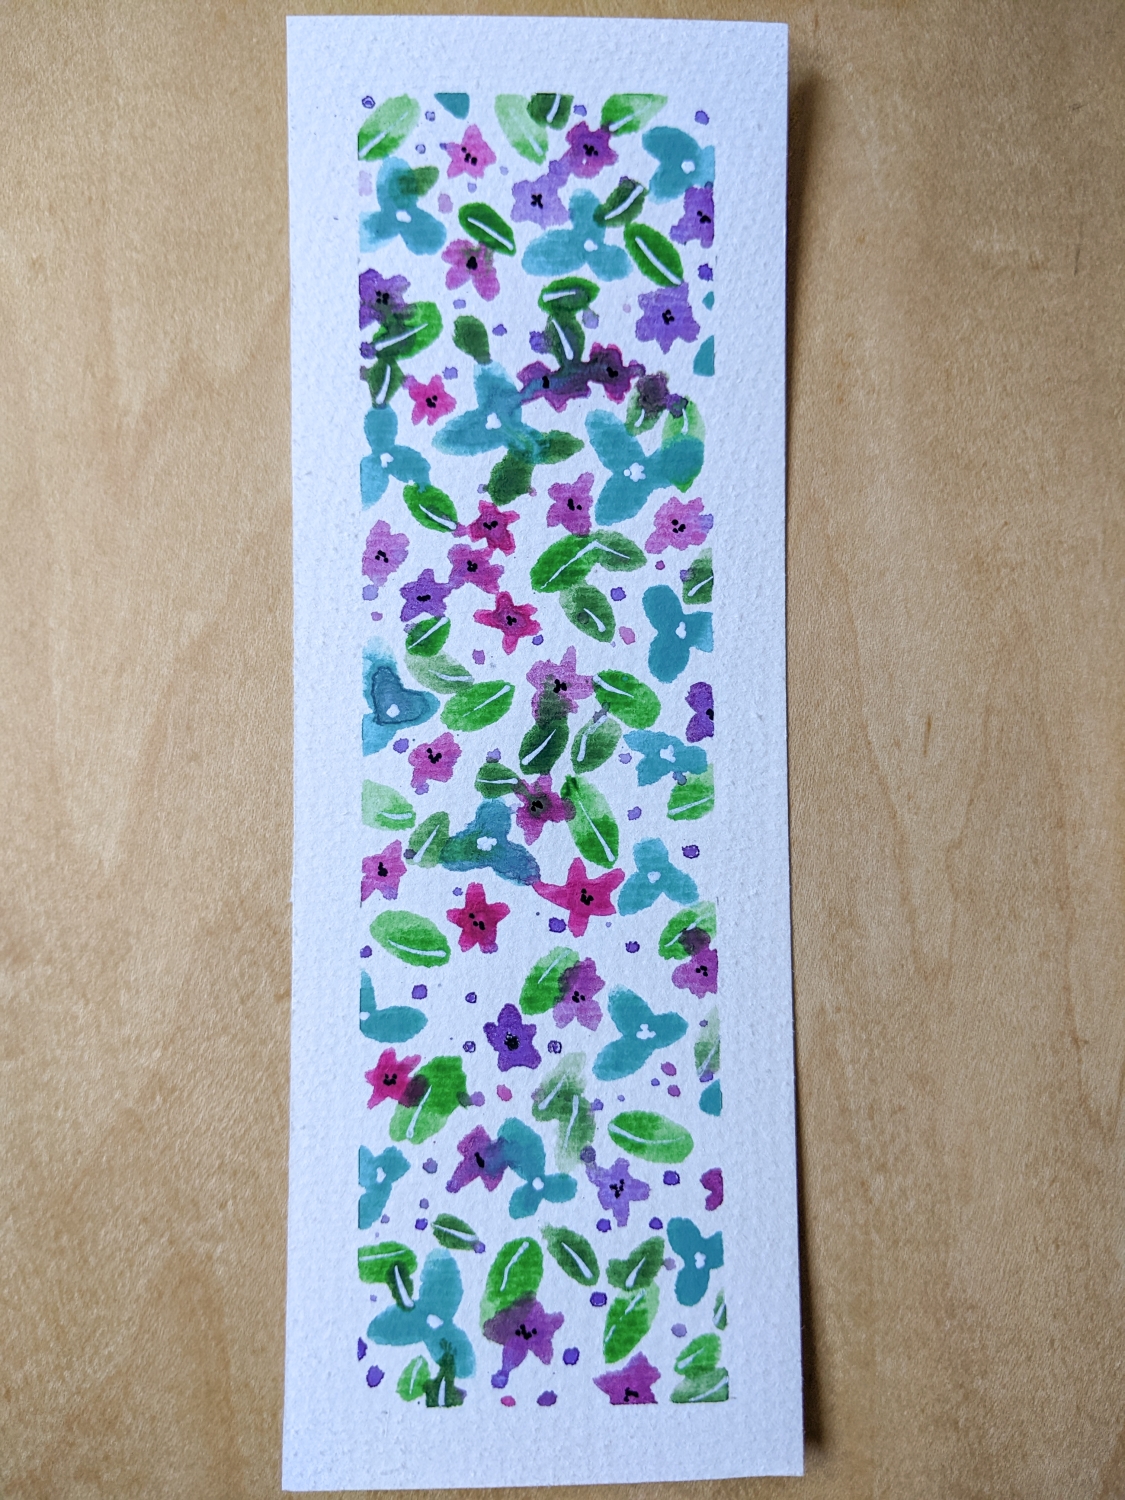
Here are some other artworks I made using this technique.

I hope you enjoyed these paintings as much as I did! If you have any requests for future art projects, let me know. I’d love getting creative with you.
Until next time.
Yolandie


Let’s Chat!