
It’s officially summer vacation here in my corner of the world, and it’s time to break out the art supplies.
I’ve lined up four beginner-friendly art projects that everyone in the family will enjoy while also teaching those basic painting techniques every artist needs at their foundation.
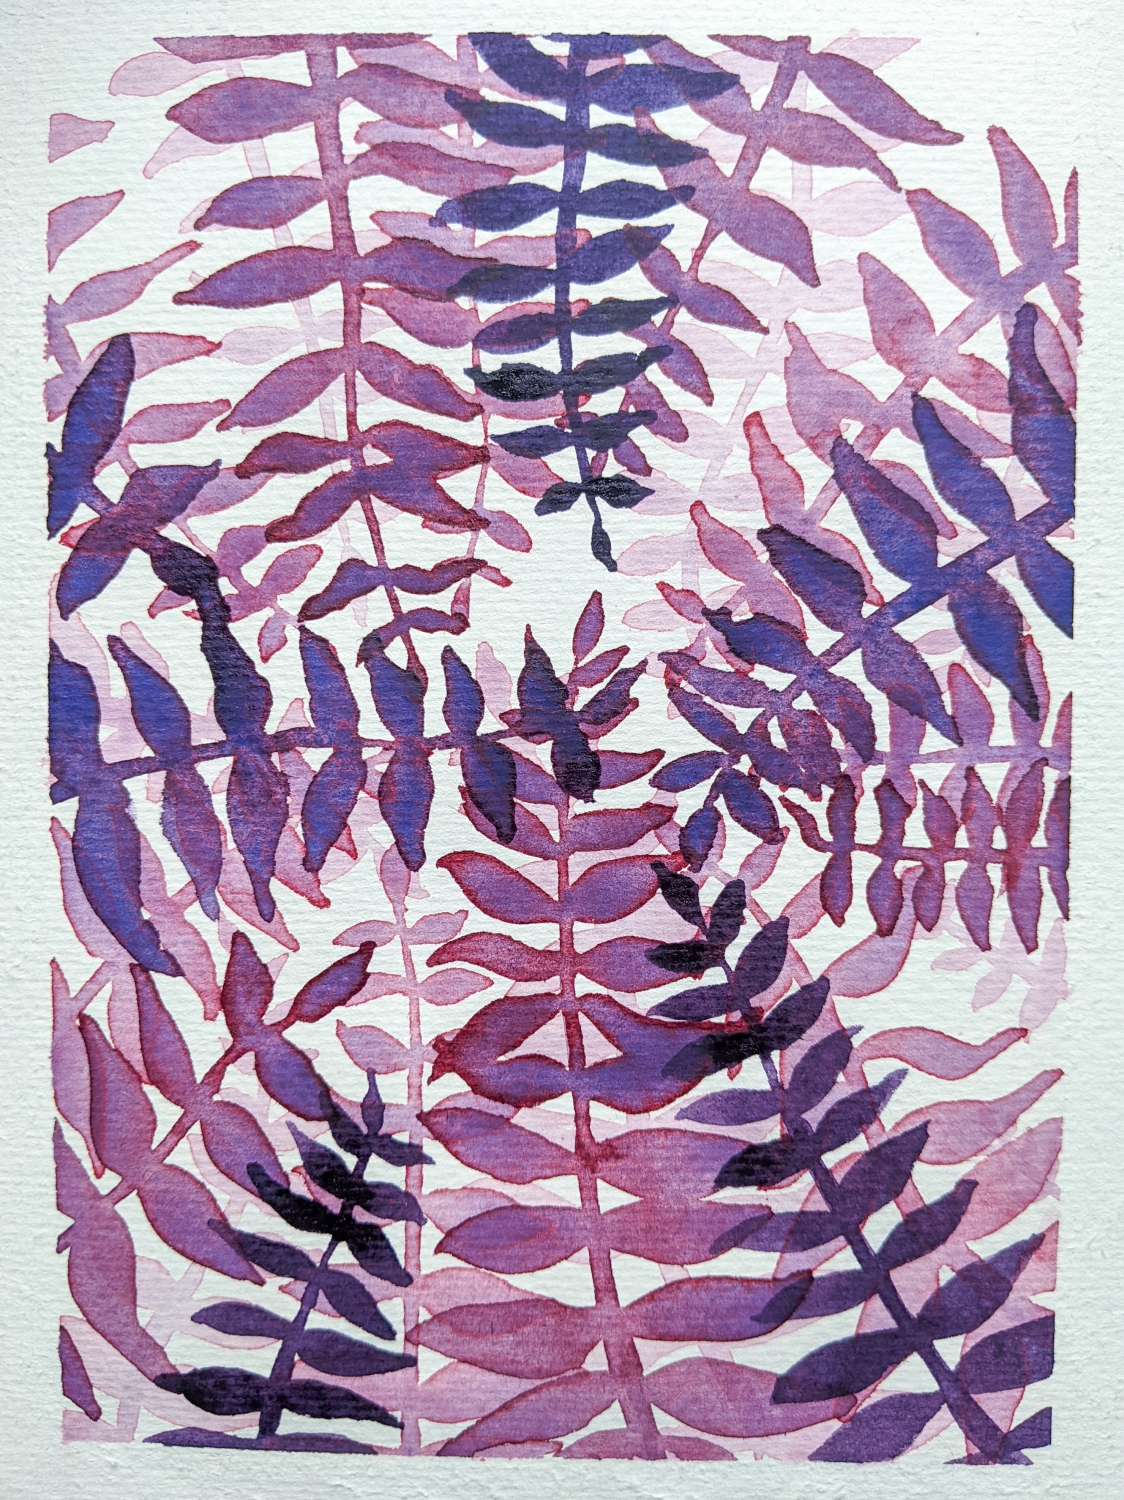
This week, we’ll learn about painting in layers with super-easy but striking foliage.
This technique teaches us the value of working in layers in our artworks. Certain media, like watercolours, sometimes require us to paint the lightest shades first because each layer will darken the pigment. Watercolours aren’t easy to lighten once dry, so understanding how to build an artwork from the lightest colour upward will be an effective tool to create stunning art.
I’ve chosen watercolours for this tutorial, but you can achieve the same effect with any artistic medium, except gouache. (Gouache isn’t a good layering medium because the paint will reactivate when wet. Each new layer will take on the pigment of the last one, leaving the colour muddy.)
Before starting, I stretched the watercolour paper—check out the tutorial for that in this post.
You’ll Need:
- Your chosen medium. As I said above, I used my trusty Winsor & Newton Cotman pocket watercolour set, specifically Sap Green, Viridian, and later a spot of Burnt Umber to darken the greens.
- A paintbrush. I used a #8 round watercolour brush.
- A painting surface. I used 140lb/300gsm cold-pressed, cellulose-based watercolour paper, which I secured with regular painter’s tape.
- Water with which to clean your brush. If you’re using watercolours, I’d recommend 2 water sources, 1 for cleaning the brush, and another with clear water for mixing.
Step 1
We’ll use a simple colour palette of the same colour family for this painting. I chose greens for this tutorial, but any colour will work beautifully.
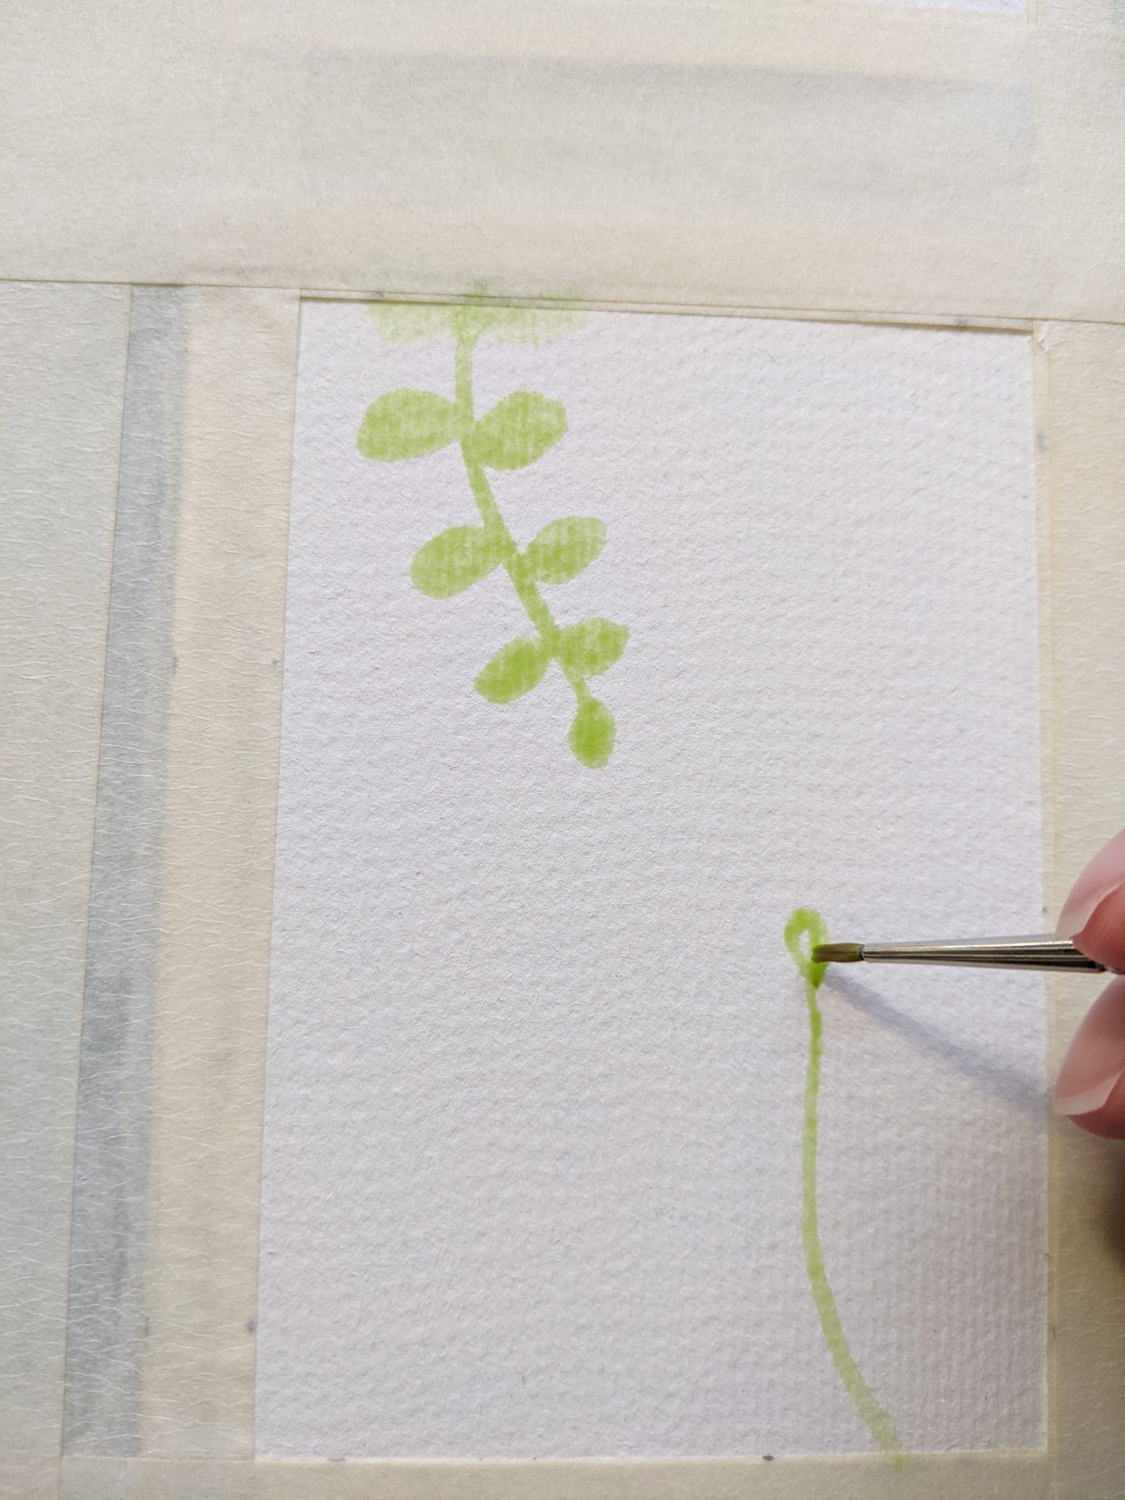
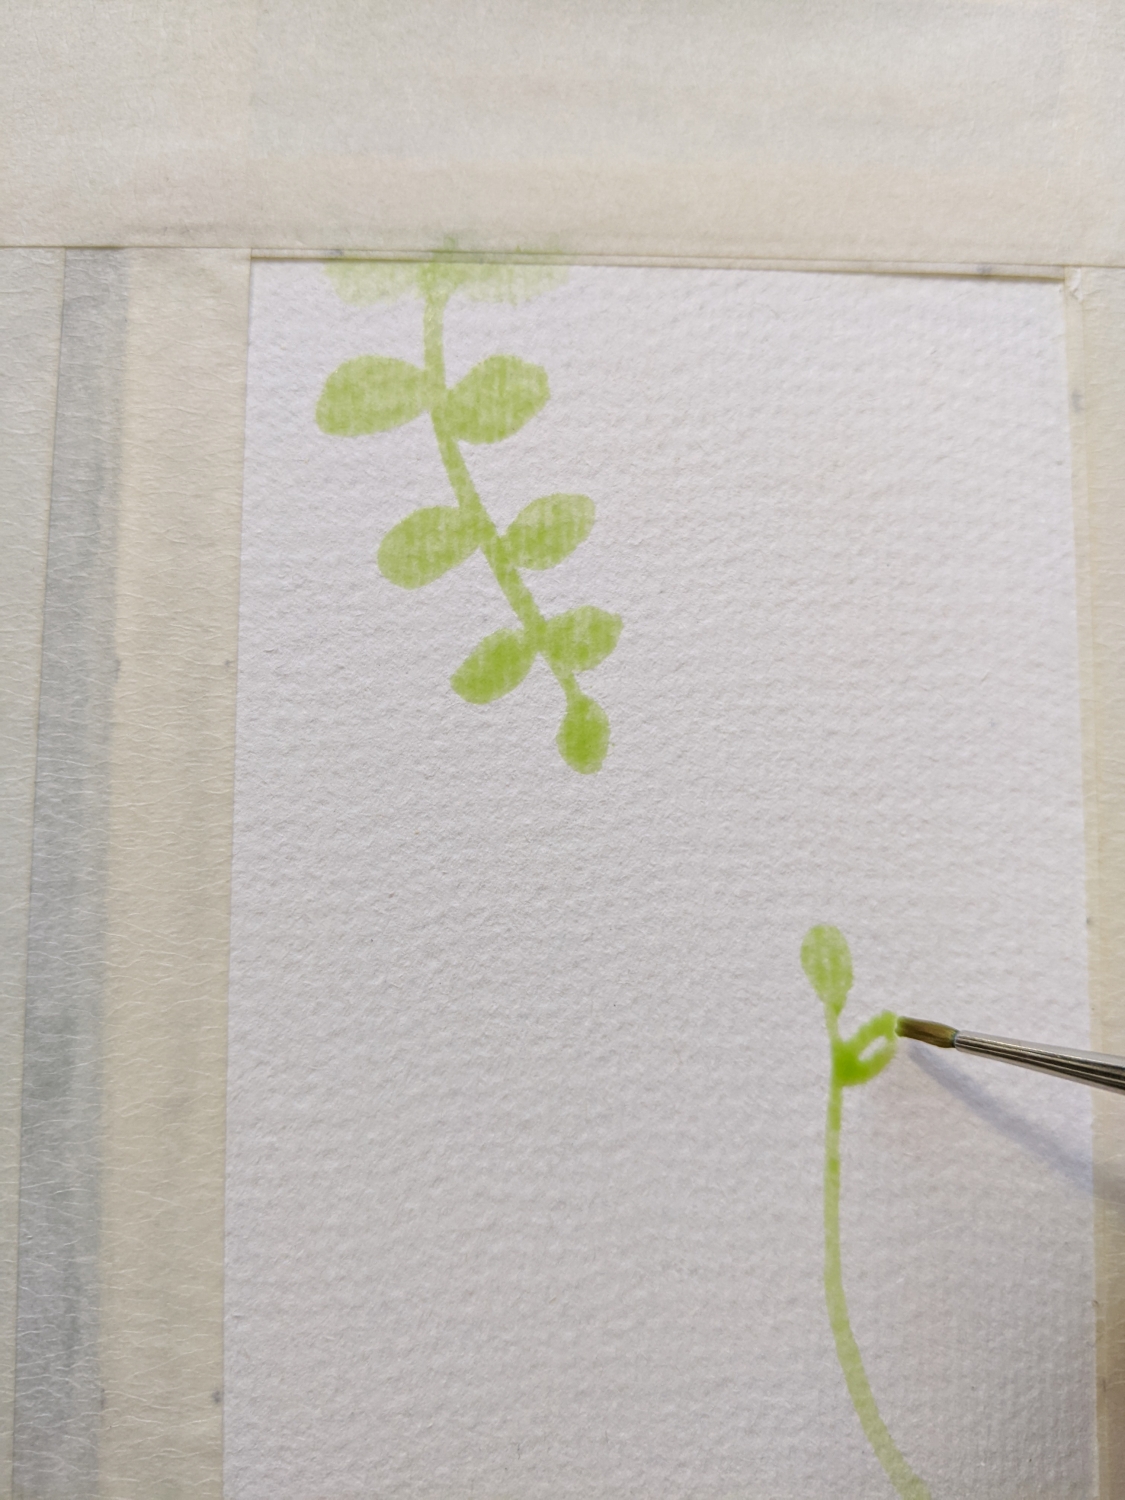
Pick the lightest shade for the first layer. If you’re using watercolours like me, simply water down your chosen shade.
Paint a stem from the outer edge of the page, reaching towards the middle.
Then add a small, oval-shaped leaf to the top of the stem.
Working downward, add more oval-shaped leaves, slightly larger towards the bottom of the stem.
This doesn’t have to be perfect! Nature is organic, and no two leaves are ever identical.
Continue adding stems and leaves until you’ve painted them around the page.
Allow the paint to dry before moving on to the next step.


Step 2 Onward
Repeat the first step, allowing the leaves to overlap with those on the previous layer, but use a slightly darker shade for each new layer.
Yup, it’s that easy!
The most important thing to remember is to allow each layer to completely dry before adding the next, or the pigment will bleed.
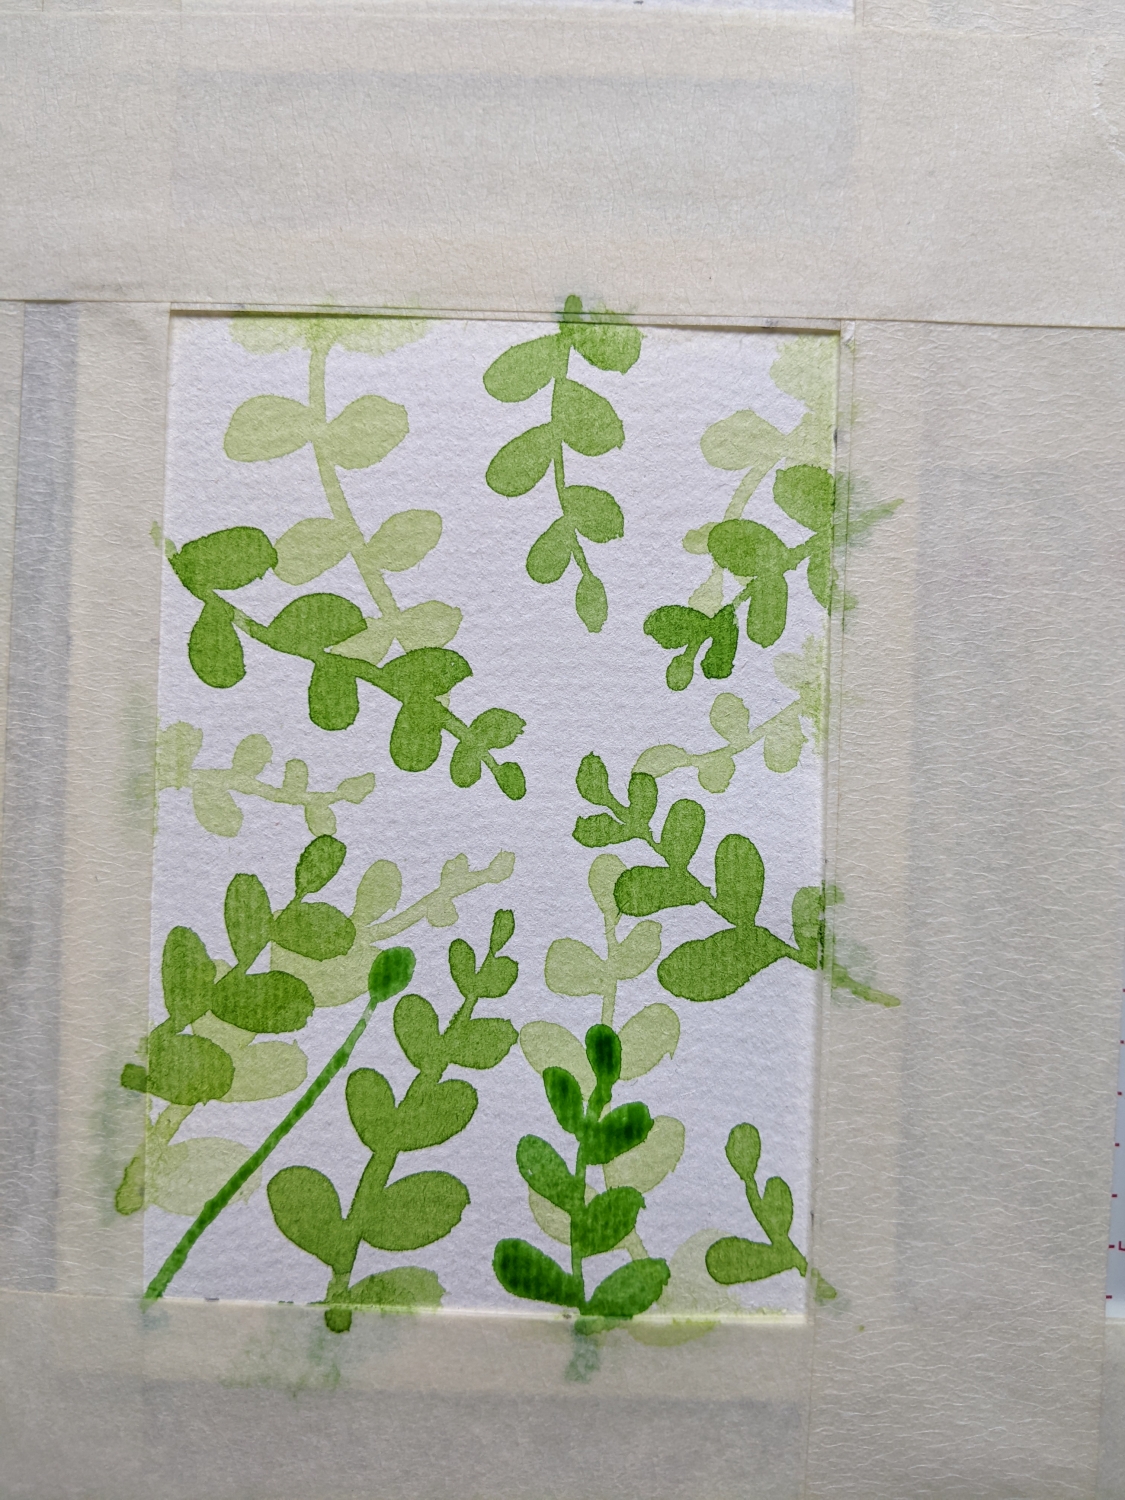


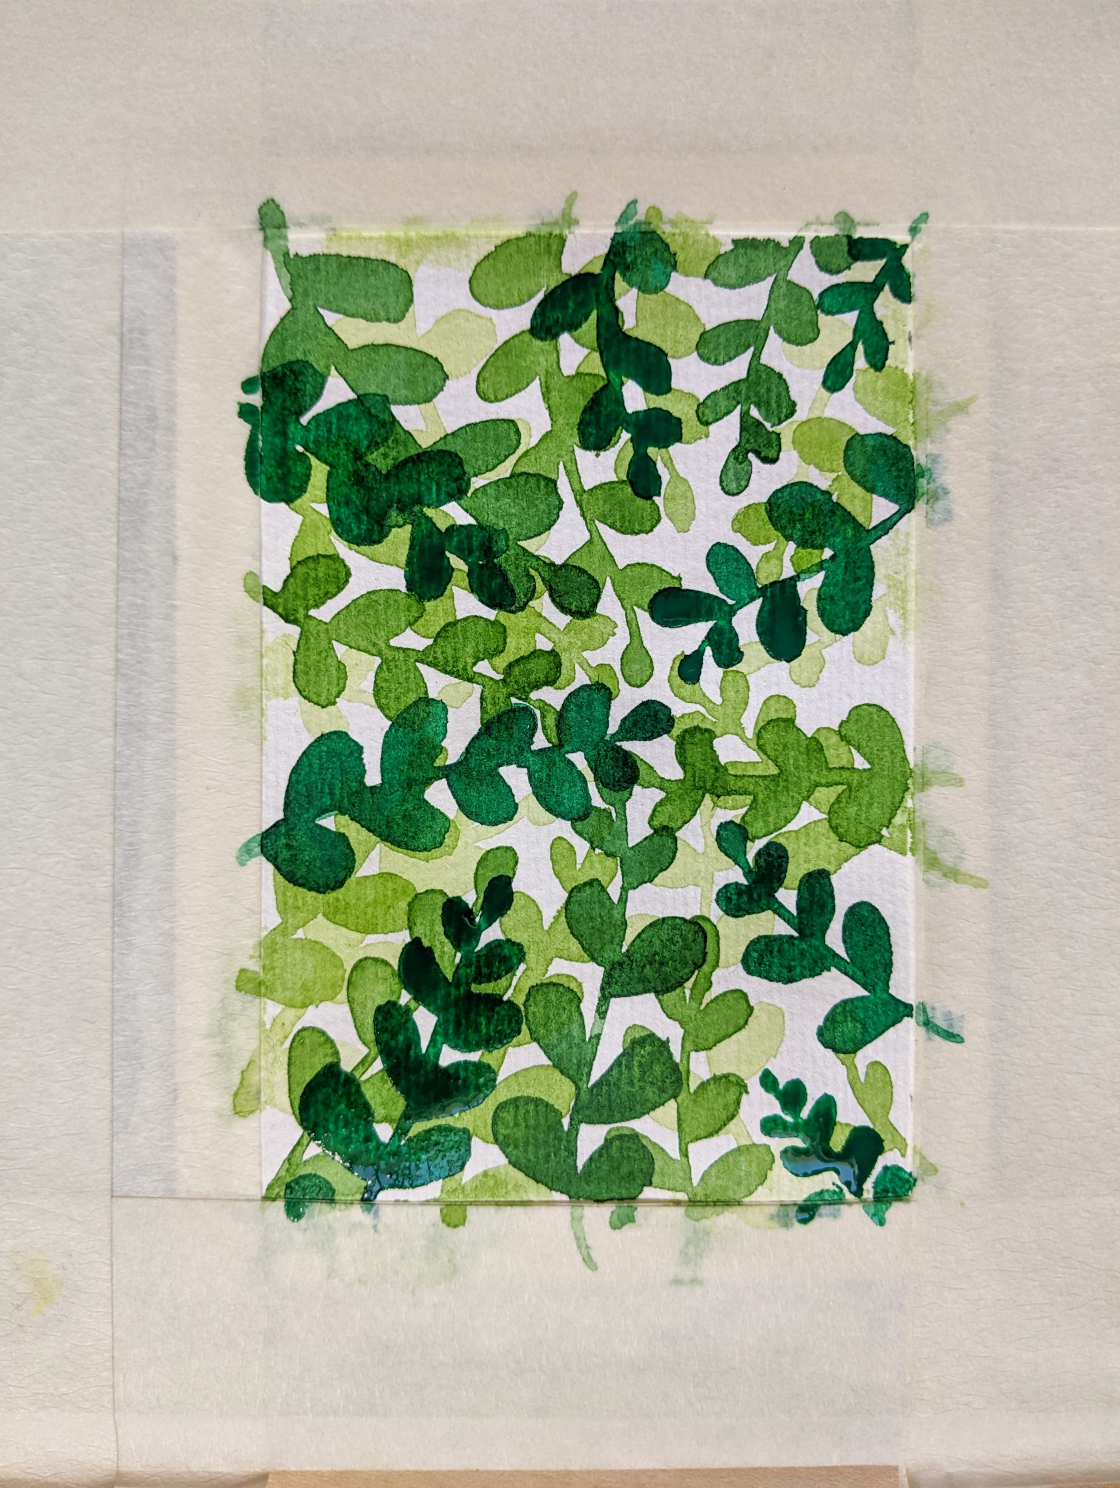
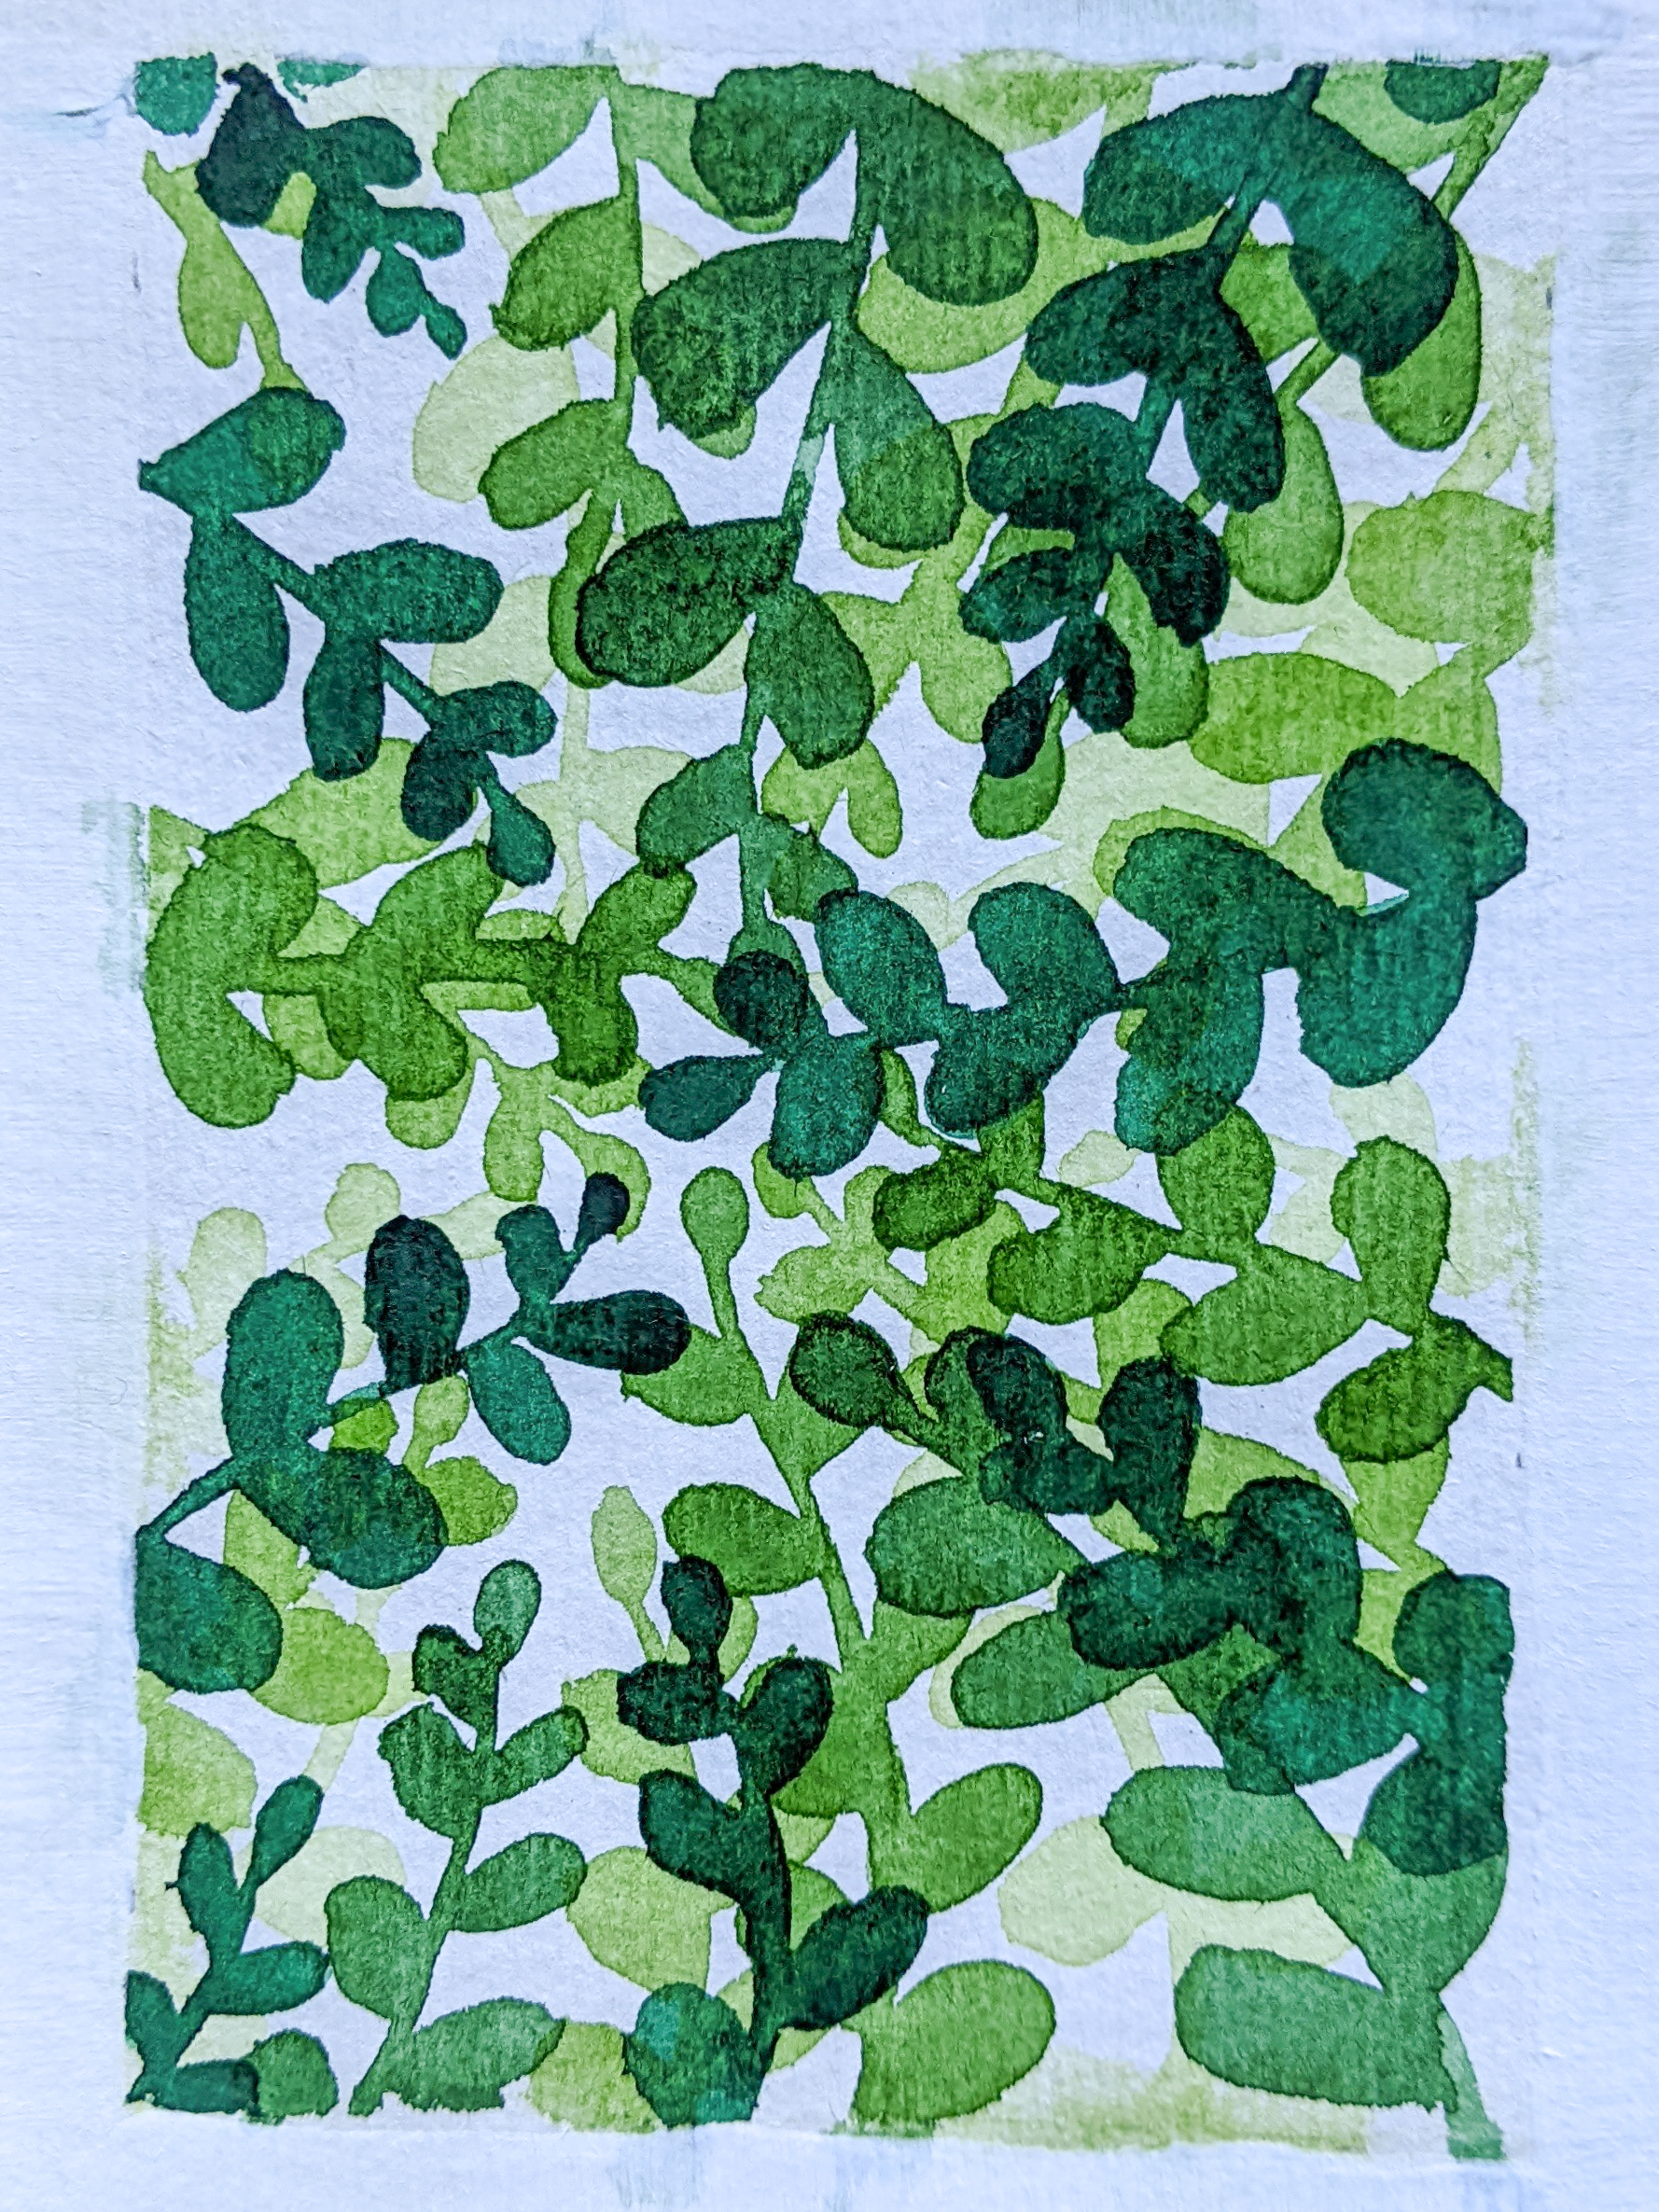
I completed this painting in 5 layers, but you can stop earlier or keep going until your painting is complete.
Here are some examples of artworks I’ve made using this technique.

Have fun painting!
Until next week.
Yolandie


Let’s Chat!