
As is typical of my brand of ADHD, I didn’t start my crochet journey with the easy stuff. I fell head-first into intermediate projects, which resulted in a lot of unravelling and re-crocheting. I do the same thing when I write novels. 😂 I get so excited that I skip the groundwork and dive into the project, only to realise I’ve created gaping plot holes and months of editing work.
But I’ve made peace with how my brain works (sort of 😅). By crocheting and unravelling, I’ve learned how to control my gauge, create uniform stitches, and create my own patterns. Without purchasing more yarn. 😉
Most crocheters turn to granny squares during their learning phase, but I was late to the party. How was I to know that these humble little squares would turn into my absolute favourite thing to crochet?
There are hundreds (if not thousands) of different granny square designs. In fact, I’ve seen about a dozen different ways of crocheting the classic design! And then we can also create granny triangles, rectangles, and hexagons (and more) or use the basic granny stitch in many other ways.
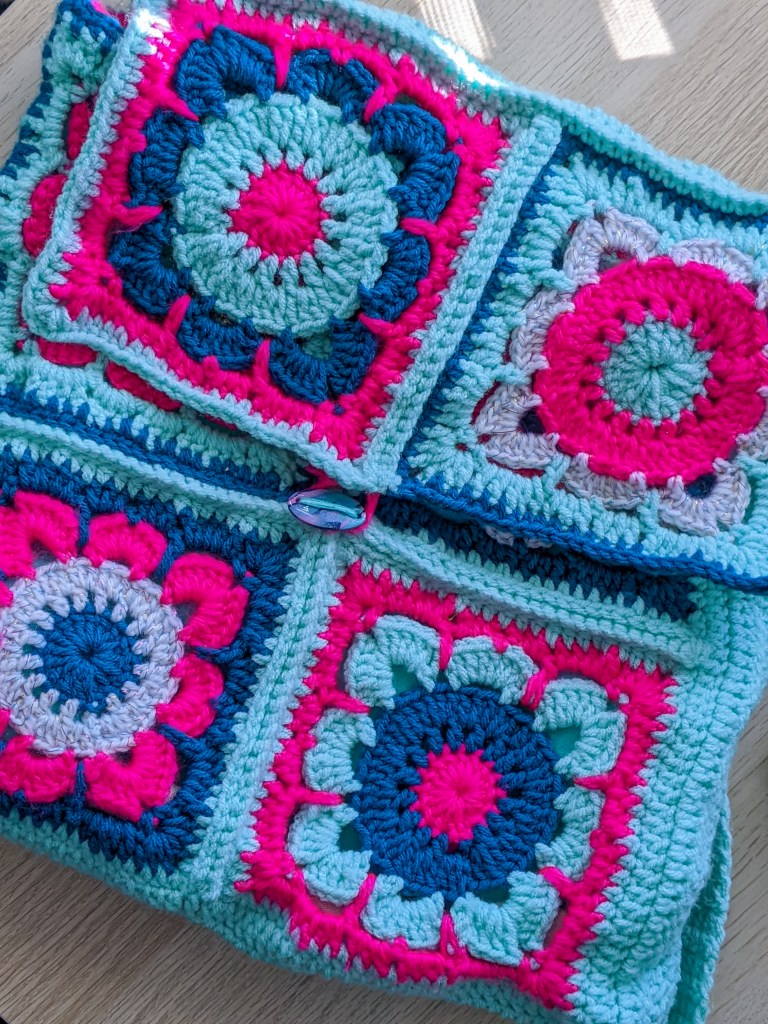
This granny square backpack was the first wearable crochet project I made. It was also my very first attempt at something not amigurumi and led to many other crochet projects.

In this post, I want to show you how easy it is to create something with only beginner techniques in your arsenal.
But before we start, this post contains links to various tutorials. I never receive compensation for brands, persons, channels, or products mentioned in my posts. Every resource listed here helped me learn about crochet.
If you’re interested in more beginner-friendly tutorials, have a look at my Crochet Playlist on YouTube. I’ve saved all of my favourite tutorials from Crochet gurus and will continue to add to this list as I learn.
Right. Let’s get to it!
Yarn and Crochet Tools
Yarn:
I used 4 colours of medium-weight yarn:
- 1 skein of Craft Smart Value in Mint
- ½ skein of peacock blue
- ½ skein of neon fuscia
- ½ skein of white with rainbow glitter
Unfortunately, I can’t share the exact colour codes or brands of the blue, pink, or glitter yarn. Those skeins moved with us from Germany and are remnants from when I repainted dolls.
But these products are similar:
- Soft Classic Solid Yarn by Loops & Threads:
- Mint
- Reef
- Soft Classic Neon Yarn by Loops & Threads:
- Neon Pink
- Caron Simply Soft Party:
- Snow
Hook and Other Tools:
For this project, I used a 5.5 mm hook.
I own this crochet hook set from Amazon. At $12 for 9 hooks, this is incredible value for money. It has everything a beginner needs!
I also used scissors, a yarn needle, and an old shopping tote for the lining. Reduce, reuse, recycle!
Square, Stitches, and Techniques
Willow Granny Square
Lenysea offers this great willow square tutorial on YouTube. It’s easy to follow and her instructions are concise. And if you don’t like watching videos, a written version of the pattern is also available in the top comment.
Lenysea uses a single colour for the square in her tutorial, but I opted for multiple colours.
As a beginner, colour changes can be intimidating. TL Yarn Crafts shows us how to change colour with a standing double crochet, and it is ingenious. I wish I’d known about this technique earlier!
I made 10 different squares for this project:
- 2 x blue inner circle, pink outer circle, white flower, blue frame
- 2 x pink inner circle, blue outer circle, mint flower, pink frame
- 2 x blue inner circle, white outer circle, pink flower, blue frame
- 2 x mint inner circle, pink outer circle, white flower, mint frame
- 1 x mint inner circle, white outer circle, pink flower, mint frame
- 1 x pink inner circle, mint outer circle, blue flower, pink frame
Once I’d completed all the squares, I framed each with a single crochet border (double crochet in UK terms). If the edge of the square was mint, I used blue for the frame. Otherwise, I used mint.
Each square measures about 16.5 cm (6.5 in).
Single Crochet Joining Technique (Double Crochet in UK Terms)
Now that I’d made a stack of granny squares, I had to learn how to join them. Once again, Toni came to the rescue!
In her video, How to Join Crochet Squares and Seams (4 Easy Crochet Seaming Techniques for Beginners), TL Yarn Craft teaches the single crochet joining technique. This is the third technique in the video and starts at the 4:17 timestamp.
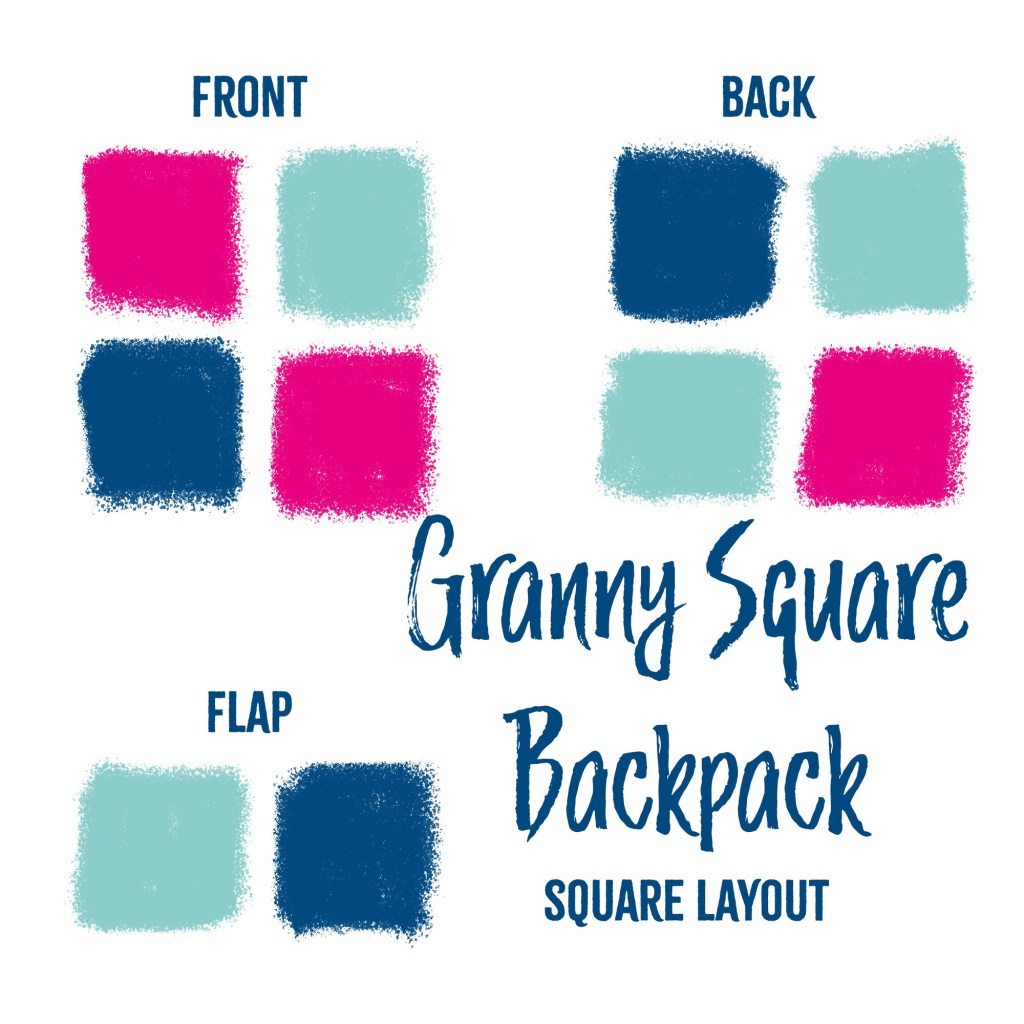
I joined 4 squares for the back, 4 for the front, and 2 for the flap. Like this:
Half Double Crochet Stitch (Half Treble Crochet in UK terms)
To assemble the front, back, and flap, I used the half double crochet stitch (half treble in UK terms). Bella Coco teaches this stitch in episode 4 of her How to Crochet For Absolute Beginners series.
* Attach Front to Back:
Row 1:
I started in the top corner of the front panel. Here, I chained 2 and then worked 1 HDC into each stitch along the edge. At the next corner, I made 4 HDC into the corner gap, then continued with 1 HDC in each stitch until I reached the next corner. Once again, I made 4 HDC into the corner gap and continued along the edge with 1 HDC in each stitch. Once I reached the top corner of the other side, I chained 2 and turned my work.
Row 2:
I made 1 HDC in each stitch all the way around to the other edge. I completed the last stitch, chained 2, and turned my work.
Row 3:
Once again, I made 1 HDC in each stitch to the other edge. Once I’d made the final stitch, I inserted my hook into the corresponding corner stitch of the back panel (the front side should face outward) and joined the two panels with a slip stitch. I chained 1 and turned my work.
Row 4:
I joined the two panels using the single crochet joining technique.
* Attach Back and Flap:
Row 1:
I started in the top corner of the back panel, chained 2, worked 1 HDC into each stitch along the edge, then I chained 2 and turned my work.
Row 2-4:
Repeated the steps from row 1.
After the final stitch in row 4, I inserted my hook into the corresponding corner gap of the flap panel (front side facing outwards) and attached the panels with a slip stitch.
Row 5:
I joined the panels using the single crochet joining technique.
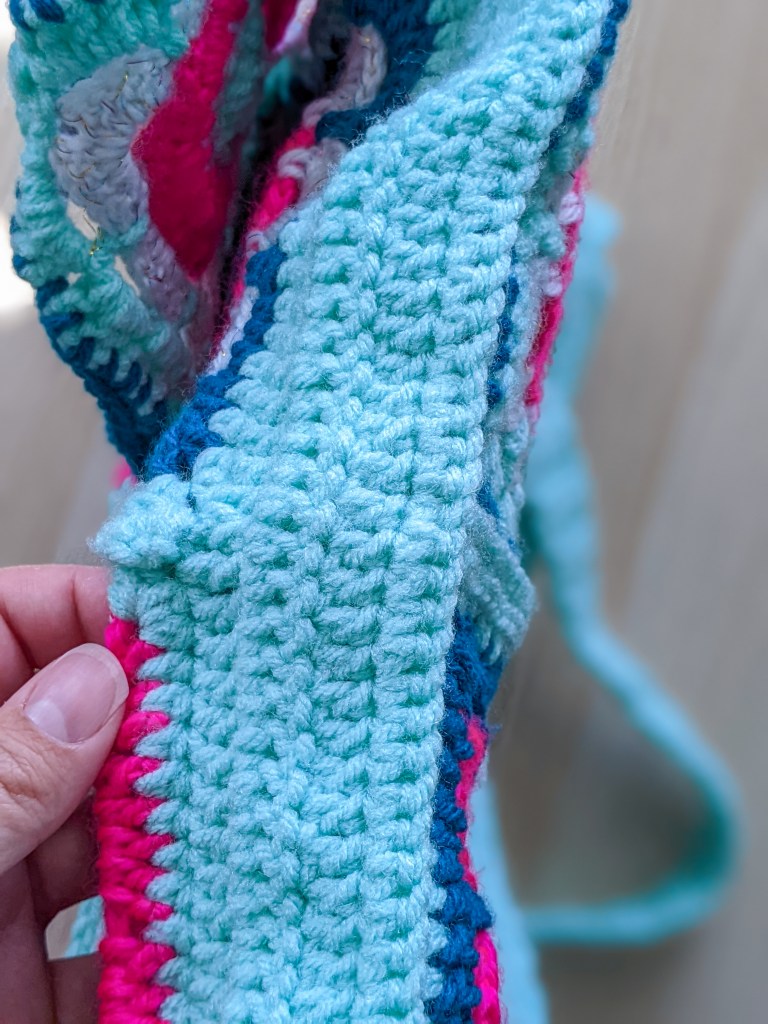
* Crochet Straps
Starting in the middle of the back panel, in the row below the first row of HDC.
Row 1 (Top of Straps):
I used the join between the top two granny squares as my guide. Once I’d found the stitch directly in the middle of the join, I counted back 5 stitches. This was my starting point.
I attached 11 single crochet (UK double) to the back panel, and the 6th stitch lined up with the middle. At the end, I chained 1 and turned my work.
Row 2:
I made 11 HDC stitches, chained 2, and turned my work.

Row 3 – 53 (1st Strap):
I made 5 HDC, chained 1, and turned my work.
Once I’d completed the last row, I used the single crochet joining stitch to join the strap to the bottom corner of the back panel.
I reattached my hook to the other edge of the top part of the straps, then followed the same steps as I did for row 3-53.
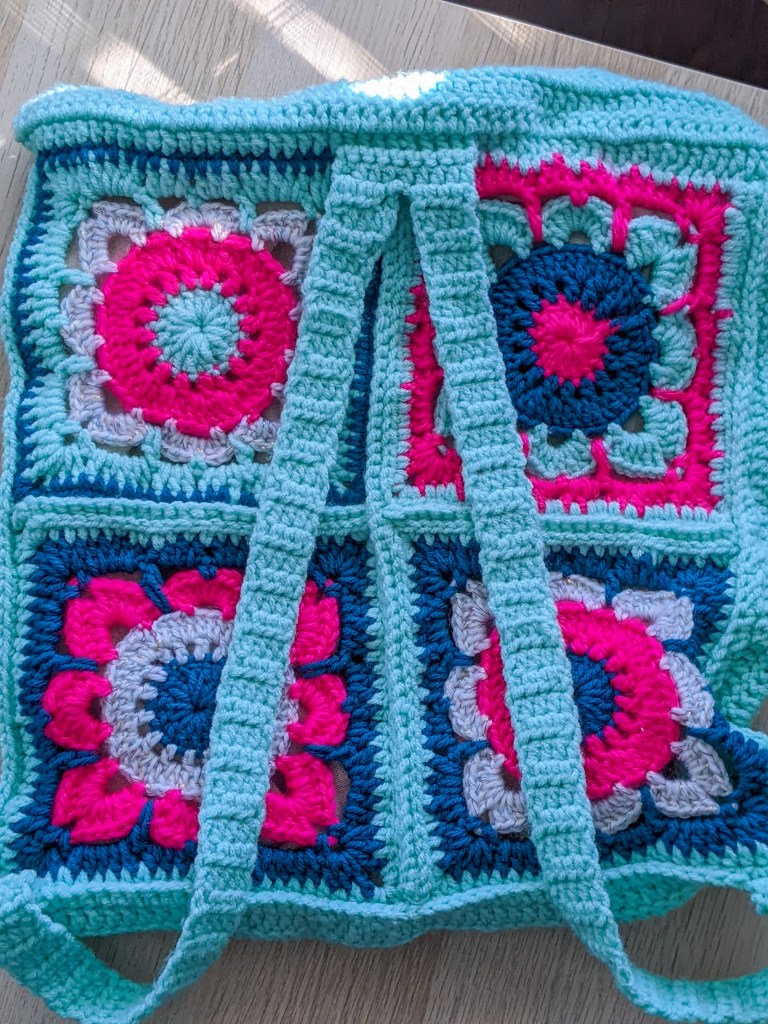
Finally, I used a retired shopping tote as the lining for the backpack. I sewed it to the rim using a whip stitch, then crocheted 2 rows of single crochet to hide the stitches.

For fastening, I made a polymer clay button that attaches with a small cord. Though this design works, the fastening does require some tweaking. I’d like to try a drawstring or perhaps magnetic fastenings in future projects.

As a final touch, I crocheted a little cell phone bag with an easy-grab sling.
I chained 23 and made a SC in each stitch. At the end of the row, I chained 2, turned my work, and made 1 HDC in the back loops of each stitch. From there on, I alternated between single crochet and half double crochet in the back loops of each subsequent row. There are a total of 18 rows.
I slip stitched the edges together and gave the top edge a single crochet border.

Like all first attempts, this project has a few imperfections. But my kid loves her new accessory and I learned so much during this process.
Will you try to make a granny square bag?
Until next time,
Yolandie


Let’s Chat!