
Many of us picked up new hobbies during the pandemic, and our homes are chock-full of the cool stuff we’ve been making. So, it’s no surprise that home-based businesses are everywhere, and the call to support small is trending.
My social feeds are buzzing with inspirational stories, tips, and ideas for creators who want to display their goods at craft markets. And that is what motivated me to exhibit my hand-made clay items at a craft market last month.
Before the event, I spent hours researching successful market vendors and learning how they attract customers. Most of them agree on one point.
In the age of aesthetics, displaying our handmade products in a pleasing manner is almost as important as the products themselves. It’s all about creating an experience for the customer, a vibe, that will help us connect with them and stand out in their memories. Everything has to be pretty and represent our brand.
But we’re not made of money, am I right? And when we do have some spare cash, most of us are skipping all the way to the craft store. 🤣 Hey, these hobbies aren’t cheap!
The good news is attending a craft market as a vendor need not break the bank. We can create gorgeous displays from dollar store finds, DIY projects, or decorations around our homes.
As always, I’m not being compensated for mentioning any brand, store, or product in this post.
Ready? Let’s go!
Easy & Inexpensive Market Display Items
Table Coverings
This might sound silly, but a tablecloth is already half the battle won.
Many markets provide tables for their vendors’ use. Unless we haul around our own table or use the same stall every time, we have no idea what our assigned spot will look like.
The easiest way to create a pretty backdrop for our lovingly crafted goods is to lay down a tablecloth. This is such a small thing that makes a massive difference in the look and feel of our stalls.
I picked up solid white spandex tablecloths with elastics that cover the table legs. I got this two-pack from Amazon and I’m really impressed with the quality.
At almost $40, this is the most expensive display item I purchased for the market, but I figure it’s an investment. Spandex is great because the stretch fits various table sizes, and the elastic leg fasteners will secure these coverings in windy conditions. Also, they are machine washable, which is always a bonus.
But this is the kind of item most of us already have available at home! And even if we don’t use tablecloths, flat sheets are a budget-friendly alternative.
Vertical Display Stands
I struggled to find vertical display stands that fit my style and needs. Amazon offers many viable options for organising earrings at home, but those don’t accommodate display cards. Other options do not support square display cards, or their hooks would require me to punch a hole through my logo. Besides that, these things can be super expensive!
Thankfully, my hubs knows his way around tools and helped me make a few different display options in time for the market.
We were lucky enough to have some wood and MDF cutoffs available at home, which saved us some cash. If we’d purchased the materials, we’d likely have spent around $50.
I searched through Instagram and Pinterest for inspiration and found some really cool pics of display stands using craft laundry pegs. This seemed like the perfect fix since I could peg the display cards on the side, avoiding the logo.
I picked up 100 pegs for $11 from Amazon but later found similar ones at Walmart for under $10.
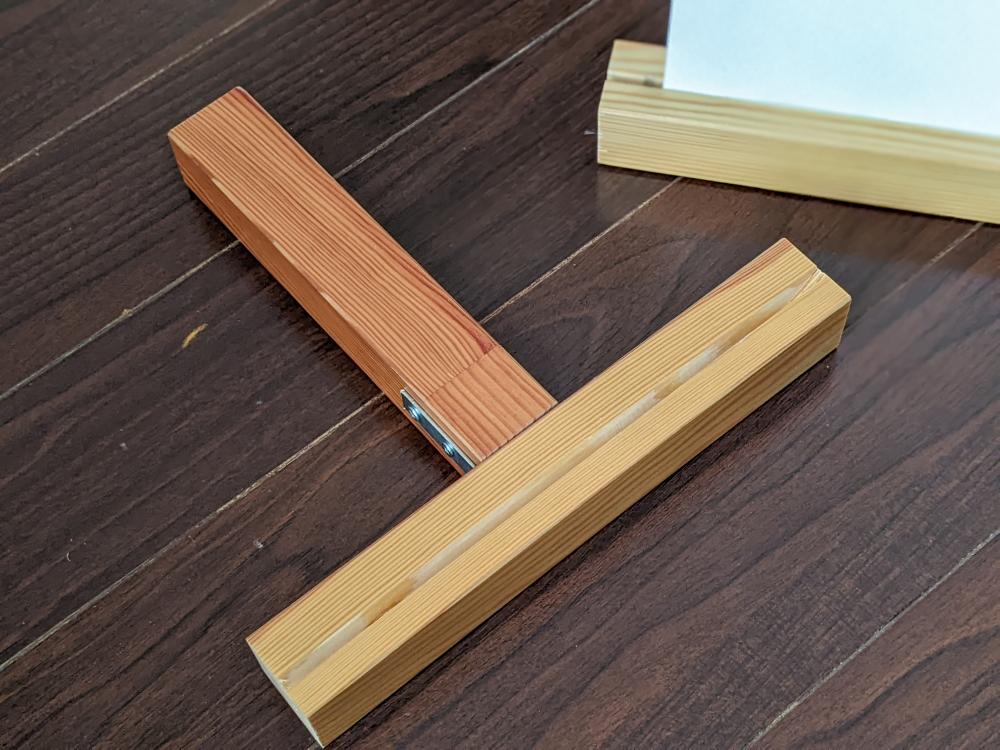
Jan used 2×2 offcuts to make T-shaped stands with a groove etched in one side, cut the MDF to size, and we slid that into the groove. Happy with the fit, I measured and marked the places where I wanted to fasten the pegs, then stuck them down with hot glue.


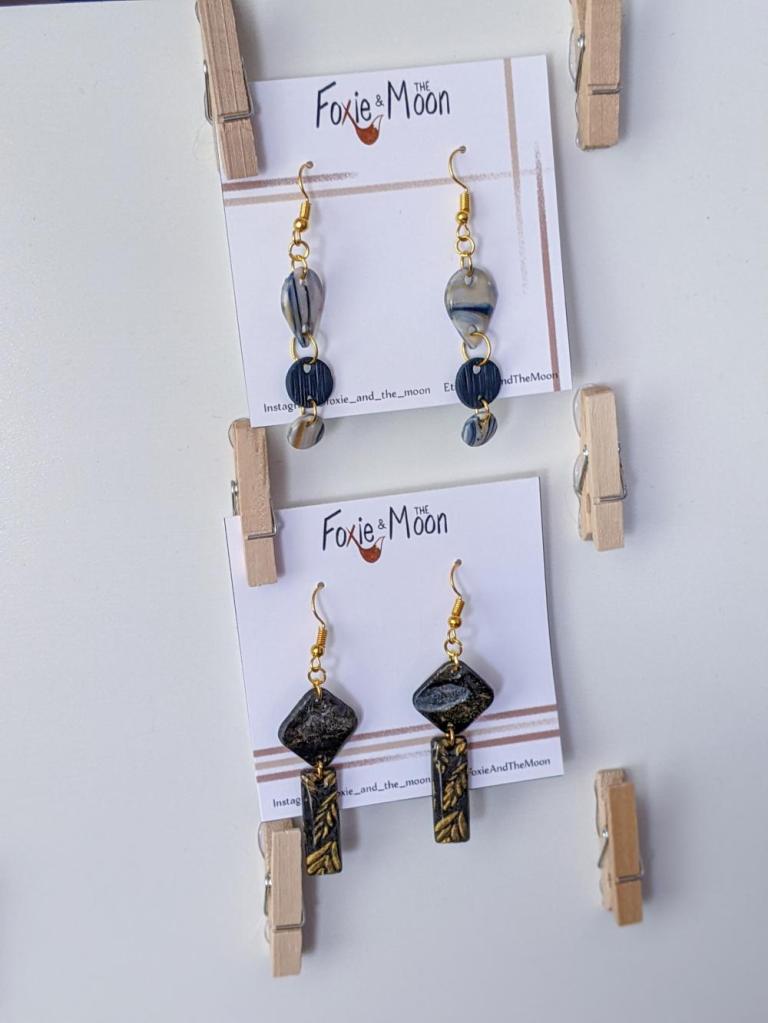
The only problem is that not all of my earrings work with the pegs! Hook backs look great, as pictured above, but the earring posts I use for studs and other hanging designs are longer than the width of the pegs. This difference causes the display card to bend, and the earrings don’t hang as they’re meant to.
I used these stands for my keychains instead, but if I’d had more time, I might have elevated the pegs a bit more.
As a quick and easy alternative, Jan cut another 2×2 offcut into short legs, and I glued them to the remaining MDF boards to create small tables. These are obviously super lightweight, but since polymer clay barely weighs anything, they served their purpose beautifully.


Baskets and Acrylic Containers
To display stud trios, I picked up clear acrylic containers and textured plastic baskets from the dollar store.
The acrylic containers worked really well, as the clear sides don’t distract from the product. These square ones cost me $1.25 each! They’re also versatile enough to use at home, so I’ll definitely purchase more of these in the future.
The plastic basket didn’t work for displaying products, but I used it to contain paper bags and business cards. I purchased it for $2.25.

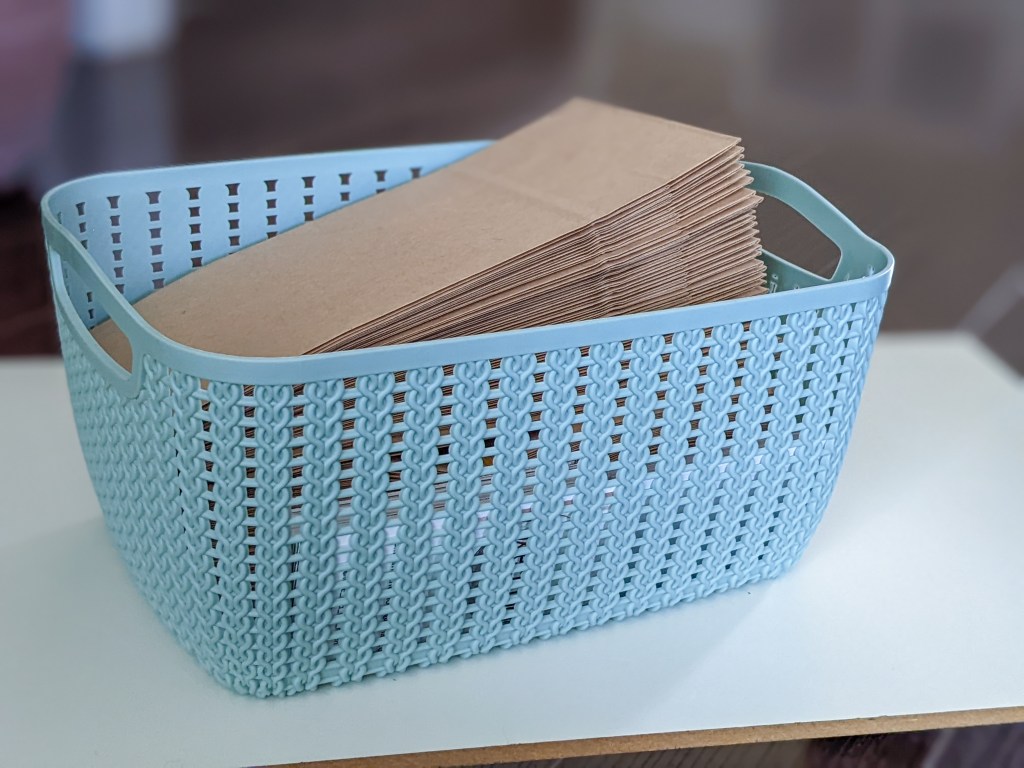
Any kind of basket, tray, or wooden crate would also work here!
Frames
Adding a photo frame to the table adds a sweet, homey touch. This is a great way to display your logo and Instagram QR code, but it would also work for price lists.
These are also dollar store finds. The white one was $3.50 and the silver one was $2.50.

Letter boards
A letter board is a great way to display prices, social media handles, or any other information your client might need at a glance. However, I will also use individual price tags for my next market! I found myself constantly explaining which products matched which price, and though I love chatting with customers, adding price tags will more effectively communicate information.
You can find fancy boards with cursive letter packs and special characters online. But simpler ones from the dollar store better suited my budget.
The small one was $2.25, and I purchased the larger one for $4, but that one is older and seems to have been discontinued.

Easels
We have letter boards, frames, and other items that need to be held upright. For that, we’re going to require easels or stands.
I was lucky enough to have a bunch of these around the house. This cute mini easel originally came with a tiny canvas and was part of a stocking stuffer a few years back. The other stands were gifts from my dad, who has a laser cutter. It’s good to have connections!
But if you don’t have access to a laser cutter, I have you covered. I found this 12-pack of mini easels on Amazon, and these plate display stands will work perfectly for frames. I’ve also seen similar easels at the dollar store, or you could make them yourself following this great tutorial by Acutabove Woodworking.

If you have any tips or tricks for display stands, let’s hang out in the comments!
Until next time!
Yolandie


Let’s Chat!