
This was such a fun little project, especially after about two weeks with a stiff wrist that demanded I let my art supplies gather dust. It’s nothing serious, please don’t worry. Just an old injury acting up.
I wanted to try something with mixed media this time, so I used watercolours (I picked up a cheap set for experimenting from Michael’s) watercolour pencils and soft pastels. The colour palette is primarily Payne’s Grey, French Ultramarine and Viridian, with some added Leaf Green, Cadmium Red, Violet Grey and Bright Pink, and a splash of Burnt Umber and Yellow Ochre. I also used a white soft pastel for the highlights.
Okay, let’s get started.
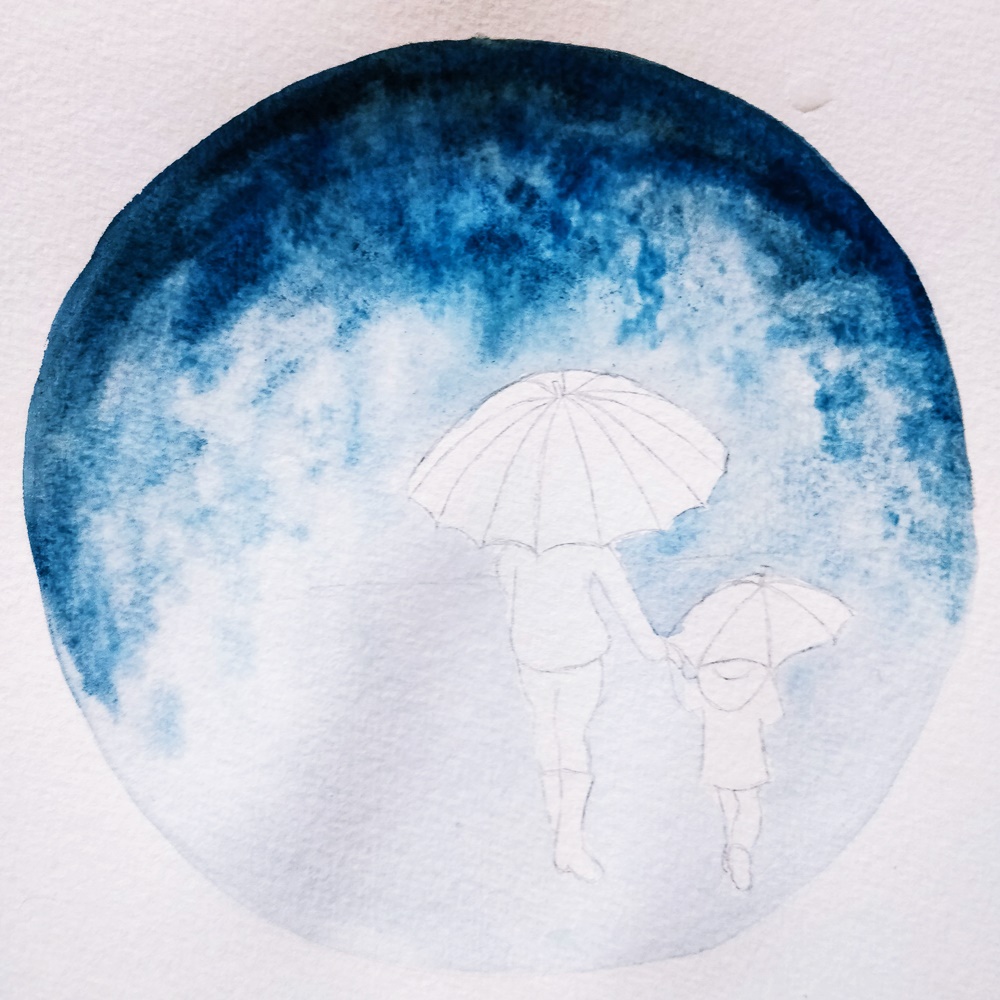
First, as always, the line work. I looked at a few photos of people under umbrellas and took some elements I liked from them all for my drawing.

Next, I wet my paintbrush and added water to everything except the figures. Make sure that the paper is good and damp, but not soaking.
Then I added grey and blue to the skyline in stippling motions and let the paint do its thing.


I blended the colours with the brush the slightest bit, but for the most blending, I held the page up at a 90 degree angle, so the water and paint would run downwards. Bless you, gravity. The running pigment gives the streaky effect of falling rain. You can play around with this to get different results, like holding the page at an angle for diagonally falling rain. It’s relaxing and pretty neat!

Anyway, I repeated the stippling of colour and letting the pigment flow while the page was still wet, adding more water when I needed to, until I was happy with the intensity of the colours.
Then, adding some more water as needed, I painted the ground grey.


As you can see above, I also added a grey tree on the horizon. I have a tree tutorial for you in case you need some inspiration. 🙂


Next, I added some green to the leaves, grass and added some distant fir trees to the horizon while the grey paint was still slightly damp, all the while using a stippling motion. The grey base gives the painting that dreary, rainy feeling. I also relied on the grey pigment to double as my shadow shade, so I dappled some more grey in random places for that purpose.
Then I added some shrubbery to the foreground using the same stippling technique and colours. I also deepened the greens I’d put down already until the colours were as intense as I wanted them to be.
None of this needs to be perfect, since everything is a little blurry in the rain.


Next, I added some brown shadows behind the figures. I planned to add a path later, so this would just serve as a slightly darker layer later on.

I applied the paint to dry paper for all of the following steps.
When everything had dried completely, I added some browns to the tree’s trunk in stippling motions, then added another layer of green to intensify the colours.


Next, I painted the figures. For their jeans, I used the same Ultramarine and grey I’d been using so far, just more watery. You can use any colours of your liking for this part, the most important thing is to keep your shadows on the same sides. There’s nothing really to it. 🙂


I waited for the last layer to dry, then pulled out my trusty watercolour pencils and applied them to the shadows. I also drew a path in browns and painted everything with water.


While that was drying, I darkened the shrubs in the foreground and added some more greens to the other foliage a last time, for added intensity. What is watercolour painting if not constant layering, eh? 🙂 I also added shadows behind the figures again.


When everything had dried completely, I added highlights with the soft pastel. I made mini halos around the umbrellas and drew some small lines to simulate splashes on their surfaces. I also added these lines to the bottom edges of the umbrellas, like water drips. Then, random highlights on the plants, especially the shrubs in the foreground, some shiny spots on the path and diagonal lines across the sky and foreground, like falling rain.


You’ll need some kind of sealant for the pastel, but don’t worry, you likely have something in your house that will work. Hairspray. It’s a trade secret, so ssh, but this is a fantastic sealant for pastel and graphite projects. Spray a good coat from about 15 cm away, and you’re golden. Just keep in mind that the sealant will fade the pastel a little bit, so you might need to apply another layer of highlights and reseal once the first layer is dry.
Here’s the final product.

I had so much fun painting this, I might just try another. I hope you enjoy it too!
Have a good one and until next time.
Yolandie


6 responses to “Rainy Watercolour Tutorial”
Dis pragtig! Lyk soos jy en Kayla wat in die reën loop. Laat my sommer verlang! Mis julle. xxx
LikeLike
❤
LikeLike
This is so helpful! I am learning to draw and I have plans to learn to use pastels and also watercolours! Thank you for this.
LikeLike
I’m so glad you liked it! I might do more pastel tutorials too, they’re so fun to work with. Messy though. 🙂
LikeLike
I was also thinking to do some watercolor art
LikeLike
Go for it!
LikeLike